36
Lantern Installation
Installation instructions - Levelling the base
Due to the narrow divergence of the lantern, to achieve proper performance, the light must be installed
perfectly level.
In order to do this, the following steps should be taken.
1. The bolts should be inserted from underneath the platform, and tighten into position with the
appropriate nut.
2. A secondary nut should be placed over each bolt, to enable levelling
process.
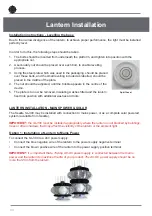
3. Using the steel plate which was used in the packaging, should be placed
over these bolts, and the small levelling included as labelled, should be
placed in the middle of the plate.
4. The nut should be adjusted, until the bubble appears in the centre of the
device.
5. The plate is to now be removed, insulating washes fitted and the lantern
fixed into position with additional washes and nuts.
LANTERN INSTALLATION - MAINS POWER & SOLAR
The Sealite SL-300 may be installed with connection to mains power, or as a complete solar powered
system (available from Sealite).
IMPORTANT:
the SL-300 must be installed appropriately where the lantern is not blocked by buildings,
trees or other shadows that may affect the visibility of the lantern or the ambient light.
Option 1: Installation of Lantern to Mains Power
To connect the SL-300 to a 24V power supply:
• Connect the blue negative wire of the lantern to the power supply negative terminal
• Connect the brown positive wire of the lantern to the power supply positive terminal
IMPORTANT:
it is important that a 15Amp AC-DC power supply is connected between the mains
power and the lantern to maximise the life of your product. The AC-DC power supply should be no
more that 20m from the lantern.
Spirit Level


