01284 757500
E-mail:
01284 703534
Sole UK Distributor,
Sealey Group,
Bury St. Edmunds, Suffolk.
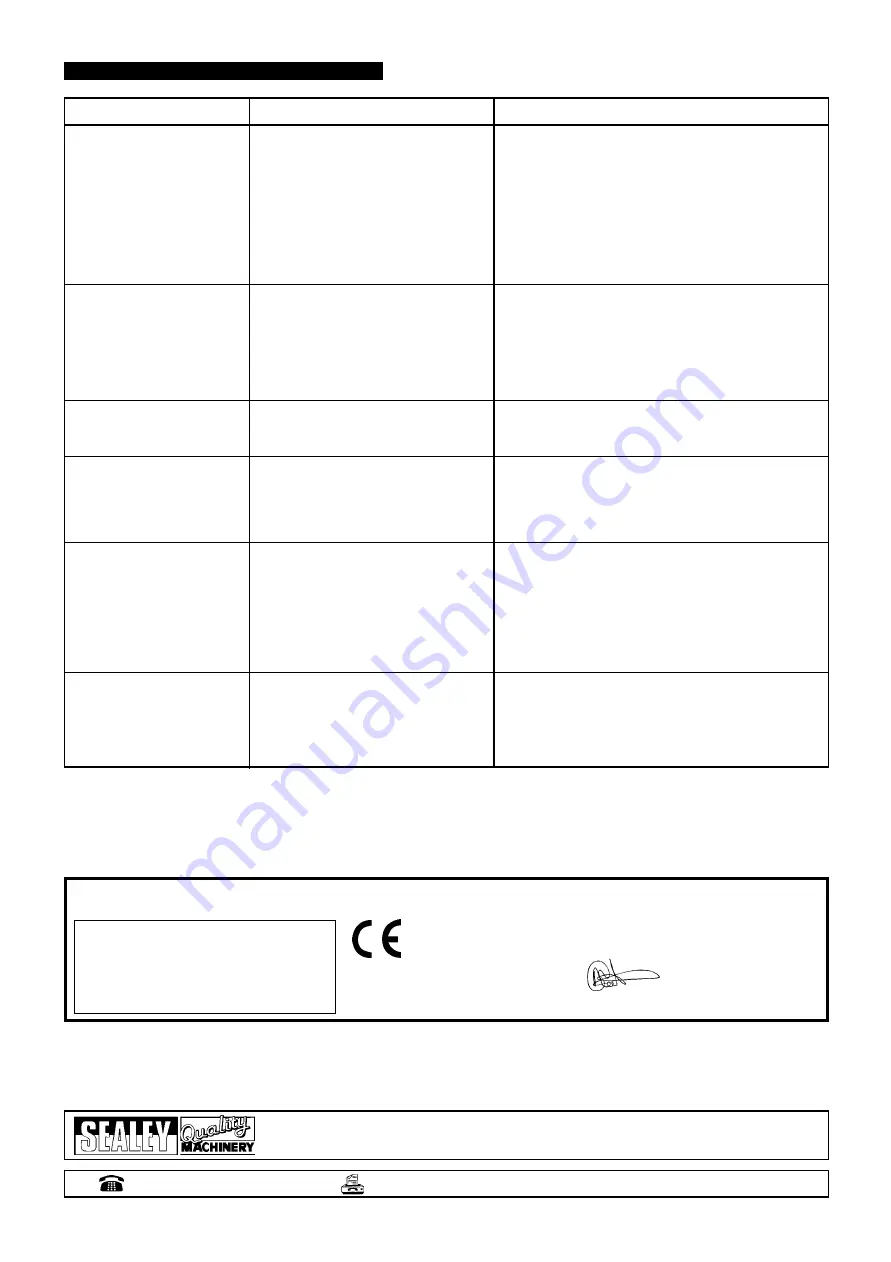
PROBLEM
CAUSE
SOLUTION
7.
TROUBLESHOOTING
Workpiece is loose in the vice.
Incorrect speed or feed.
Blade is too course.
Workpiece is too course.
Incorrect blade tension.
Blade is in contact with workpiece when
saw is started.
Blade is rubbing on the wheel flange.
Blade guides are misaligned.
Blade is too thick.
Blade is too course.
Incorrect speed - too fast.
Inadequate feed
Hard spots or scale on the workpiece.
Blade is twisting.
Insufficient blade tension.
Blade is sliding.
Blade guides are worn.
Blade guides are misaligned.
Blade guide brackets are loose.
Blade tension too high.
Drive belt tension too high.
Blade too coarse or too fine.
Gears need lubrication.
Blade is binding in the cut.
Feed pressure too great.
Blade guides are misaligned.
Inadequate blade tension.
Blade is dull.
Incorrect speed.
Blade guides too far from workpiece.
Blade guide assembly is loose.
Blade is too coarse.
Blade is binding in the cut.
Blade tension is too high.
Excessive blade breakage and/
or teeth ripping from the blade.
Premature blade dulling.
Unusual wear on side or back
of blade.
Motor overheating.
Bad, crooked or rough cuts.
Blade twisting.
Clamp the workpiece securely.
Adjust the speed or feed to suit the workpiece.
Replace with a finer blade.
Use the saw at slower speed and use a finer blade.
Adjust blade tension.
Place blade in contact with the workpiece only after the
saw has started.
Adjust tracking.
Adjust blade guides.
Use correct blade.
Replace with a finer blade.
Reduce blade speed.
Adjust hydraulic feed control and/or bow weight.
Reduce blade speed, increase feed pressure.
Replace blade and adjust to the correct tension.
Increase blade tension.
Increase blade tension and reduce blade speed.
Replace blade guides.
Adjust guide pivots.
Tighten blade guide brackets.
Reduce blade tension.
Reduce drive belt tension.
Use a blade more suitable for the workpiece.
Lubricate the gears.
Decrease feed and blade speed.
Adjust hydraulic feed control and/or bow weight.
Adjust blade guides.
Increase blade tension.
Replace the blade.
Adjust the speed.
Adjust guides.
Tighten the guide assembly.
Use a finer blade.
Adjust hydraulic feed control to decrease feed pressure.
Decrease blade tension.
SM35CE - 0016 - (4) - 140301
NOTE:
It is our policy to continually improve products and as such we reserve the right to alter data, specifications and component parts without prior notice.
IMPORTANT:
No liability is accepted for incorrect use of this equipment.
WARRANTY:
Guarantee is 12 months from purchase date, proof of which will be required for any claim.
INFORMATION:
For a copy of our latest catalogue and promotions call us on 01284 757525 and leave your full name and address, including postcode.
Declaration of Conformity
We, the sole importer into the UK, declare that the product listed below is in conformity with the following
standards and directives.
The construction file for this product is held by the Manufacturer and may
be inspected, by a national authority, upon request to Jack Sealey Ltd.
For Jack Sealey Ltd. Sole importer into the UK of Sealey Quality Machinery.
12 Horizontal Bandsaw
Model No: SM35CE
73/23/EEC Low Voltage Directive
89/336/EEC EMC Directive
98/37/EC Machinery Directive
93/68/EEC CE Marking Directive
31st September 1999
Signed by Mark Sweetman


