• 7 •
of the battery. Connect the NEGATIVE (BLACK) clamp to the vehicle
chassis or engine block away from the battery. Do not connect the
clamp to the carburettor, fuel lines or sheet-metal body parts. Connect
to a heavy gauge metal part of the frame or engine block.
5.
For a positive-grounded vehicle, connect the NEGATIVE (BLACK)
clamp from the jump starter to the NEGATIVE (NEG, N, -)
ungrounded post of the battery. Connect the POSITIVE (RED) clamp
to the vehicle chassis or engine block away from the battery. Do not
connect the clamp to the carburettor, fuel lines or sheet-metal body
parts. Connect to a heavy gauge metal part of the frame or engine
block.
6.
Slide the ON/OFF switch to the ON position. The green LED on the
smart cable should light.
NOTE:
If the vehicle battery is extremely discharged, the initial current
draw from the jump starter may activate short circuit protection in the
smart cable. When the condition is corrected, the smart cable will
automatically reset.
7.
After a proper connection has been made, crank the engine. If the
engine does not start within 5-8 seconds, stop cranking and wait at
least 1 minute before attempting to start the vehicle again.
NOTE:
If the car does not crank a second time, check the smart cable
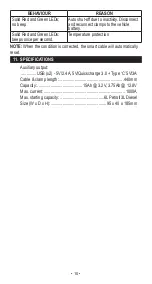
to see if the green LED is lit. If an LED is flashing, refer to section 10,
Troubleshooting
. When the condition is corrected, the smart cable will
automatically reset.
NOTE:
Cold weather may affect the performance of the jump starter’s
lithium battery. If you hear only a click and the engine does not turn
over, try the following:
With the jump starter connected to the car battery and the green
LED illuminated on the smart cable, turn on all lights and electrical
accessories for one minute. This draws current from the jump starter
and warms the battery. Now try to crank the engine. If it does not turn
over, repeat the procedure. Extremely cold weather may require two or
three battery warmings before the engine will start.
IMPORTANT:
DO NOT
attempt to jump start your vehicle more
than three consecutive times. If the vehicle will not start after three
attempts, consult a service technician.
8.
After the engine starts, unplug the battery clamps from the jump
starter socket and then disconnect the black clamp (-) and the red
clamp (+), in that order. Slide the ON/OFF switch to the OFF position.
9.
Recharge the unit as soon as possible after each use.
7.2 CHARGING A MOBILE DEVICE, USING THE USB PORTS
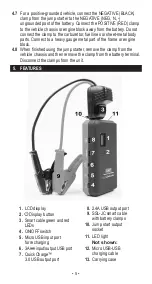
The SL69S includes three USB ports. The standard one provides up
to 2.4A at 5V DC. The second port is a 3A input/output USB. The
third port is a Quick Charge 3.0™, which provides up to 5V at 3A, 9V
at 2A or 12V at 1.5A.
1.
Consult your mobile device manufacturer for proper charging power
specifications. Connect a mobile device cable to the appropriate USB
port.


