Power supply . . . . . . . . . . . . . . . . . . . . . . . . . . . . . .230V ac - 1ph
Supply current . . . . . . . . . . . . . . . . . . . . . . . . . .6A max. (starting)
3.6A max. (charging)
Output voltage . . . . . . . . . . . . . . . . . . . . . . . . . . . . . . . . . .12/24V
Charge current . . . . . . . . . . . . . . . . . . . . . . . . . . . . . . . . 16A max
Start boost current . . . . . . . . . . . . . . . . . . . . . . . . . . . . . .30A max.
External fuse . . . . . . . . . . . . . . . . . . . . . . . . . . . . . . . . . . . . . .T5A
Internal fuse . . . . . . . . . . . . . . . . . . . . . . . . . . . . . . . . . . . .T63mA
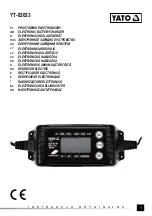
2. INTRODUCTION & SPECIFICATIONS
The Electrocharge 160 is a booster/charger with 230Volt ac input and an electronically controlled 12/24 V dc output. The unit is intended for
charging free-electrolyte lead-acid batteries as used in motor vehicles (petrol and diesel), motorcycles and boats. The unit is also capable of
supplying up to 30 amps to assist engine starting. The equipment casing meets IP20.
,
The unit is ready for use
with the exception of the
Power Clamps which must
be assembled as in fig.1.
fig. 1
3
Check the Off LED to ensure the booster/charger is registering Off before handling the power clamps.
3
Ensure the booster/charger is Off before attaching/detaching the power clamps to/from the battery.
3
Keep tools and other items away from the engine, and ensure you can see the battery and working parts of engine clearly.
3
Ensure the voltage on the booster/charger is set to the same voltage as the battery.
3
If battery has caps to access the battery fluid, remove the caps and check the fluid level before connecting the power clamps. If necessary top-up
the battery with distilled water by referring to the battery manufacturers instructions (
Apply the personal safety precautions described in part 1.2)
.
3
The cables may become hot with excessive use. If so allow a few minutes for them to cool down before attempting to re-use.
3
If the booster/charger receives a sharp knock or blow the unit must be checked by a qualified service agent before using.
3
If the battery terminals are corroded or dirty clean them before attaching the power clamps.
3
Keep children and unauthorised persons away from the working area.
7
DO NOT dis-assemble the booster/charger for any reason. The booster/charger must only be checked by qualified service personnel.
7
DO NOT try to charge a non-rechargeable battery.
7
DO NOT try to start engine or to charge battery if battery is frozen.
p
WARNING!
DO NOT drop metal tools in the battery area, or allow them to touch the battery terminals, to prevent the risk of sparking, short
circuit and possible explosion.
7
DO NOT allow power clamps to touch each other or to make contact with any of the vehicles metallic parts.
7
DO NOT cross connect power leads from booster/charger to battery. Ensure positive (+) (RED) is to positive and negative (-) BLACK is to negative.
If symbols cannot be distinguished, remember that the negative terminal is the one directly connected to the vehicle bodywork.
7
DO NOT pull the cables or clamps from the battery terminals.
7
DO NOT use the booster/charger outdoors, or in damp, or wet locations, and DO NOT operate within the vicinity of flammable liquids or gases.
7
DO NOT use booster/charger inside vehicle or inside engine compartment. Ensure there is sufficient ventilation, and do not cover or obstruct
booster/charger ventilation louvres.
7
DO NOT use this product to perform a task for which it has not been designed.
p
WARNING!
DO NOT simultaneously charge batteries of different capacities or discharge levels .
p
WARNING!
If a fuse blows, ensure it is replaced with an identical fuse type and rating.
3
When not in use, store the booster/charger carefully in a safe, dry, childproof location.
,
3. OPERATING MODES
p
WARNING!
Ensure you have read and understood safety and operational instructions before connecting Electrocharge 160 power clamps to the battery.
Only when you are sure that you understand the operating modes and procedures is it safe to proceed with the actual charging process.
3.1.
OPERATING MODES
There are two operating modes as follows:
3.1.1. BOOST MODE (fig. 2. A ).
In the Boost mode the booster/charger micro-processor automatically controls current/voltage for
starting and limits current output to 5 seconds in every 25.
3.1.2.
CHARGE MODE (fig. 2. B ).
The booster/charger will supply the selected charging current for up to ten hours. If the battery
reaches the fully charged voltage before this time the booster/charger will automatically switch
from current to voltage mode. If, at ten hours, the battery voltage has not reached this level then charging will continue for a further two hours.
To determine the charging current to select, take the battery capacity (Ah) and divide by 10 (h)
Example: Battery capacity = 65Amp.hours
Nominal charge time = 10 hours
65Ah ÷ 10h =
6.5A
, the required charging current. Select nearest available - in this case 5A
3.1.3. STAND-BY (fig. 2. C ).
The Stand-by function produces an auxiliary output, 12Vdc 0.8A, which will maintain the vehicles essential electronic functions whilst
the battery is disconnected for charging. Connect the auxiliary power lead to the cigarette lighter socket on the vehicle before disconnecting the battery.
This function is automatically available with either of the above modes.
ELECTROCHARGE 160 - 0051 - (1) - 010699
fig. 2