4. TROUBLESHOOTING
3.7
BULk FILLING
3.7.1 Press the catch plate to release the plunger rod.
3.7.2 connect a low pressure bulk greasing unit to the bulk filler
nipple (fig.3B) at the top of the gun and fill until plunger rod
is fully extended.
3.7.3 Press and hold the catch plate and push the plunger rod
down until some resistance is felt. release catch plate.
3.8
OPERATION
3.8.1 Turn the trigger locking knob to the upper “unlock” position.
3.8.2 Slide the grease tube connector out of the stowage point on
the top of the unit (fig.3f) and push the connector onto the
chosen grease nipple and
operate the trigger until the
desired amount of grease has been dispensed.
3.8.3 When the grease gun is not in use turn the trigger locking
button (fig 4.4) to the lower “lock” position .
3.9
ELIMINATING AIR POCkETS
3.9.1 if you encounter air pockets during operation the following
procedures can be used to eliminate them.
3.9.2 Hold down the catch plate and exert force on the plunger
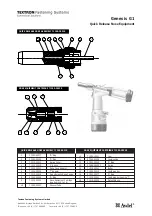
(fig 4.K), whilst pressing the vent valve (fig 4.A).
3.9.3 operate the trigger (fig 4.H) in short, sharp bursts until
grease begins to flow from the connector at the end of the
flexible tube.
3.9.4 Slowly turn the thumb screw on top of the grease release
valve (fig.3c) anticlockwise until grease and air begin to
escape from the hole in the side of the valve. When all the
air has been expelled and only grease is escaping, shut the
valve by turning the thumb screw clockwise.
3.10 READING THE BATTERY DISPLAY
3.10.1 To check the remaining battery power, press and hold down
the LED display button (fig.3E) on the top of the grease gun.
A gauge will appear on the display (fig.3D) showing the
percentage of battery charge left. The display has five
segments, each representing 20% of the full charge.
Original Language Version
cPG18V issue no.1 21/12/09
NOTE: It is our policy to continually improve products and as such we reserve the right to alter data, specifications and component parts without prior notice.
IMPORTANT:
no liability is accepted for incorrect use of this product.
WARRANTY:
Guarantee is 12 months from purchase date, proof of which will be required for any claim.
INFORMATION:
for a copy of our latest catalogue and promotions call us on 01284 757525 and leave your full name and address, including postcode.
01284 757500
01284 703534
Sole Uk Distributor, Sealey Group,
Kempson Way, Suffolk Business Park
,
Bury St. Edmunds, Suffolk,
iP32 7Ar
www.sealey.co.uk
Web
CONDITION
POSSIBLE CAUSE(S)
CORRECTIVE ACTION
Motor fails to run.
- Battery needs recharging.
- recharge battery.
- faulty wiring to motor.
- remove battery, disassemble
handle and check wiring for loose
connections.
Pressure release valve opens to
discharge grease.
- Blocked line.
- check lines, pipe joints and
grease fittings and remove any
obstructions.
- Blocked bearing.
- Blocked grease fitting.
Grease gun fails to dispense
grease.
- Grease tube is out of grease.
- check that the tube contains
grease.
- Loss of prime.
- repeat priming operation.
- check valve is not functioning.
- remove check valve, clean and
inspect the valve seat.
Grease gun continues to lose
prime.
- Air may be trapped in locations
throughout the grease tube ass’y
after bulk filling.
- Empty grease tube ass’y, refill and
repeat priming operation.
- Grease tube follower may be
binding.
- replace grease tube ass’y.
Battery fails to charge.
- charger may not have power.
- check the mains charger is
providing power.
- Battery may be dead.
Fig.4


