36
Installation
3
Installation
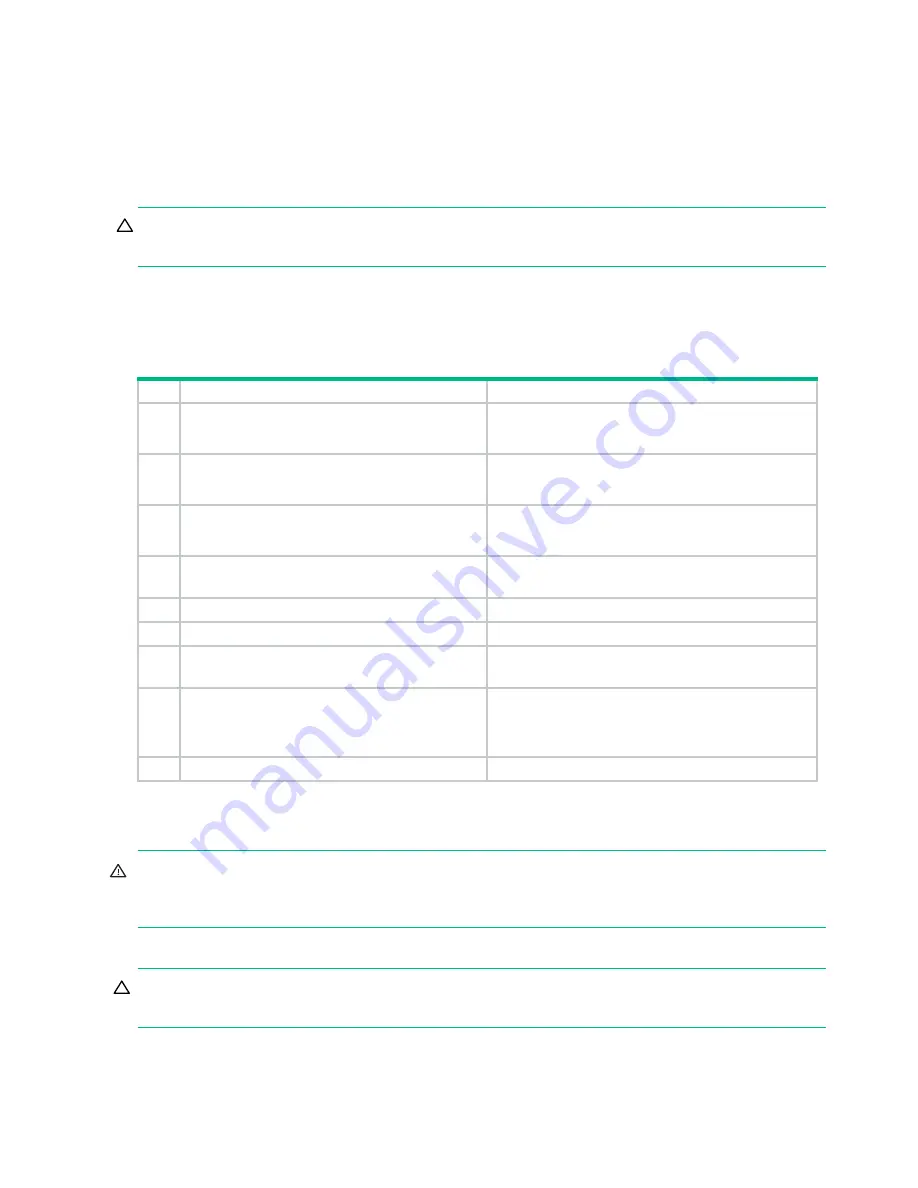
Installation checklist
This chapter shows how to plan for and successfully install your enclosure system into an industry standard 1.2 m rack
cabinet.
CAUTION:
To install the system, use only the power cords supplied, or power cables that match the specification
quoted in
“AC power cords/universal jumper cords” (page 97)
The following table outlines the steps required to install the enclosure. To ensure successful installation, perform the
tasks in the order presented. For rackmount installation, temporarily place all drive modules in a static-protected area,
and then install them after the 4U106 is installed in the rack.
You must adhere to all related safety requirements prior to and during installation of a new storage enclosure or during
FRU replacement.
WARNING!
Do not attempt to install the storage enclosure into the rack cabinet with disk drives preloaded in the slots.
Serious injury and damage could result. Unload any disk drives in storage enclosure slots to an ESD-protected area. Do
not further lighten the storage enclosure by removing other components.
WARNING!
You must use a mechanical lift for mounting the storage enclosure into the rack cabinet. Do not use a
vacuum lift because it might damage the storage enclosure.
Table 3
Installation checklist
Step
Task
Where to find procedure
1
Complete all installation prerequisites.
See
“Installation checklist” (page 36)
See
“Complete installation prerequisites” (page 37)
2
Unpack the enclosure.
See
“Installation checklist” (page 36)
See
“Unpacking and preparing the enclosure” (page 38)
3
Prepare the site for installation of the storage
enclosure into the rack cabinet.
See
“Installation checklist” (page 36)
See
“Unpacking and preparing the enclosure” (page 38)
4
For rackmount installation, temporarily place all disk
drives in a static-protected area
See
“Installation checklist” (page 36)
5
Install the rackmount kit in the rack cabinet.
See
“Installing the rackmount railkit” (page 42)
6
Mount the storage enclosure into the rack cabinet.
See
“Installing the storage enclosure” (page 54)
7
Install disk drives in the storage enclosure.
See
“Installing disk drives in the storage enclosure”
8
Connect data cables and power cables.
See
“Routing power and data cables using the CMA”
See
“Powering on/powering off” (page 71)
9
Test enclosure connectivity.
See

