Step 1—Switching the system on
Plug in the transducer cable to the control box; look for
a blinking red LED light. Red light indicates the system
is on and outputting depths. The transducer MUST be in
water to output depths.
Step 2—Connect to Bluetooth
When the system is powered on and the red light is
blinking, a Bluetooth connection can now be connected
using instructions from your collection device of choice
(refer to your data collector manual). When the Bluetooth
connection is enabled, a solid blue LED light will appear.
Step 3—Connecting the serial cable
A serial cable is included to output data from the
SonarMite. The transducer must be connected and a
red LED light blinking to output data.
Step 4—Data Collection
The SonarMite has eight output formats, depending on
the software used for data collection. Instructions for
changing the format and sound velocity is covered in
Step X. Please visit our website support section for the
specific setup guides for your system:
http://www.seafloorsystems.com/support.html
Step 5—Bar checking
Bar checking is calibrating the system for the sound
velocity of the water being surveyed. There are two
methods of doing this:
5a. digital bar check (example Odom Digibar Pro)
5b. build a bar check consisting of a flat, large base at
a fixed distance from the transducer. For shallow water,
sound velocity tables can be used to set the SonarMite
to a desired setting. To do this, obtain water temperature
from mid-water column, and refer to proper sound
velocity table for fresh or salt water. For questions, call
our support line.
Note: using the seabed for calibration is not acceptable;
this should only be used for rough check.
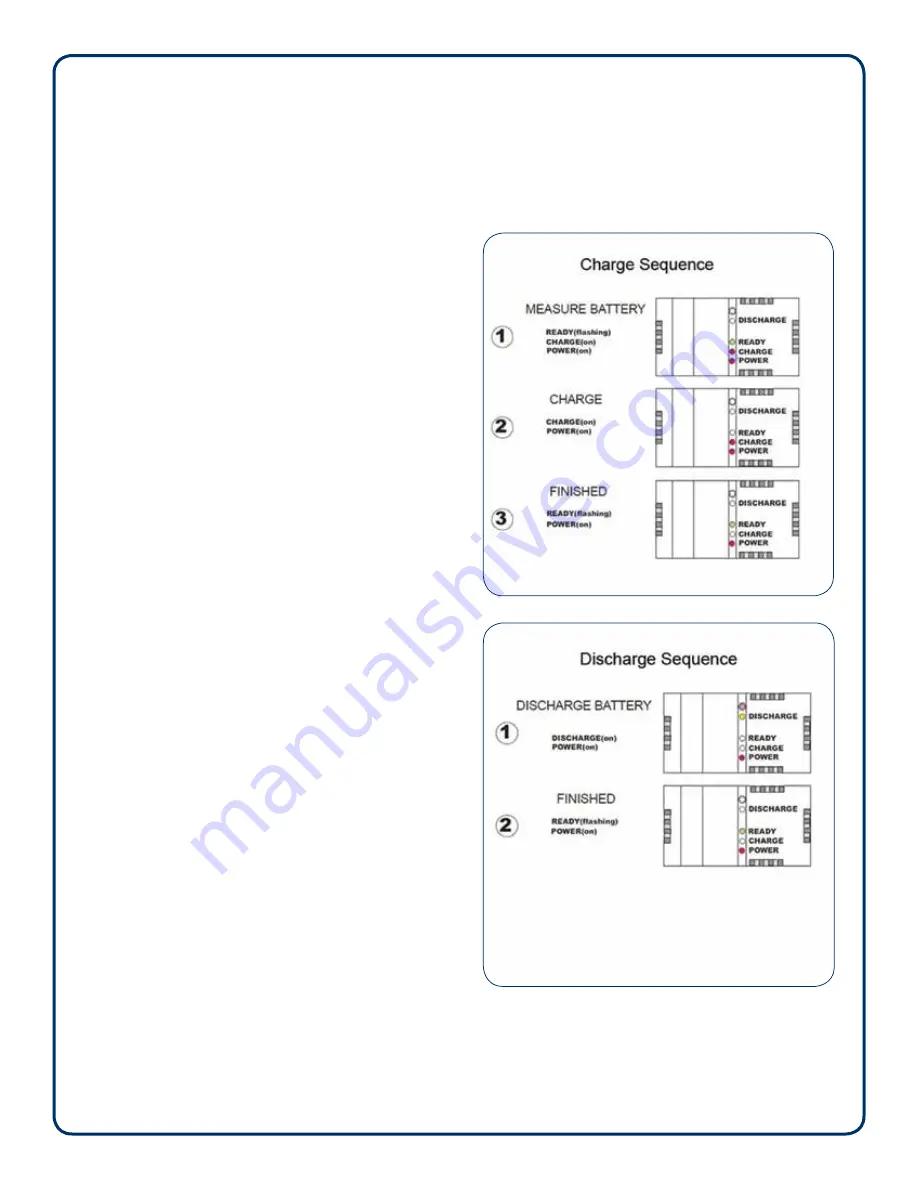
Step 6—Internal battery charging
Fully charge the battery, overnight, prior to using
the system. A full discharge and recharge should be
conducted every six months. Refer to the charge/
discharge illustrations.
Page 2
SonarMite MILSpec/M8 User Manual | Rev 07/22/2016
Summary of Contents for HydroLite-TM
Page 17: ...Pg 1 of 5 SeafloorTM quick start guide SonarMite Android Bluetooth App Ver 2 1...
Page 18: ...Pg 2 of 5...
Page 19: ...Pg 3 of 5...
Page 20: ...Pg 4 of 5...
Page 21: ...Pg 5 of 5...
Page 22: ...Trimble Survey Controller Access SeafloorTM quick start guide Pg 1 of 4...
Page 23: ...Pg 2 of 4...
Page 24: ...Pg 3 of 4...
Page 27: ...SeafloorTM quick start guide Pg 1 of 6 Trimble SCS900 with SonarMite...
Page 28: ...Pg 2 of 6...
Page 29: ...Pg 3 of 6...
Page 30: ...Pg 4 of 6...
Page 31: ...Pg 5 of 6...
Page 32: ...Pg 6 of 6...
Page 33: ...SeafloorTM quick start guide Pg 1 of 3 Trimble Access Drivers for SonarMite DFX...
Page 35: ...Pg 3 of 3...
Page 38: ...Pg 4 of 13 Pg 3 of 13...
Page 39: ...Pg 6 of 13 Pg 5 of 13...
Page 40: ...Pg 8 of 13 Pg 7 of 13...
Page 41: ...Pg 10 of 13 Pg 9 of 13...
Page 42: ...Pg 12 of 13 Pg 11 of 13...
Page 44: ...Pg 1 of 3 SeafloorTM quick start guide SonarMite with Leica 1200 GPS System...
Page 45: ...Pg 2 of 3...
Page 46: ...Pg 3 of 3...
Page 47: ...Pg 1 of 1 SeafloorTM quick start guide Topcon Magnet...


