


Website: www.seada.co.uk
9/18
E-mail: [email protected]
(3)
Click “Save” to save all configurations above.
Note:
If you don’t want to save the configurations, you can click “Cancel” to cancel the
operations.
6..2 Configurations of RS232 Control:
(1)
C
lick the second “Edit” to enter the following page.
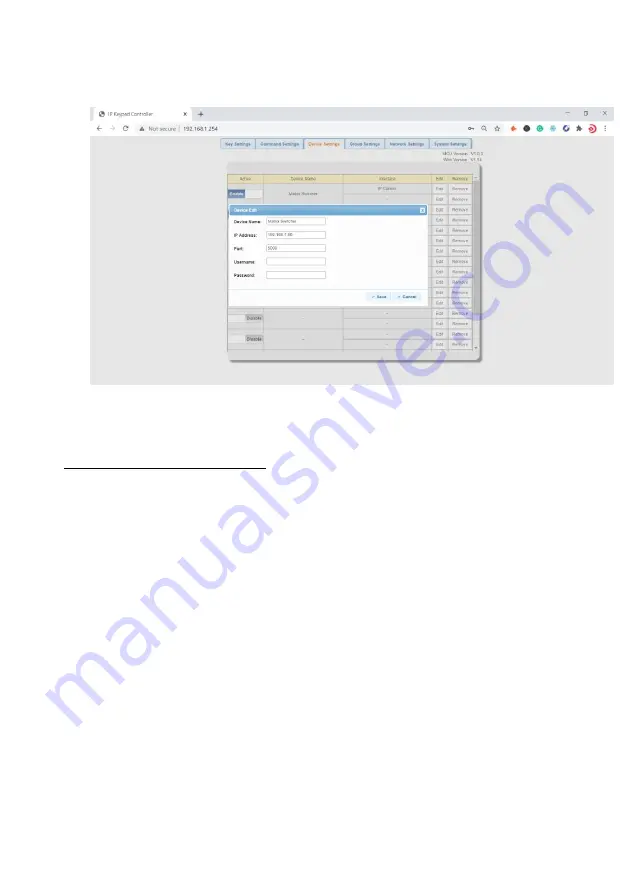
(2)
Configure the items in the picture above. These parameters are provided by third-party
devices manufacturers and can be found in instructional documentations.
•
Device Name
: The “Device Name” configured in the first “Edit” tab.
•
Baud Rate
: Select the baud rate from the drop-down menu.
•
Parity Bits
: Select the parity bits from the drop-down menu.
•
Data Bits
: Select the data bits from the drop-down menu.
•
Stop Bits
: Select the stop bits from the drop-down menu.
(3)
Click “Save” or “Cancel” to save or cancel the configurations above.
If y
ou click “Save”, the page will return to the “Device Settings” tab automatically.
After
successful configuration,
the “Device Settings” page
will look like the following:


