


SCT PERFORMANCE, LLC.
User’s Manual
3.5 Using the iTSX Gauges to Monitor & Data Log
Using the iTSX Gauges to Monitor & Data Log your vehicle’s engine parameters:
iTSX can monitor & data log your vehicle's engine parameters in real-time on the gauges included in the iTSX App.
Monitoring & Data Logging Setup:
In order to monitor your vehicle's data via your mobile device, some setup is required in the iTSX
App.
1. To begin the setup of the gauges, touch Gauges from the iTSX main screen.
2. The iTSX gauges will appear on the screen. If you have previously setup monitoring & data
logging, the gauges will automatically connect to your vehicle and begin displaying data
from your vehicle.
Selecting a Gauge Layout & Data Configuration Set to Monitor / Data Log:
1. To setup the gauges for the first time, touch anywhere on the screen to enter Editing mode
and touch the "Edit" button when displayed.
2.
When in Editing mode, the gauges will appear with dashed lines around each gauge.
3. Touch the Panel Settings button to open the Panel Settings screen.
Selecting a Data Configuration Set:
Data Configuration sets contain a group of parameters that are available for monitoring with your
vehicle.
1. To select a Vehicle Data Configuration set, touch the Data Configuration box located at the
top of the Panel Settings screen.
2. Choose from one of the available Vehicle Data Configurations by touching the set in the list.
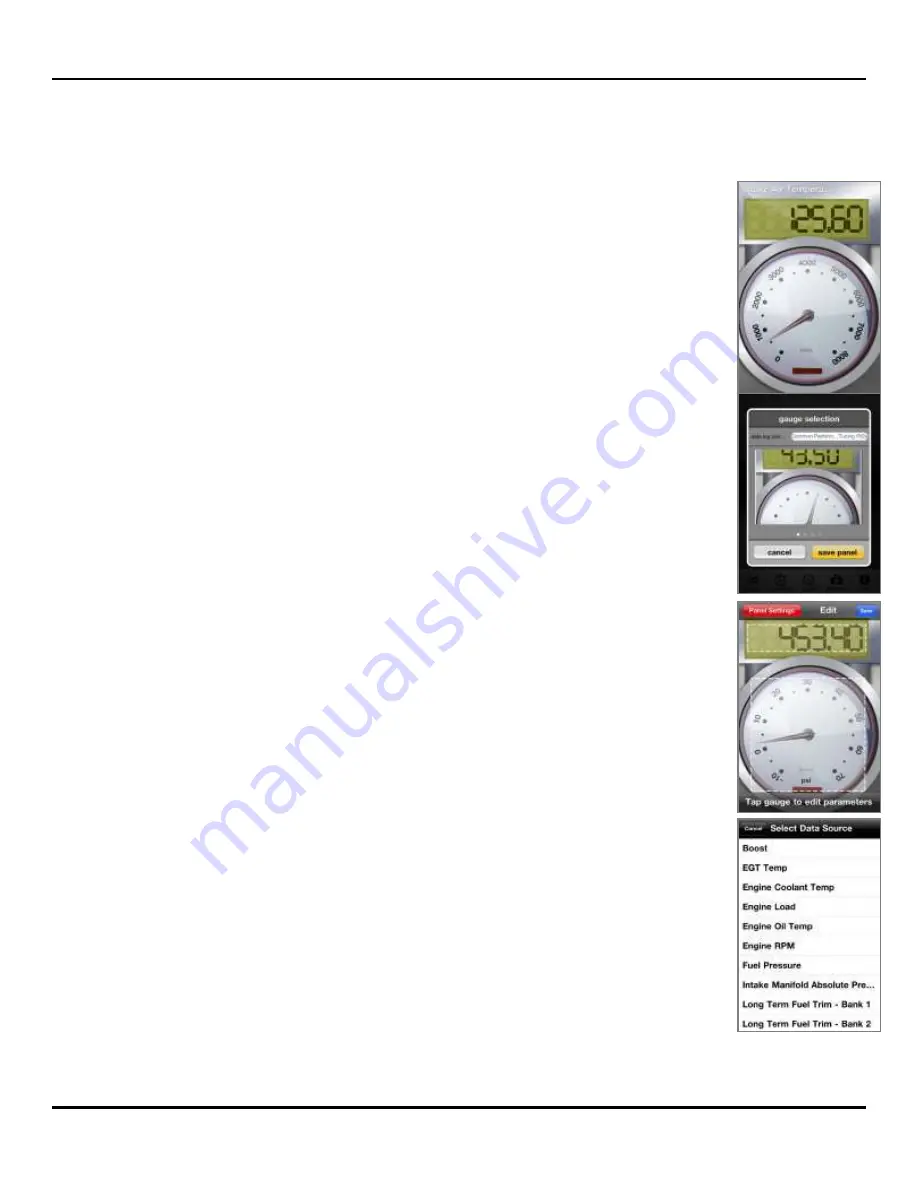
Selecting a Gauge Layout:
1. To select a gauge layout, navigate through the available layouts flick left or right on the
gauge images.
2. Once you have selected a gauge layout, touch the "Save Panel" button to continue.
Configuring each Gauge to Monitor Specific Vehicle Parameters:
1. To assign a vehicle parameter to each gauge, touch anywhere on the screen to enter Editing
mode and touch the "Edit" button when displayed.
2. When in Editing mode, the gauges will appear with dashed lines around each gauge.
3. To assign a vehicle parameter to each gauge, touch the gauge you wish to assign the vehicle
parameter to.
Assigning a Data Source to the gauge:
1. To assign a parameter to the gauge, touch the Data Source box located at the top of the
Configure Gauge panel.
2. In a drop down menu, a list of available parameters for monitoring will be displayed.
3. Using flick motion, scroll through the list of available parameters.
4. To select a parameter, simply touch the item in the list.
Assigning a Custom Label to the gauge:
1. To assign a custom label or name to the gauge, touch the label text box.
2. The device keyboard will be shown, allowing you to enter a custom label / name for the
gauge.