background image

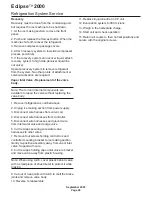
Refrigeration System Service

Recovery

Recovery must be done from the condensing unit,
but requires the ice machine to be shut down.

1. At the ice making section, remove the front
panel.

2. Push and release the Harvest button. When the
machine shuts off, recover the refrigerant.

3. Remove compressor package covers.

4. Attach recovery system to low side (compressor
process port valve)

5. If the recovery system can recover liquid, attach
recovery system to high side (receiver liquid line
out valve)

Operate recovery system to remove refrigerant
from the system. No other points of attachment or
solenoid activation are required.

Vapor Inlet Valve - Replacement of the valve
body.

Note: The coil and internal components are
available to repair the valve without replacing the
valve body.

1. Recover refrigerant as outlined above.

2. Unplug ice making section from power supply.

3. Disconnect wire harness from valve coil.

4. Disconnect wire harnesses from controller.

5. Disconnect wire harnesses and ground wire
from inlet water valve and purge valve.

6. Cut tie wraps securing wire water valve
harnesses to other wires.

7. Remove four screws holding control box and
controller mounting bracket to ice making section.
Gently re-position assembly away from vapor inlet
valve. Support with wire.

8. Cut tie wraps holding vapor inlet valve to bracket
and move valve away from plastic housing.

Note: When using torch, cover plastic behind valve
with a small piece of sheet metal to protect it while
brazing.

9. Cut out or heat joints with torch to melt the braze
joints and remove valve body.

10. Reverse to reassemble.

11. Replace liquid line drier in CP unit.

12. Evacuation system to 300 microns.

13. Weigh in the nameplate charge.

14. Start unit and check operation.

15. Return all covers to their normal positions and
secure with the original screws.

Eclipse

ä

2000

September 2003

Page 46

Summary of Contents for CME2086

Page 1: ...age 17 Ice making section Page 18 Bin Thermostat Routing Page 19 Bin Thermostat Bracket Bulb Page 20 Water and Drain Page 21 Water and Drain Page 22 Ice Making Section Set Up Page 23 Coupling Connections Page 24 Condensing Unit Connections Page 25 Final Placement Bin Thermostat Deployment Page 26 Controller Operation Page 27 Purge Adjustment Page 28 Initial Start Up 2000 Only Page 29 Startup Three...

Page 2: ...n altered in any way including the use of any part and or other components not specifically approved by Scotsman Scotsman reserves the right to make design changes and or improvements at any time Specifications and design are subject to change without notice Warranty Refer to the warranty coverage in effect when the equipment was sold Warranty statements are included with each product Systems Each...

Page 3: ... Ampacity Max Fuse Size Cabinet Size Weight lb CME2086RLS 1A 115 60 1 3 15 30 w x 24 d x 28 h 154 Height does not include bin thermostat bracket mounted in bin Model Electrical Contains Headmaster Minimum Circuit Ampacity Max Fuse Size Refrigerant Charge R 404A Cabinet Size Weight lb CP2086 32A 208 230 60 1 Yes 41 3 50 21 lb 29 w x 18 d x 34 h 200 CP2086 3A 208 230 60 3 Yes 28 3 30 21 lb same 200 ...

Page 4: ...ght side of the compressor package contains the model number serial number electrical data and system refrigerant charge A second plate located behind the front panel in front of the compressor also lists the model number serial number and refrigerant charge Condenser The dataplate lists the condenser s electrical information plus the model and serial numbers Eclipseä 2000 September 2003 Page 4 Da...

Page 5: ...5 17 08 2 53 4 85 17 31 TOP VEIW ICE DROP AREA TOP ACCESS REFRIGERANT LINE SETS UTILITY CHASE 30 00 3 02 1 90 15 76 5 19 REAR VEIW WATER INLET 3 8 FLARE DRAIN 3 4 PVC FEMALE REFRIGERANT LINE SETS CONNECTIONS 24 00 3 18 Thermostat Routing Hole 13 from front 4 63 from side ...

Page 6: ...LECTRICAL INLET 3 4 SUCTION LINE INTERFACE HARNESS ACCESS HOLE 3 8 CONDENSER LIQUID LINE OUT 1 2 CONDENSER DISCHARGE LINE IN CONDENSER FAN WIRE ROUTING ERC2086 This Side Attaches to CP2086 27 90 28 53 35 72 2 75 Liquid Line Discharge Line 29 50 38 47 33 19 6 68 22 51 29 19 9 16 Mounting Hole 9 16 Mounting Hole 32 2 2 0 2 0 3 8 LIQUID LINE 15 1 5 1 5 ...

Page 7: ...nnections can be made out the top panel or out the back The electrical power cord and the water inlet line can also be routed through either of those areas The drain may be routed out the back or to the left side The bin thermostat when deployed will be about 5 below the bottom of the cabinet and that is where the ice will fill to This ice level maximizes ice storage without overfilling the bin or...

Page 8: ...the ice making section up to a limit of 15 feet Distance from unit Limited to the length of the available pre charged tubing Elevation CP unit limited to 35 feet above the ice making section Compressor package Electrical power must be supplied to the compressor package The remote condenser fan motor takes its power from the compressor package Ice making section location and attachment The 115 60 H...

Page 9: ...r or onto a coil in a separate rack condenser Separate coils must be Scotsman approved The correct size and capacity New or not have been part of a system that used mineral oil Eclipseä 2000 September 2003 Page 9 Typical System on Bin Typical System on Dispenser CME2086 ERC2086 CP2086 Dispenser Refrigerant Tubing and 24 volt Control Wire ...

Page 10: ...ne that uses a non Scotsman condenser In that case the CP unit is NOT bolted to the condenser and a RTE10 line set is used to connect the CP s refrigeration system to the condenser s Eclipseä 2000 September 2003 Page 10 CME2086 RTE10 CP2086 Bin Refrigerant Tubing and 24 volt Control Wire Pre approved non Scotsman condenser ...

Page 11: ... to be attached to the other end of the condenser Roof Piercing The roof or wall must have a passage large enough for the three pre charged pre bent tubes and the control wire to pass through The minimum recommended size is 4 ID In most areas the power supply may also pass through the same passage If there isn t a passage one must be created In most cases this must be done by a licensed and bonded...

Page 12: ...ark Ice Making Section Elevation over Condensing Unit 15 feet Line Routing Allowed One rise after a drop Allowed One drop after a rise Not Allowed More than one rise after a drop Not Allowed More than one drop after a rise Eclipseä 2000 September 2003 Page 12 22 87 17 15 40 35 Condensing Unit Distance Schematic Max Rise 35 Feet Max Drop 15 Feet Max Length Limit of Line Set Condensing Unit Located ...

Page 13: ...apart to install it Identify the ice machine end of the tubing Each tube has one end formed to route through the hole in the unit s top Tape the ends of the vapor and liquid line tubes together along with the interconnecting wire Extend the end of the interconnecting wire about 2 feet beyond the end of the precharged tubes and then tape it back onto the tubes Route the three tubes and the wire fro...

Page 14: ...enoid valve that opens to fill the reservoir Low Side Access Valve allows connection for diagnosis of ice machine section refrigeration operation Not for recovery Liquid Vapor and Suction Connections where the pre charged tubing kits connect to Eclipseä 2000 September 2003 Page 14 Water Pump Water Level Sensor Drain Valve Water Inlet Solenoid Valve Freezing Compartment Low Side Access Valve Vapor ...

Page 15: ...ring harvest Receiver stores liquid refrigerant for freeze and provides vapor for harvest Suction Access Valve provides a place to attach a refrigeration manifold for diagnostics and recovery Eclipseä 2000 September 2003 Page 15 CP Unit Refrigeration Connection ID Power Routing Hole Vapor Line Connection 24 volt comm line Routing Hole Liquid Line Connection Suction Line Connection Liquid from Cond...

Page 16: ...cure CP unit to ERC 11 Attach leg brace between ERC unit and CP unit 12 Route wires from condenser through hole in back of CP unit to the CP unit control box 13 Pull ERC female refrigerant connections forward to engage male connections on CP unit 14 Rotate swivel nuts to tighten refrigerant connections Use a back up wrench to hold female connection to prevent tearing of the diaphragms 15 Connect w...

Page 17: ... the control box Route power conduit liquid tight and wires to the hole in the side of the CP unit Secure with the proper type of connector Note The power supply wires must be the correct size and type per the National Electric Code Locate the nameplate on the CP unit for the Voltage Phase Minimum Circuit Ampacity and Maximum Fuse Size Either fuses or HACR type circuit breakers may be used Follow ...

Page 18: ...ing the head unit on a bin or dispenser See sales information for the correct kit Place adapter kit onto bin or dispenser top If adapter does NOT have gasket tape install tape such as Scotsman part number 19 0503 04 Attachment If the unit is a direct fit place it on the bin If the unit is in a position that it need not be moved to complete the installation secure it to the bin with the hardware pr...

Page 19: ... Carefully position the thermostat bulb on the bracket see the diagram on the next page 5 Fasten the bracket to the bottom of the ice machine with the two 3 pronged knob head screws supplied with the unit 6 Pull back into the ice machine any excess capillary tubing 7 Return the baffle to the bin and continue with the installation Note If the machine is located at an altitude higher than 2 000 ft a...

Page 20: ...mostat Bracket Bulb Eclipseä 2000 September 2003 Page 20 Attach Thermostat Bulb to Bracket Mount Bracket to Bottom of ice Head Bracket Thermostat Capillary Tube Insert Tip into Hole Snap Tube Through Slot Bulb ...

Page 21: ...emble the ice making section to the dispenser or bin and install the water and drain connections before placing the system in its installed position A loop of water supply tubing will allow movement of the system In other tight situations the unit should have its water and drain tubing connected and stubbed out before placing on the dispenser or bin The drain fitting is adaptable to drain connecti...

Page 22: ...ntains provisions for back flow prevention in its design No external back flow preventer is required Drain Connect rigid drain tubing to the reservoir drain fitting on the right side of the cabinet Route the drain either out the back or to the left side Run the drain tubing to the building drain Do not Tee into any other drain including the bin or dispenser drain Eclipseä 2000 September 2003 Page ...

Page 23: ... to the middle fitting Connect the liquid line to the bottom fitting See Coupling Connections on the next page for detailed instructions After couplings are connected add cork tape type insulation to exposed fittings to reduce condensation potential Eclipseä 2000 April 2002 Page 23 Refrigerant Lines Shown Routed Out The Top Add insulation Suction Vapor Liquid Refrigerant Lines Shown Routed Out the...

Page 24: ...turned or the diaphragms will be torn by the piercing knives and become loose in the refrigeration system causing severe operational problems Note As the coupling is tightened the diaphragms in the quick connect couplings will begin to be pierced As that happens there will be increased resistance to tightening the swivel nut 4c Continue tightening the swivel nut until it bottoms out or a very defi...

Page 25: ...id line to the matching fittings on the CP unit See Coupling Connections on the prior page for detailed instructions Eclipseä 2000 September 2003 Page 25 Assembled Condensing Unit Control Wire Power Supply Inlet Field Supplied Service Disconnect Liquid Line Suction Line Vapor Line ...

Page 26: ...trolled environment 2 Confirm that all packing materials have been removed from all products 3 Confirm that the ice making section is level 4 Confirm that all the refrigerant connections have been made and checked for leaks 5 Confirm that the proper power supply has been turned on to the condensing unit 6 Confirm that cold potable water has been supplied to the ice making section and checked for l...

Page 27: ...t part of the cleaning process Push and release again to start the second part of the cleaning process Off Push and Release to shut the machine off at the end of the next harvest cycle Push and Hold for three seconds to stop the machine Push and Hold again to go into the Purge Adjustment or Error Recall mode Cycle Definitions Freeze The refrigeration system is operating to remove heat from the eva...

Page 28: ...is light is ON Off For excellent water conditions Adjust by pushing and releasing the Freeze button Pushing and releasing the Freeze button increases the purge one level up to the maximum then it goes to the minimum 4 The machine will automatically restart after 60 seconds of no switch inputs or restart the machine by pushing in and holding the Off button for more than 3 seconds then releasing it ...

Page 29: ... does not begin to cool the evaporators or suction line the compressor motor is likely running backwards See next page After a few minutes ice will begin to form on the evaporators When enough ice has formed to nearly empty the water reservoir the controller will refill the reservoir The next time the water level drops that far the ice is ready for release and the Controller will initiate a Harves...

Page 30: ...rsed 1 Remove front panel of CME2086 2 Push and hold the Off button until the pump stops 3 Go to the CP unit A Disconnect electrical power to CP unit B Remove front panel C Pull off compressor terminal cover D Locate terminals switch any two wires E Return compressor terminal cover to its original position F Reconnect electrical power to the CP unit G Go to the CME2086 and push the freeze button t...

Page 31: ...the evaporators until it begins to freeze to the evaporators As ice builds up the water level in the reservoir falls until it reaches a point where the water level sensor indicates to the controller that the water level is low At that point about half way through the freeze cycle the controller opens the water valve to refill the reservoir The second time the water level drops in the freeze cycle ...

Page 32: ...the suction line which carries it back to the condensing unit where it enters the accumulator In the accumulator most of any liquid carried with the suction gas is separated and only vapor flows out of the accumulator through the CPR valve and to the compressor where the cycle continues During harvest discharge gas flows through the open condenser by pass valve into the vapor line Power is also ap...

Page 33: ... the temperature it expects to find at that point in the cycle If normal nothing happens If high the controller checks the discharge temperature If that is normal nothing happens If that is low the controller starts a diagnostic process that could lead to the unit shutting off as the refrigeration system may not be operable 6 Assuming that the system is working normally the controller will shut th...

Page 34: ... No Ice Released If no ice is sensed harvest continues until it reaches its pre set maximum when the controller switches the unit back into freeze Shut Down Maximum Harvest Time If a maximum harvest time is reached again during the next harvest cycle the controller will shut the system down and blink the refrigeration diagnostic light It will automatically attempt a restart in 50 minutes If the ma...

Page 35: ...the ice machine cleaner has circulated for 10 minutes push and release the Clean button This starts the rinsing process The Clean indicator light will be ON Note The rinse process flushes any residual cleaner out of the ice machine s water system 10 Continue the rinsing process for 20 minutes then push the off button to switch the machine off 11 Go to the next step to sanitize the machine or go to...

Page 36: ...tes Normal freeze cycle starts Water Interruptions The water level sensor checks for water fill whenever the water inlet valve is activated If the water level sensor does not record a full reservoir within the pre set time the controller shuts the unit off blinks the water diagnostic light two times and repeats After 20 minutes the inlet water valve is powered again and if the water level sensor i...

Page 37: ...en any damaged fins with a fin comb If the coils have become coated with grease a coil cleaner will have to be used to wash the coils Disconnect power to the condensing unit and remove the condenser top Inspect the fan blade to be sure it is not cracked and is clean Return the condenser top to its original position and reconnect the power supply Eclipseä 2000 September 2003 Page 37 Moving Parts Ha...

Page 38: ... rinse process After 20 minutes push and release the Off button 14 Push and release the Freeze button 15 Return all covers and panels to their original positions Inlet Water Valve Screen The inlet water valve has a screen on its inlet side to keep debris from flowing into the valve In some cases this screen may become clogged or restricted by debris build up Check for the proper water flow Flow ra...

Page 39: ...til the tray flips out of its socket 13 Wipe the lens clean with a soft cloth dipped in an ice machine cleaner solution 3 parts water to 1 part ice machine cleaner Do NOT use any abrasives on the lenses 14 Return the tray to its normal position Be sure it snaps into place The gray wire must be secured under the black plastic clip 15 Return each ice sensor to its normal position Be sure no wires ar...

Page 40: ...e measures correctly proceed to the next step 5 Reconnect the harness Be SURE it is on properly and has a good connection To confirm unplug the harness from the water sensor and redo step 4 at the end of the harness Then plug the harness back onto the sensor Harness Connected Voltage DC 6 At the controller measure the voltage between the top and bottom pins on connection 2 This should be between t...

Page 41: ...peration including harness between sensor and controller Ice making section has exceeded maximum freeze time and controller has shut down the system Condenser coils may need cleaning Check condenser fan blade and motor Check for excessive air intake temperatures at condenser coil Check compressor contactor Check compressor and starting components Check water pump Check purge valve for leak through...

Page 42: ...during harvest No ice sensed during harvest Ice sensing system failure Check sensing system by pouring about 10 ice cubes through the ice outlet port The bin full light should blink indicating that it has sensed the ice If not check the sensors Check the ice sensors Place an object between the ice sensors after 5 seconds the Bin Full light will be glowing steadily if not check operation of sensors...

Page 43: ...ume of drinks dispensed cold plate melting ice Suggest pre cooler for water supply to cold plate Vapor inlet valve leaks through slightly during the freeze cycle Check valve body for similar temperatures on inlet and outlet the outlet should be colder and frost develops on the tubes to the evaporators Cascading shield missing out of position and water is cascading out of the reservoir Install or r...

Page 44: ...ze button Controller Diagnostic Codes If a Diagnostic Light Water Light Refrigeration Light Blinks once and repeats Water pump will not start Very long ice harvest Blinks twice and repeats Lack of water fill No harvest of ice Blinks three times and repeats not used High discharge temperature Is ON all the time Water valve leaking thru rapidly Maximum freeze time Both ON all the time Check for ther...

Page 45: ...or Amps Single Phase 20 Three Phase 14 Batch Weight 19 20 lb Discharge Pressure Cut Out Switch Cuts Out at 450 PSIG Resets at 350 PSIG Compressor ZS38K4E Expansion Valves 1 Eclipseä 2000 September 2003 Page 45 70 70 50 90 90 70 120 110 100 Freeze 11 to 12 minutes 12 to 13 minutes 17 to 18 minutes Harvest 3 minutes 2 minutes 2 minutes 70 70 50 90 90 70 120 110 100 Suction at Ice Making Section end ...

Page 46: ...ce making section from power supply 3 Disconnect wire harness from valve coil 4 Disconnect wire harnesses from controller 5 Disconnect wire harnesses and ground wire from inlet water valve and purge valve 6 Cut tie wraps securing wire water valve harnesses to other wires 7 Remove four screws holding control box and controller mounting bracket to ice making section Gently re position assembly away ...

Reviews: