


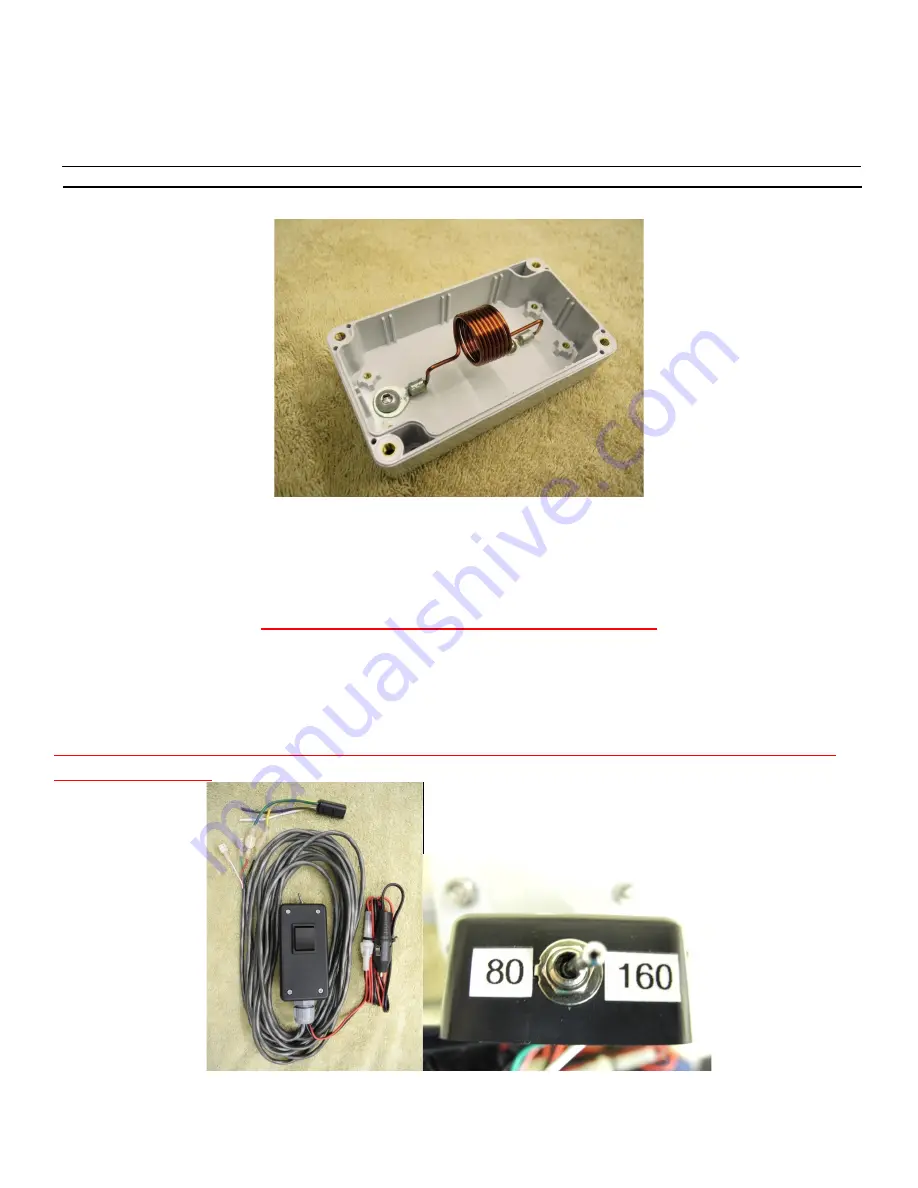
Our New sealed shunt coil enclosure
Follow our 160 meter
dual shunt coil enclosure instructions located on the previous page for installing our
new sealed shunt coil enclosure for our 80 meter antennas the SA-680s “shorty” and our SA-680 standard.
Controlling the Antenna
The supplied wiring harness comes equipped with a fused accessory plug already attached. However, for
permanent installations, this
1 amp fused connection is required by the customer
to be made to a power
source other than the accessory socket.
On the top of the 160 meter antenna control box is the 80/160 meter switch. When operating on 80 meters the
switch must be switched to the 80 meter position. When operating on 160 meters the switch must be switched to
the 160 meter position.
“WARNING” Do not operate this switch when transmitting, you will damage the dual shunt
coil relay contacts.
Connect the fused power plug to the 12 volt accessory outlet in your vehicle.