Technical Procedure
Page 4
637-8642 Rev. A
12. Loop the free end of the belt/band over the generator
pulley.
TECH TIP:
If the generator band slips off of the flywheel pulley,
remove the finger guards with a #2 phillips screwdriver - it
makes placing the belt/band into the pulley groove much
easier.
13. After replacing the belt/band the carbon blue belt (main
drive belt) will need to be tensioned.
14. Use a 10mm deep socket to tension/loosen the left and
right tension nuts by turning clockwise to tighten and
counter-clockwise to loosen. Be sure to adjust the bolts
evenly so that the flywheel is not angled between the forks.
Using a Hz-detecting app, pluck the belt and measure the
Hz.
A properly tensioned belt should measure at ~100
Hz.
TECH TIP:
If an accessory (such as the Body Bar Holster) is lim-
iting access to the tensioning nuts, use a 6mm allen key with a
10mm deep socket on the end of it to work within the clearance
available.
15. Lower the brake down and ensure that none of the brake
magnets are touching the flywheel.
16. Once the belt has been tensioned so that the correct Hz is
measured and the flywheel has been checked for align-
ment then tighten the axle bolts that were loosened in Step
4.
NOTE:
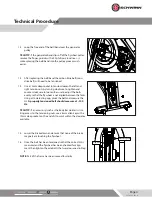
Part of the frame has been moved for clarity
Brake Magnets
Flywheel


