


5
Pointoselect Digital DT | Instruction Manual
5.
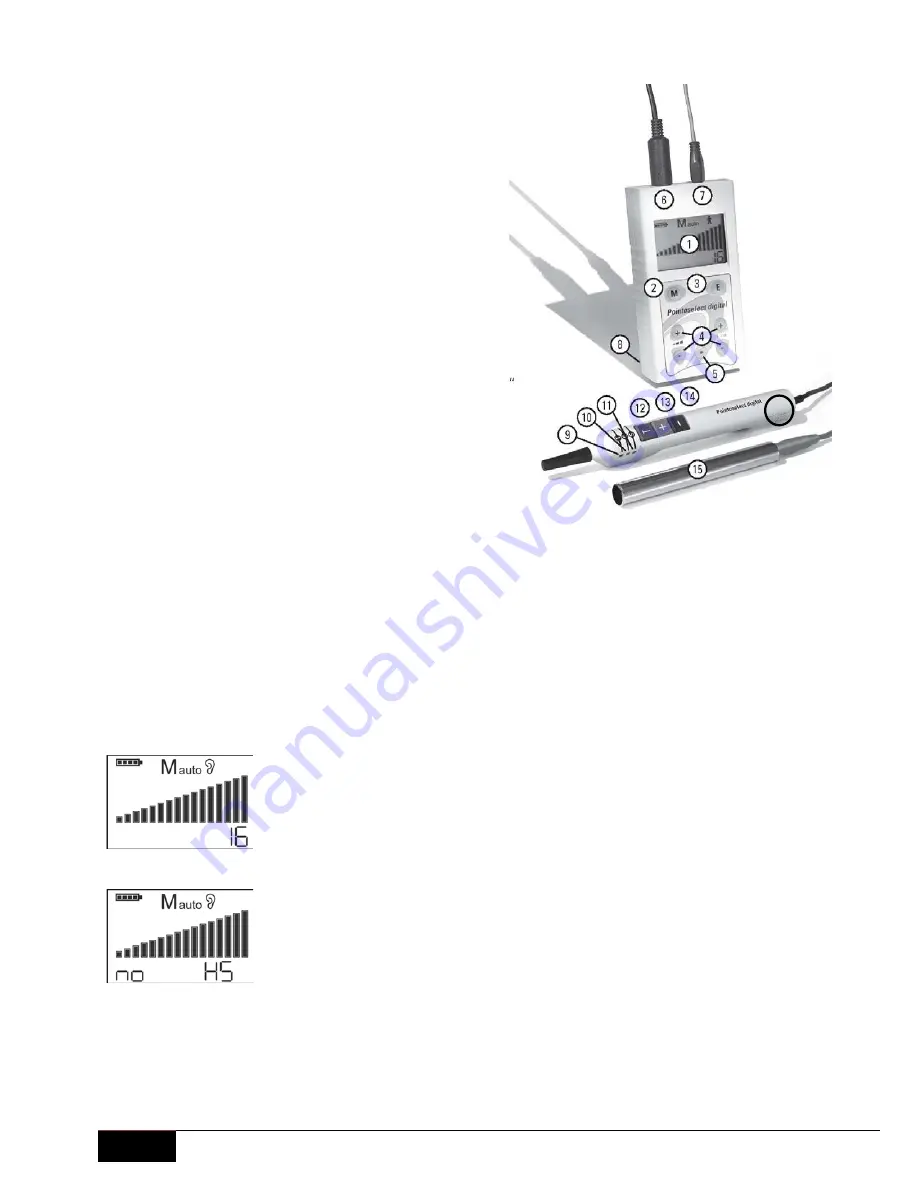
Description of the Pointoselect Digital DT
1. Display
2. Mode key: automatic or manual
3. Edit key
4. Adjustment keys
+
To increase
-
To decrease
5. ON/OFF key
6. Output sockets for the hand probe
7. Output socket for the hand electrode
8. Battery compartment (rear side)
9. LED for therapy
10. LED for Gold Point
11. LED for Silver Point
12. Treatment key
13. Plus key
14. Minus key
15. Hand electrode (sometimes called ground bar)
16. Hand probe (sometimes called hand set)
6.
Operating the Pointoselect Digital DT
Setting up the device
Before starting the device, insert the battery in the battery compartment (no. 8). The hand probe (no. 16)
and the hand electrode (no. 15) must be connected to the respective output sockets of the Pointoselect
digital DT. Take particular care of the connecting pins of the hand probe while plugging the hand probe
in and out. Note that the hand probe can only be connected to its socket in one direction. Follow the
arrow on the hand probe and on the socket of the device.
The patient needs to hold the hand electrode and the acupuncturist needs to touch the patient.
Starting the device
Start the Pointoselect digital DT by pressing the
key. The last settings in use
appear on the display. The battery symbol on in the upper left hand side of the
display shows the state of charge. In case the battery is fully loaded, all battery
segments within the battery symbol are visible. The segments gradually disappear
as the battery voltage decreases.
If not used for 2 minutes (measurement or stimulation) the device switches off
automatically.
If the hand probe is not correctly connected to the Pointoselect digital DT, „no HS“
appears in the display.
16