Mounting
22
04.00|ROTA FSW |en
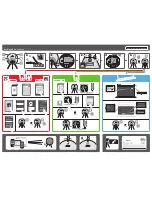
Assembly of the ROTA FSW Chuck quick-change with a direct
mount
(Figure "Assembly of the chuck quick-change or intermediate
flange" see chapter "Checking the spindle nose of the holder of the
If the ROTA FSW chuck quick-change is mounted directly on the
machine spindle without a reducing or an extension flange, the fol-
lowing points must be observed:
• Before assembly of the ROTA FSW chuck quick-change, remove
any dirt or chips from the machine spindle and from the
centering mount and contact surface of the ROTA FSW chuck
quick-change.
WARNING
Risk of injury if the ROTA FSW chuck quick-change falls during
transport or assembly.
• Use a crane to assemble the ROTA FSW chuck quick-change.
This can be fastened on the eye bolt provided (see Fig. 2
"Assembly of the chuck quick-change or intermediate flange"
– C). The eye bolt is included in the scope of delivery.
• Push the ROTA FSW chuck quick-change onto the machine
spindle. Ensure that the through-bores for fastening the chuck
quick-change line up with the threaded holes of the spindle
nose (see Fig. "Assembly of the chuck quick-change or interme-
diate flange" – D).
• Insert and slightly tighten the supplied mounting screws.
Afterwards check the ROTA FSW chuck quick-change for run-
out accuracy on the flex taper and run-out and true running
accuracy on the clamping equipment contact surface (see Fig.
"Assembly of the chuck quick-change – E) and align at the outer
diameter with gentle taps using a plastic hammer. Then tighten
the mounting screws on the ROTA FSW chuck quick-change to
the specified torque (see chapter "Screw torques"
). Then check radial and axial run-out again
(see fig. "Assembly of the chuck quick-change or intermediate
flange" – E).
The radial and axial run-out accuracy to be reached depend on the
diameter of the chuck.
Tolerances for run-out accuracy and axial run-out accuracy corre-
spond to the Technical Supply Terms for lathe chucks as per DIN
ISO 3442-3.
5.3.2


