


Chuck function
01.00| |en
23
Replacement or renewal of jaws
Chuck jaws for maximum repeat clamping accuracy must
be turned or ground in the chuck under clamping pressure.
Self-centering clamping (see drawing) must be selected in
this case.
• When turning or grinding, ensure that the turning ring or
turning pin is clamped by the top jaws and not by the base
jaws.
• Tighten the jaw mounting screws to the specified torque.
(
4, Page 15)
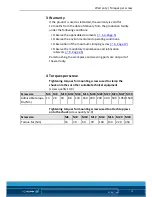
Tighten the jaw mounting screws, quality class 12.9, using a
torque wrench. On no account tighten the Allen key with an
extension pipe or with hammer blows. See "Screw tightening
torques" chapter
(
4, Page 15)
.
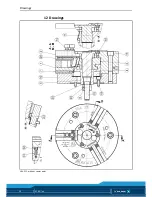
Disassembly and assembly of the Chuck
The chuck can only be disassembled once it has been removed.
(See "HSA chuck assembly" chapter
(
7.2, Page 19)
).
WARNING
Risk of injury due to the power chuck falling during
transportation, installation or removal
During transportation and when installing or removing the power
chuck, ensure it does not fall.
HSA 160, HSA 160/2, HSA 180/2, HSA 200, HSA 250, HSA 250/2,
HSA 265, HSA 315 and HSA 315/2
• Unscrew the cylindrical screw (Item 18) and remove the guide
bushing (Item 4, 11, or 13).
• Pull the guide part (Item 5) with piston (Item 3) out of the
chuck body (Item 1). Pull out the bolt (Item 7). The guide part
(Item 5) and the piston (Item 3) can be detached from one
another by twisting the parts by 60° (bayonet connection).
• Slide the base jaws (Item 2) inwards out of the guide and
remove from the chuck body.
• If fitted, remove the set-screw (Item 22) and then the screw
(Item 15) and nut (Item 6).
8.2
8.3


