background image

• 4 •

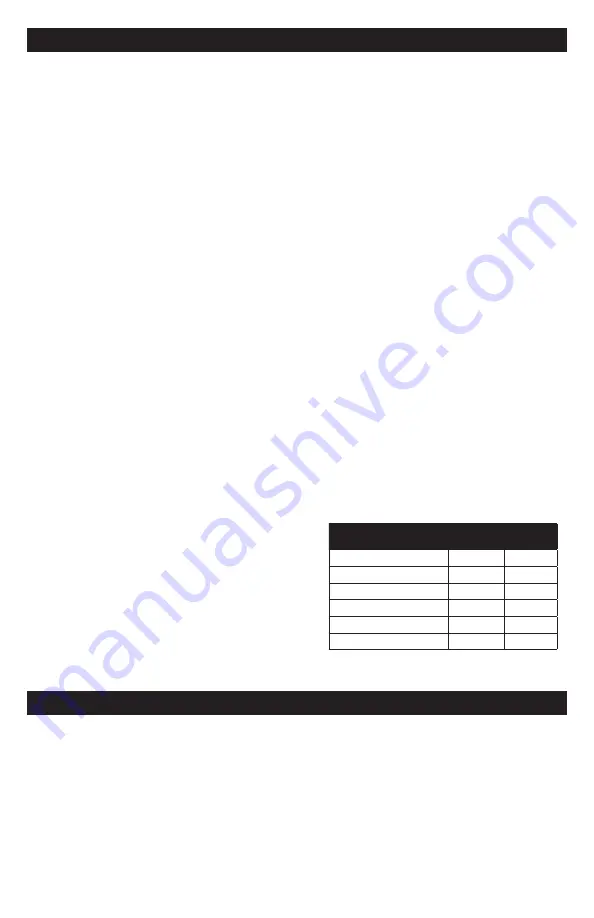
5.  OPERATING INSTRUCTIONS

5.1  JUMP STARTING A VEHICLE

IMPORTANT:

 Using the Engine Start 

feature without a battery installed in the 

vehicle will damage the vehicle’s electrical 

system.

1. 

Turn the ignition OFF.

2. 

Lay the DC cables away from any  

fan blades, belts, pulleys and other 

moving parts.

3. 

For a negative-ground vehicle (as in 

most vehicles), connect the Instant 

Power’s POSITIVE (RED) clamp to the 

POSITIVE (POS, P, +) battery post. 

Next, connect the NEGATIVE (BLACK) 

clamp to the vehicle chassis or engine 

block, away from the battery. 

4. 

For a positive-ground vehicle, connect 

the Instant Power’s NEGATIVE 

(BLACK) clamp to the NEGATIVE 

(NEG, N, -) battery post. Next, connect 

the POSITIVE (RED) clamp to the 

vehicle chassis or engine block away 

from the battery.

5. 

Turn the switch to the ON position

6. 

Crank the engine for no more than  

8 seconds. If the engine does not start, 

wait 2 minutes before cranking again.

7. 

After the engine starts, turn the switch 

to the OFF position and remove the 

unit from the battery.

8. 

Charge the unit.

5.2  USING THE USB PORT 

The USB port provides up to 2A at 5V DC.

1. 

Ensure the battery clamps are securely 

clipped on the storage holders.

2. 

Turn the unit ON.

3. 

Plug your device into the USB port.

4. 

When finished using the USB port, turn 

the switch to the OFF position.

5. 

Charge the unit.

5.3  USING THE WORK LIGHT

The work light is controlled by a sliding ON/

OFF switch located on the front of the unit. 

• Make sure the lamp is turned OFF when 

the unit is being recharged or stored. 

• Position the unit on a flat, stable surface 

near the intended work area.

• Ensure the battery clamps are securely 

clipped on the storage holders.

5.4  POWERING A 12V DC DEVICE

The unit is a power source for all 12V DC 

accessories that are equipped with a 12V 

accessory plug. Use it for power outages 

and on fishing or camping trips.

NOTE:

 Do not power a 12V device with 

the unit while charging the internal battery. 

1. 

Make sure the device to be powered 

is OFF before inserting the 12V DC 

accessory plug into the 12V DC 

accessory outlet.

2. 

Open the protective cover of the DC 

power outlet on the unit. 

3. 

Plug the 12V DC device into the DC 

power outlet and turn on the 12V DC 

device (if required).

4. 

When finished, turn off the DC device  

(if required) and unplug from the DC 

power outlet.

CAUTION:

 Do not use the unit to run 

appliances that draw more than 20A DC.

NOTE: 

Extended operation of a 12V DC 

device may result in excessive battery 

drain. Recharge the unit immediately after 

unplugging the 12V DC device.

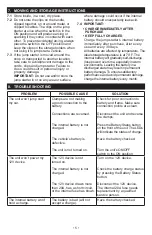
Estimated run-times 

APPLIANCE TYPE

EST 

WATTAGE

APPROX. 

USAGE

Cell phone, fluorescent light

4 watts

19 hrs

Radio, fan, depth finder

9 watts

9.3 hrs

Camcorder

15 watts

5.6 hrs

Electrical tool

24 watts

3.5 hrs

Electric cooler

48 watts

1.8 hrs

Car vacuum, air compressor

80 watts

1.1 hrs

NOTE:

 Actual time may vary. Times are based  

on the internal battery being fully charged.

6.  MAINTENANCE INSTRUCTIONS

6.1 

After use and before performing 

maintenance, unplug and disconnect  

the jump starter.

6.2 

Use a dry cloth to wipe all battery corrosion 

and other dirt or oil from the battery clips, 

cords and the jump starter case.

6.3 

Ensure that all of the jump starter 

components are in place and in good 

working condition.

6.4 

All servicing should be performed by 

qualified service personnel.

Summary of Contents for SJ1342

Page 1: ...and effectively Please read and follow these instructions and precautions carefully POR FAVOR CONSERVE ESTE MANUAL DEL USUARIO Y LEALO ANTES DE CADA USO En este manual le explica cómo utilizar la fuente de poder de manera segura y confiable Por favor lea y siga las siguientes instrucciones y precauciones ESSAYER DE GARDER LE MANUEL D INSTRUCTIONS ET LE LIRE AVANT CHAQUE UTILISATION Ce manuel expli...

Page 2: ... jump starter if it is damaged 1 14 If someone else uses the jump starter ensure they are well informed on how to use it safely and have read and understood the operating instructions 1 15 The jump starter is NOT designed to be installed as a replacement for a vehicle battery 1 16 Use ONLY on vehicles boats and garden tractors powered with a 12V DC battery system 1 17 If the engine fails to start ...

Page 3: ... hours When the RED LED turns off the jump starter is ready to use 4 When the internal battery is fully charged the charger will automatically go into maintain mode and maintain the battery at full charge without damaging it When in maintain mode the GREEN LED will light as long as there is an AC cord connected to the charging port 5 Charge the jump starter as soon as possible after use 4 6 CHARGI...

Page 4: ...e near the intended work area Ensure the battery clamps are securely clipped on the storage holders 5 4 POWERING A 12V DC DEVICE The unit is a power source for all 12V DC accessories that are equipped with a 12V accessory plug Use it for power outages and on fishing or camping trips NOTE Do not power a 12V device with the unit while charging the internal battery 1 Make sure the device to be powere...

Page 5: ...nal battery will gradually self discharge lose power over time especially in warm environments Leaving the battery in a discharged state may result in permanent battery damage To ensure satisfactory performance and avoid permanent damage charge the internal battery every month 8 TROUBLESHOOTING PROBLEM POSSIBLE CAUSE SOLUTION The unit won t jump start my car Clamps are not making a good connection...

Page 6: ...r or replacement to occur Manufacturer does not provide any warranty for any accessories used with this product that are not manufactured by Schumacher Electric Corporation and approved for use with this product This Limited Warranty is void if the product is misused subjected to careless handling repaired or modified by anyone other than Manufacturer or if this unit is resold through an unauthori...

Page 7: ... que se está cargando 1 11 Para evitar la formación de arcos eléctricos nunca permita que las pinzas se toquen entre sí o estén en contacto con la misma pieza de metal 1 12 El uso de un accesorio no recomendado ni vendido por Schumacher Electric Corporation puede ocasionar daños en la unidad o lesiones corporales 1 13 Nunca opere la unidad si está dañado 1 14 Si otra persona usa la unidad asegúres...

Page 8: ...S PARA MANTENER LA BATERÍA INTERNA DE LA UNIDAD COMPLETAMENTE CARGADA Y PROLONGARÁ SU VIDA ÚTIL 4 1 COMPROBACIÓN DEL NIVEL DE CARGA DE LA BATERÍA INTERNA Pulse el botón Estado de la batería en la parte frontal de la unidad Las luces de LED indican el nivel de carga de la siguiente manera ROJO menos del 20 de la carga completa inmediatamente cargar la unidad AMARILLO NARANJA 20 80 de la carga compl...

Page 9: ...que del motor lejos de la batería 4 En los vehículos con carga positiva a tierra conecte la pinza con el polo NEGATIVO NEGRO del Instant Power al POSTE NEGATIVO NEG N de la batería A continuación conecte la pinza con el polo POSITIVO ROJO al chasis del vehículo o al bloque del motor lejos de la batería 5 Coloque el interruptor en la posición de Encendido ON 6 Accione el encendido del motor durante...

Page 10: ...quier servicio debe realizarse por personal calificado en el ramo 7 INSTRUCCIONES PARA EL MANEJO Y ALMACENAMIENTO 7 1 Almacene en el interior en un lugar fresco y seco 7 2 No guarde las pinzas en asas enganchados entre sí en o cerca de metales o enganchados en cables Las pinzas en la unidad están energizadas Cuando el interruptor se encuentra en la posición ON y producen arco o chispas si hacen co...

Page 11: ...ería interna no está cargada El aparato de 12V absorbe más de 20A tiene un corto circuito o el fusible interno se ha dañado Encienda el aparato de 12V Verifique la condición de carga de la batería girando el interruptor situado enfrente de la unidad Desconecte el aparato de 12V El fusible interno de 20A necesita ser reemplazado por un técnico calificado La batería de la unidad no retiene la carga ...

Page 12: ... de manera inadecuada es reparado o modificado por personas que nos sean el Fabricante o si esta unidad es revendida a través de un vendedor minorista no autorizado El fabricante pudiera anular esta Garantía Limitada si la etiqueta warranty void if removed es removida del producto El Fabricante no realiza ninguna otra garantía incluidas a título enunciativo las garantías expresas implícitas o lega...

Page 13: ...peut entraîner des dommages à l appareil ou des blessures corporelle 1 13 Ne jamais utiliser l unité si elle est endommagée 1 14 Si quelqu un d autre utilise l unité assurez vous qu ils sont bien informés sur la façon de l utiliser en toute sécurité et avoir lu et compris les instructions de fonctionnement 1 15 L unité n est pas conçue pour être installée comme un remplacement de la batterie du vé...

Page 14: ...ation d une rallonge inadéquate peut entraîner un risque d incendie et d électrocution 1 Pour charger retournez le connecteur CA à l arrière de l unité vers le bas et brancher un cordon AWG 18 ou plus grande 2 Branchez la rallonge dans une prise électrique murale 120V AC 3 Pendant que l unité est en charge le voyant ROUGE s allume Cela peut prendre jusqu a 72 heures Quand le voyant rouge s éteint ...

Page 15: ...ue vous avez terminé du port USB mettez le sélecteur rotatif sur la position OFF 5 Chargez l unité 5 2 UTILISATION DE LA LAMPE La lumière de travail est commandé par un sélecteur ON OFF situé en avant de l unité Assurez vous que la lampe est éteinte lorsque l appareil est en cours de recharge ou stockées Placez la puissance instantanée sur une surface plane et stable près de la zone de travail pré...

Page 16: ...RTANT N utilisez pas ou n entreposez pas l aide au démarrage sur toute surface qui pourrait être endommagée par une fuite imprévue d acide de la batterie interne 7 4 IMPORTANT CHARGEZ L APPAREIL IMMÉDIATEMENT APRÈS L AVOIR ACHETÉ MAINTENEZ LE COMPLÈTEMENT CHARGÉ Chargez la batterie interne aide de démarrage immédiatement après l achat après chaque utilisation et tous les 30 jours La température a ...

Page 17: ...rge Faites vérifiez la batterie 9 AVANT DE RETOURNER POUR LES RÉPARATIONS Si ces solutions ne permettent pas d éliminer le problème ou pour plus d informations sur le dépannage contacter le service technique au services schumacherelectric com www batterychargers com ou composez le 1 800 621 5485 Du lundi au vendredi 07h00 17h00 CST Pour RÉPARATION OU RETOUR contactez le service téchnique au 1 800 ...

Page 18: ... que le fabricant ou si cet appareil est revendu par un détaillant non autorisé Le fabricant peut annuler la garantie si l étiquette warranty void if removed est retirée du produit Le fabricant ne fait aucune autre garantie y compris mais sans limiter garantie expresse implicite ou légale y compris sans limitation toute garantie implicite de valeur marchande ou la garantie implicite d adéquation à...

Page 19: ...____________________ Esta es la única garantía limitada expresa y el productor no autoriza ni otorga a alguien a realizar alguna otra obligación No existe ninguna otra garantía más que la descrita en el manual del dueño La tarjeta de garantía debe enviarse durante los primeros 30 días después de la compra El cliente debe mantener el recibo de compra ORIGINAL como comprobante el cual le otorga todo...

Page 20: ...er Electric Corporation 801 Business Center Drive Mount Prospect IL 60056 2179 É U Nom________________________________________________________________ Adresse_____________________________________________________________ Ville_____________________________Prov_______________ Code postal________ Tél ________________________Courriel__________________________________ Nom du magasin où vous avez acheté ...

Reviews: