www.scheppach.com /
+(49)-08223-4002-99 /
+(49)-08223-4002-58
GB | 39
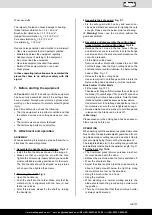
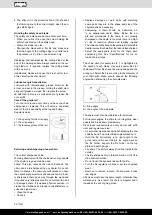
Automatic thread trimming (Fig. 24)
The cutting blade is delivered with a filled line cassette.
This line will wear out during work. To feed new line,
forcefully press the head of the line cassette onto the
ground while the engine is running at working speed.
The line is automatically fed due to centrifugal force.
The knife at the line guard will shorten the trimming line
to the correct length. Run the trim line approach cau-
tiously to an obstacle and cut with the tip of the line
around the obstacle.
Mowing with brush cutter and hedge trimmer
Use the cutting blade to comb through brushwood,
rank growth, young tree populations (trunk diameter
of maximum 2 cm), and high grass.
• The maximal diameter to cut depends on the wood’s
type, age, moisture and hardness.
• Therefore cut very thick branches using branch shears
to your desired length before trimming the hedge.
• While using metal cutting tools, there is generally
a risk of recoil, when the tool hits a solid obstacle
(stones, trees, branches, etc.). Thereby, the tool is
hurled backwards against the rotating direction.
• Cut the hedge in trapezium shape.
• Stretch a guide over the complete length of the hedge
when you want to shorten the upper edge of the
hedge evenly.
• Trim in several passes if you have to cut down a large
portion of the hedge.
• To cut rank growth and brushwood, you “immerse”
the cutting blade from the top.
Best time for hedge trimming:
• Leaved hedge: June and October
• Conifer hedge: April and August
• Quickly growing hedge: from May and then every 6 weeks
Pay attention to breeding birds in the hedge. If so, put off
hedge trimming or leave this area out.
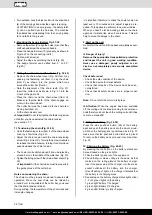
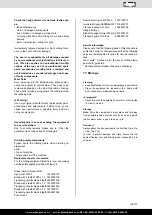
Angle adjustment
By swivelling the cutter head, the hedge trimmer can be
adjusted to the working conditions from +90° to -75°. Fig.
29.
• Warning! Adjust the angle only when the motor has
been turned off.
• Push both levers down and put the cutter head in
the required position. Fig. 29
• Release both levers until they click into place in the
notch.
• Before use, check that the adjustment levers have
clicked into place properly. Fig. 29
Oil the blades and the angle adjustment each time
before starting work, with environmentally friendly lu-
bricant.
Regularly oil the blades during working hours as well.
Warning! Oil the tool only when the motor has been
turned off.
The battery pack can become a little warm during the
charging. This is normal. If the battery pack fails to
charge, check:
• whether there is voltage at the socket outlet
• whether there is good contact at the charging con-
tacts.
If the battery pack still fails to charge, send
• the charging unit
• and the battery pack
to our customer service center.
To ensure that the battery pack provides long service,
you should take care to recharge it promptly. You must
recharge the battery pack when you notice that the
power of the cordless equipment drops. Never fully
discharge the battery pack. This will cause it to devel-
op a defect.
9.
Working instructions
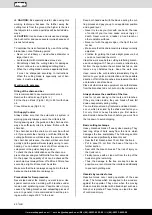
Working with brush cutter / grass trimmer
•
When you work with the brush cutter for the first
time, familiarize yourself with the operation and
control of the cutting blade without running engine.
• The design of the brush cutter allows for operation
only at the right side of the user’s body.
•
Keep the brush cutter firmly with both hands on the
handles.
• Always make sure that the cutting tool continues to
rotate briefly after the throttle has been released.
• Always so that the cutting tool no longer turns in a
proper engine idle not press down the throttle.
• Always work with high speed so you have the best
cutting results.
•
m
Caution: Always be extra careful when working
in difficult terrain and slopes. Cut tall grass gradual
-
ly so as not to overload the unit.
• Always wear safety glasses and hearing protection
and a safety helmet.
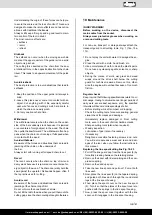
Mowing with grass trimmer
• Use the plastic line cassette for a clean cut also at
uneven edges, fencing posts, and trees.
• Carefully advance the trimming line to an obstacle,
and use the tip of the line to cut around the obsta-
cle. When the trimming line comes into contact
with stones, trees, and walls, the line wears out or
breaks off ahead of time.
• Swing the cutting blade like a normal scythe hori-
zontally from right to left and back again. You define
the cutting height depending on how high you are
holding the tool.
• Never replace the nylon line with a metal wire.
RISK OF INJURIES


