background image

10

English

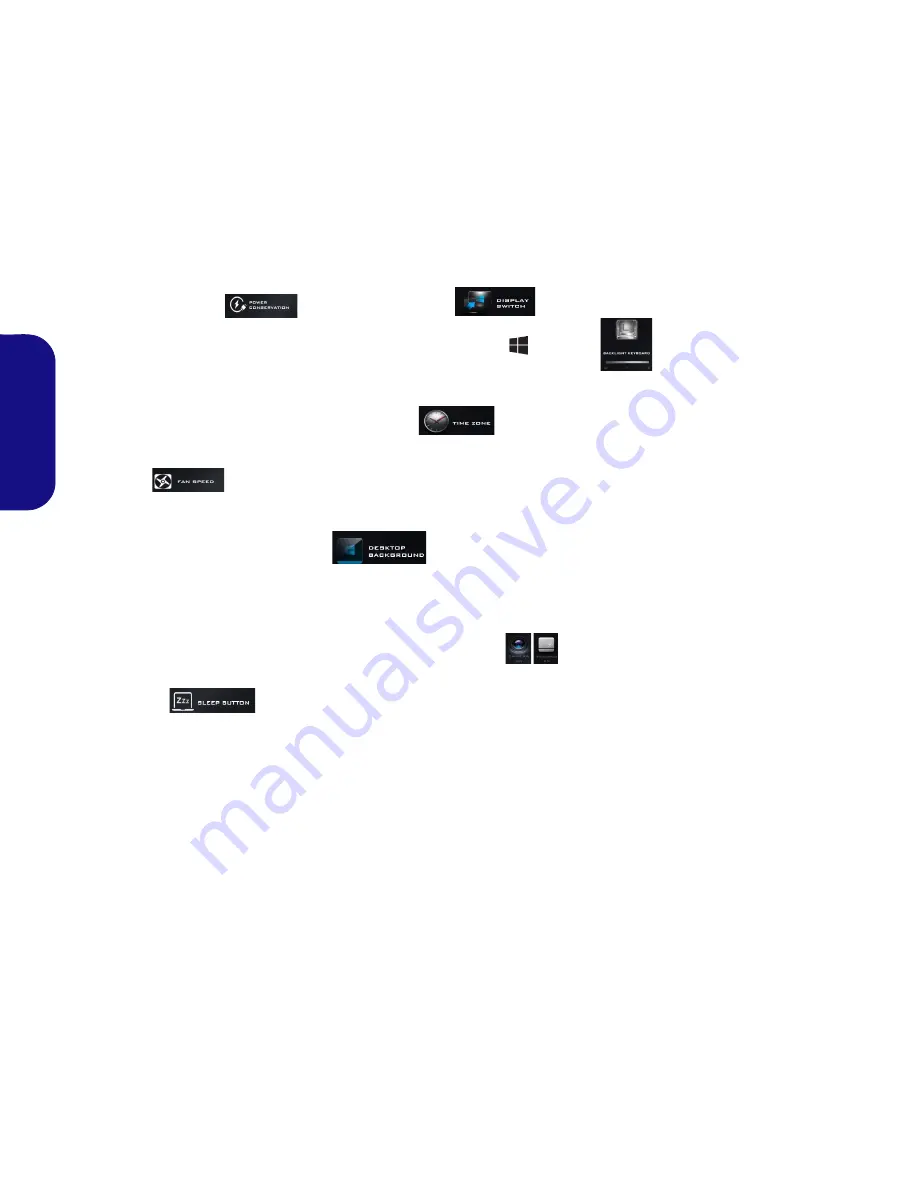
Power Conservation

This system supports 

Energy Star

power management features that place
computers (CPU, hard drive, etc.) into
a low-power sleep mode after a desig-
nated period of inactivity. Click either
the 

Performance

Balanced

 or 

Ener-

gy Star

 button. 

Fan Speed 

The fan speed will adjust itself auto-
matically to control the heat of the
CPU. However you can adjust the set-
ting to maximum if you prefer. Select

Custom

 and click on the sliders to ad-

just the settings to your preference,
however these settings can be overid-
den by the system, as a safety precau-
tion, if it requires heavier use of the fan.

Sleep Button 

Click either the 

Hibernate 

or 

Sleep

button to have the computer enter the
selected power-saving mode.

Display Switch 

Click the 

Display Switch

 button to ac-

cess the menu (or use the  

 + P

 key

combination) and select the appropri-
ate display mode.

Time Zone 

Clicking the 

Time Zone

 button will

access the 

Date and Time


Windows

control panel.

Desktop Background 

Clicking the 

Desktop Background

button will allow you to change the
desktop background picture.

Touchpad/PC Camera 

Click either of these buttons to toggle
the Touchpad or camera module’s
power status. Note that the power sta-
tus of the camera module is also ef-
fected by the 

Power Mode

 selected.

Backlight Keyboard 

Click the numbers

 under

the Backlight Keyboard icon
to adjust the brightness of the
keyboard backlight LED.  

Summary of Contents for F516

Page 1: ......

Page 2: ......

Page 3: ...Systemübersicht Ansicht von links und rechts 36 Start Menü Kontextmenü Taskleiste Systemsteuerung und Einstel lungen von Windows 10 37 Grafikfunktionen 38 Energieoptionen 39 Audiofunktionen 39 Installation der Treiber 40 Fingerabdruckleser 41 TPM Trusted Platform Module 42 Intel vPro Technology 43 3G 4G Modul 44 Fehlerbehebung 45 Technische Daten 46 Sommaire A propos de ce Guide Utilisateur Concis...

Page 4: ...form Module 90 Intel vPro Technology 91 Módulo 3G 4G 92 Solución de problemas 93 Especificaciones 94 Sommario Informazioni sulla Guida Rapida per l Utente 97 Guida di avvio rapido 100 Descrizione del sistema Vista anteriore con pannello LCD aperto 101 Indicatori LED 102 Tastiera 103 Tasti funzione e indicatori visivi 104 Control Center 105 Descrizione del sistema Vista anteriore posteriore inferio...

Page 5: ...n t or you are planning to re configure or re install portions of the system refer to the expanded User s Manual The Device Drivers Utilities User s Manual disc does not contain an operating system Regulatory and Safety Information Please pay careful attention to the full regulatory notices and safety information contained in the expanded User s Man ual on the Device Drivers Utilities User s Manua...

Page 6: ... puter Safety Information Only use an AC DC adapter approved for use with this computer Use only the power cord and batteries indicated in this manual Do not dispose of batteries in a fire They may explode Check with local codes for possible special disposal instructions Do not continue to use a battery that has been dropped or that appears damaged e g bent or twisted in any way Even if the comput...

Page 7: ...mperature environ ments and do not store unused batteries for extended periods Battery Disposal Caution The product that you have purchased contains a recharge able battery The battery is recyclable At the end of its use ful life under various state and local laws it may be illegal to dispose of this battery into the municipal waste stream Check with your local solid waste officials for details in...

Page 8: ...and as illustrated in Figure 1 to support the base of the computer Note Never lift the computer by the lid LCD 7 Press the power button to turn the computer on System Software Your computer may already come with system soft ware pre installed Where this is not the case or where you are re configuring your computer for a different system you will find this manual refers to Microsoft Windows 10 Mode...

Page 9: ... Buttons 8 Fingerprint Reader 9 LED Indicators Note that the Touchpad and Buttons valid opera tional area is that indicat ed within the red dotted lines above Wireless Device Operation Aboard Aircraft The use of any portable electronic transmission devices aboard aircraft is usually prohibited Make sure the WLAN Bluetooth 3G 4G module s are OFF if you are using the com puter aboard aircraft by put...

Page 10: ...powered by the battery with a capacity level above 20 this may not work with certain devices see page 21 Icon Color Description Orange The AC DC Adapter is Plugged In Blinking Orange The AC DC adapter is plugged in and the powered USB Port is on White The Computer is On Blinking White The Computer is in Sleep Mode Orange The Battery is Charging White The Battery is Fully Charged Blinking Orange Th...

Page 11: ...turns on off the numeric keypad It also features function keys to allow you to change operational features instantly Illuminated keyboard Optional The keyboard illumination level may be adjusted or turned off on by using the Fn F4 keys Figure 3 Keyboard Function Keys Num Lk Scr Lk Numeric Keypad Fn Key Windows Logo Key Menu Application Key ...

Page 12: ...dicators Keys Function Visual Indicators Keys Function Visual Indicators Fn Play Pause in Audio Video Programs Fn PC Camera Power Toggle Fn Touchpad Toggle Fn Airplane Mode Tog gle Fn Turn LCD Backlight Off Press a key to or use Touchpad to turn on Fn Sleep Toggle Fn Mute Toggle Fn Number Lock Toggle Fn Toggle Keyboard Illumi nation Adjust Brightness Level Illuminated key boards only Fn Scroll Loc...

Page 13: ...ntrol where applicable Certain functions will automatically be adjust ed when a power mode is selected Click the menu headings and then click any of the buttons Power Status The Power Status icon will show whether you are currently powered by the battery or by the AC DC adapter plugged in to a working power outlet The power status bar will show the current battery charge state Brightness The Brigh...

Page 14: ...use of the fan Sleep Button Click either the Hibernate or Sleep button to have the computer enter the selected power saving mode Display Switch Click the Display Switch button to ac cess the menu or use the P key combination and select the appropri ate display mode Time Zone Clicking the Time Zone button will access the Date and Time Windows control panel Desktop Background Clicking the Desktop Ba...

Page 15: ...Battery 3 Docking Port 4 Vent 5 Component Bay Cover 6 Speakers 7 Docking Station Optional Docking If your purchase includes the docking station open the docking port cover latch and align the computer with the placeholder on the docking station see the accompanying docking station for full details of the docking procedure 2 4 4 4 7 ...

Page 16: ...etting in to the contact area If your pur chase option does not include the docking sta tion an insert will be provided to prevent accidentally opening the docking port Do not attempt to open the cover or remove the insert in this case Overheating To prevent your computer from overheating make sure nothing blocks any vent while the computer is in use USB The USB 3 0 ports are colored blue USB 3 0 ...

Page 17: ...e bottom right of the screen Some of the control panels and applications referred to throughout the course of this manual can be accessed from here Throughout this manual you will see an instruction to open the Control Panel To access the Control Panel right click the Start Menu icon in the taskbar in the lower left corner of the screen and select Control Panel from the menu Or press the Windows L...

Page 18: ...operties from the menu OR 2 Click the icon in the notification area of the Desktop taskbar and select Graphics Properties from the menu Display Devices Note that you can use external displays connected to the HDMI Out port and or external monitor port See your display device manual to see which formats are supported In Windows it is possible to quickly configure external displays from the Project ...

Page 19: ...click Create a power plan in the left menu and select the options to cre ate a new plan Click Change Plan Settings and click Change advanced power settings to access further con figuration options Audio Features You can configure the audio options on your computer from the Sound control panel in Windows or from the Realtek HD Audio Manager icon in the notifica tion area control panel right click t...

Page 20: ...General Guidelines As a general guide follow the default on screen instructions for each driver e g Next Next Finish unless you are an advanced user In many cases a restart is required to install the driver Make sure any modules e g WLAN or Bluetooth are ON before installing the appropri ate driver Windows Update After installing all the drivers make sure you enable Win dows Update in order to get...

Page 21: ...tion 4 The TPM Management window allows you to configure the TPM within Windows As TPM is usually administered within large enterprises and organizations your system administrator will need to assist you in managing the information here TPM Actions 1 Click Prepare the TPM and follow the instructions in the Wiz ard to prepare the TPM this will probably require a restart of the computer and confirma...

Page 22: ...ows password click Add under Password 4 After you have added the password you will need to also add a PIN 5 Under Windows Hello click Set up under Fingerprint 6 The wizard will then guide you through the set up process to scan your fingerprints 7 You will be instructed to swipe the same finger across the reader a number of times 8 Click Close when complete 9 You can choose to Add another finger th...

Page 23: ...the following password information for the Intel Management Engine The default password is admin without quotes If you get an Error Intel R ME password change re jected message when creating a new password then note the following parameters for creating a password between 8 and 32 characters long Contain both upper and lower case Latin characters Have at least one numeric character Have at least o...

Page 24: ... be provided by your service provider USIM Card Insertion 1 Turn off the computer and turn it over and remove the battery slide the latches in the direction indicated below and slide the battery out Figure 16 Remove the battery 2 Insert the USIM card as illustrated below until it clicks into position and replace the battery Figure 17 Insert the USIM Card 1 1 ...

Page 25: ...bstantial amount of disk space for each file Note that the Windows system requires a minimum of 20GB 64bit of free space on the C drive system partition It is recommended that you save the capture video file to a location other than the C drive limit the file size of the captured video or reduce video resolution The computer is off or in Sleep Mode but powered by the AC DC adapter plugged in to a ...

Page 26: ...14nm DDR3L 1600MHz TDP 35W Intel Core i5 Processor i5 6600T 2 7GHz i5 6500T 2 5GHz i5 6400T 2 2GHz 6MB Smart Cache 14nm DDR3L 1600MHz TDP 35W LCD 15 6 39 62cm 16 9 HD 1366x768 FHD 1920x1080 BIOS AMI BIOS 128Mb SPI Flash ROM Core Logic Model A Intel Q170 Chipset Model B Intel H170 Chipset Memory Two 204 Pin SO DIMM Sockets Supporting DDR3L 1600MHz Memory Memory Expandable up to 16GB The real memory...

Page 27: ...c Bluetooth 4 1 Model B Factory Option Intel Wireless AC 8260 Wireless LAN 802 11ac Bluetooth 4 1 Factory Option Intel Wireless AC 3165 Wireless LAN 802 11ac Bluetooth 4 0 Factory Option Intel Wireless N 7265 Wireless LAN 802 11b g n Bluetooth 4 0 Slots One ExpressCard 34 54 Slot Factory Option One Smart Card Reader Slot M 2 Slots Slot 1 for WLAN and Bluetooth Combo Module Slot 2 for SATA PCIe Gen...

Page 28: ...24 English ...

Page 29: ...n ohne Vorankündigung zu überarbeiten und den Inhalt zu verändern Einige oder alle Funktionen des Computers sind bereits eingerichtet worden Falls das nicht der Fall ist oder wenn Sie ein zelne Teile des Systems neu konfigurieren oder neu installieren möchten finden Sie eine Anleitung im erweiterten Benut zerhandbuch Die Disc Device Drivers Utilities User s Manual enthält nicht das Betriebssystem ...

Page 30: ...ldschirms Wenn ein ungewöhnlicher Geruch Hitze oder Rauch aus dem Computer entweicht Sicherheitsinformationen Verwenden Sie nur einen AC DC Adapter der für die Verwendung mit diesem Computer zugelassen ist Verwenden Sie nur das Netzkabel und die Akkus die in diesem Benut zerhandbuch spezifiziert sind Entsorgen Sie die Akkus nicht in Feuer Sie können explodieren Richten Sie sich nach den regional g...

Page 31: ...nutzten Akkus über längere Zeiträume Entsorgen der Akkus Batterien Achtung Das von Ihnen gekaufte Produkt enthält einen aufladbaren Akku Dier Akku ist wiederverwertbar Nach verschiedenen na tionalen und regionalen Getzgebungen kann es verboten in einen nicht mehr gebrauchsfähigen Akku in den normalen Hausmüll zu werfen Informieren Sie sich bei Ihrem regionalen Entsorgungsunternehmen über Recycling...

Page 32: ...das Unterteil des Computers fest siehe Abb 1 Hinweis Heben Sie den Computer niemals am Deckel LCD hoch 7 Drücken Sie auf den Netzschalter um den Computer einzuschalten Systemsoftware Möglicherweise wurde das Notebook bereits mit vorin stallierter Software ausgeliefert Ist das nicht der Fall oder wenn Sie das Notebook für ein anderes System neu konfigu rieren möchten finden Sie dazu eine Anleitung ...

Page 33: ...Tasten 8 Fingerabdruckleser 9 LED Anzeigen Beachten Sie dass der Funktionsbereich des Touchpads und der Tasten innerhalb der rot gepunk teten Linien liegt 2 4 1 3 5 6 8 7 9 3 Die Benutzung drahtlos angeschlossener Geräte in Flugzeugen In der Regel ist die Benut zung jeglicher tragbarer elektronischer Funkgerä te in Flugzeugen ver boten Stellen Sie sicher dass das WLAN das 3G 4G und das Bluetooth M...

Page 34: ...Strom versorgt wird die Stromversorgung kann bei be stimmten Geräten u U nicht funktionieren siehe Seite 45 Symbol Farbe Beschreibung Orange Der AC DC Adapter ist angeschlossen Lampe blinkt Orange Wenn der AC DC Adapter angeschlos sen wird ist der USB Anschluss einge schaltet Weiß Der Computer ist angeschaltet Lampe blinkt weiß Das System ist im konfigurierten Ener giesparmodus Orange Der Akku wir...

Page 35: ...r ein und ausgeschaltet Zusätzlich gibt es Funktionstasten über die Sie direkt zwischen den Funktionen umschalten können Beleuchtete Tastatur Optional Die Stufe der Tastaturbeleuchtung kann angepasst oder aus eingeschaltet werden indem Sie die Fn F4 Tasten verwenden Abb 3 Tastatur Windows Logo Taste Menü Anwendungstaste Fn Taste Funktionstasten Num Rollen Nummemtastatur ...

Page 36: ...e in Audio Videoprogrammen Fn PC Kamera aktivieren deaktivieren Fn Touchpad aktivieren deaktivieren Fn Flugzeugmodus ein ausschalten Fn LCD Hintergrundlicht ausschalten zum Einschalten beliebige Taste drücken oder Touchpad berühren Fn Energiesparmodus wechseln Fn Stummschaltung Stumm schaltung aufheben Fn Ein Ausschalten der Nummerntastatur Fn Tastaturbeleuchtung wechseln Helligkeitsstufe anpassen...

Page 37: ...n Bestimmte Funktionen werden automatisch angepasst wenn ein Strommodus ausgewählt ist Klikken Sie auf die Menütitel und anschließend auf eine der Schaltflächen Energiestatus Das Energiestatus Symbol zeigt an ob die Stromversorgung aktuell über den Akku oder über das an das Stromnetz angeschlossene Netzteil erfolgt Die Energiestatus Anzeige zeigt den aktu ellen Akkuladestatus an Helligkeits Das He...

Page 38: ...r Klicken Sie entweder auf die Schaltflä che Ruhezustand oder Schlaf um den Computer der ausgewählten Stromspar modus aufrufen zu lassen Anzeige wechseln Klicken Sie auf die Taste zum Wechseln des Anzeigegeräts um das Menü aufzu rufen Sie können dazu auch die Tastenkombination und P ver wenden und wählen Sie einen An zeigemodus aus Zeitzone Wenn Sie auf die Schaltfläche Zeitzone klicken wird das W...

Page 39: ...n Sie den Computer am Platzhalter der Dockingstation aus eine ausführliche Beschreibung des Dockingvorgangs finden Sie im Begleitheft zur Dockingstation Vorderseite Hinterseite Abb 5 Ansicht von vorne hinten unten oben 1 LED Anzeigen 2 Akku 3 Docking Anschluss 4 Luftungsoffnung 5 Komponen tenfachabdekkung 6 Lautsprecher 7 Dockingstation optio nal 3 5 1 2 4 6 6 2 4 4 4 7 ...

Page 40: ...n nicht enthält verhindert ein spezieller Einsatz das ver sehentliche Öffnen des Dockingangschlusses Versuchen Sie nicht die Abdeckung zu öffnen oder den Einsatz zu entfernen Überhitzung Zum Schutz vor Überhitzung Ihres Computers dürfen die Luftungsoffnung en nicht während das Notebook in Betrieb ist verdeckt werden Linke Seite Rechte Seite USB Die USB 3 0 Anschlüsse sind blau Die Da tenübertragun...

Page 41: ...ich in der rechten unteren Ecke des Bildschir ms Hierüber können Sie manche Control Panels und Anwendungen aufrufen die in diesem Handbuch angesprochen werden In diesem Handbuch finden Sie eine Anleitung zum Öffnen der Systemsteuerung Um die Systemsteuerung aufzurufen klikken Sie mit der rechten Maustaste auf das Start menü Symbol und wählen aus dem Menü die Option Systemsteuerung Alternativ könne...

Page 42: ...en wählen Oder 2 Klicken Sie auf das Symbol im Infobereich auf der Desktop Taskleiste und dann aus dem Menü die Option Grafikeigenschaften wählen Anzeigegeräte Beachten Sie dass Sie externe Anzeigen nutzen können die an den HDMI Ausgangsanschluss und oder an die Schnitt stelle für externen Monitor angeschlossen sind Lesen Sie die Anleitung des Anzeigegerätes um zu erfahren welche For mate unterstü...

Page 43: ...giesparplan erstellen und wählen Sie die Optionen um einen neuen Plan zu erstellen Klicken Sie auf Energieplaneinstellungen ändern und klicken Sie auf Erweiterte Energieeinstellungen ändern um weitere Op tionen für die Konfiguration aufzurufen Audiofunktionen Die Audioeinstellungen können Sie bei Windows durch An klicken des Soundsymbols oder des Realtek HD Audio Manager Symbols im Infobereich in ...

Page 44: ...Sie auf Abbrechen um das Fenster zu schließen Befolgen Sie dann die Installa tionsanweisungen Allgemeine Hinweise zur Treiberinstallation Wenn Sie keine fortge schrittenen Kenntnisse haben folgen Sie für jeden Treiber den Anweisungen auf dem Bildschirm z B Weiter Weiter Fertig stellen In vielen Fällen ist es erforderlich den Computer nach der Treiberinstallation neu zu starten Alle Module z B WLAN...

Page 45: ...ter Kennwort 4 Nachdem Sie das Passwort hinzugefügt haben müssen Sie auch eine PIN eingeben 5 Klicken Sie bei Windows Hello unter Fingerabdruck auf Einrichten 6 Der Assistent führt Sie dann durch den Setup Vorgang um Ihre Fingerabdrücke zu scannen 7 Sie werden anschließend aufgefordert mit Ihrem Finger mehrere Male über den Leser zu streichen 8 Klicken Sie abschließend auf Schließen 9 Sie können E...

Page 46: ...lung System und Sicherheit 3 Klicken Sie auf TPM Verwaltung 4 Im Fenster TPM Verwaltung können Sie TPM unter Windows verwalten Da ein TPM normalerweise in großen Unternehmen und Organisationen verwaltet wird benötigen Sie bei der Verwaltung der hiesigen Informationen die Hilfe Ihres Systemadministrators TPM Aktionen 1 Klicken Sie auf TPM vorbereiten und folgen Sie den Anwei sungen des Assistenten ...

Page 47: ...nwortinformationen für die Intel Management Engine Das Standardpasswort ist admin ohne Anführungszeichen Falls die Meldung Fehler Intel R ME Kennwortänderung abgelehnt beim Erstellen eines neuen Kennwortes er scheint beachten Sie die folgenden Regeln für die Erstellung eines neues Kennwortes zwischen 8 und 32 Zeichen lang Enthält sowohl Groß als auch Kleinbuchstaben Enthält mindestens eine Zahl En...

Page 48: ...nbie ter Einsetzen der USIM Karte 1 Schalten Sie den Computer aus drehen Sie es herum und nehmen Sie den Akku heraus schieben Sie die Riegel in die unten angezeigte Richtung und ziehen Sie den Akku heraus Abb 16 Abnehmen des Akkus 2 Schieben Sie die USIM Karte wie unten abgebildet hinein und lassen Sie sie einrasten Setzen Sie den Akku wieder ein Abb 17 Einsetzen der USIM Karte 1 1 ...

Page 49: ...eachten Sie dass das Betriebssystem Windows mindestens 20GB 64bit freien Speicher im Laufwerk C der Systempartition benötigt Es wird empfohlen die aufgenommenen Videodateien in einem anderen Laufwerk als C zu speichern die Dateigröße der Aufnahmedateien zu beschränken oder die Auflösung der Videos zu verringern Der Computer ist ausgeschaltet oder im Energiesparmodus wird aber über den an das Strom...

Page 50: ...GHz 8MB Smart Cache 14nm DDR3L 1600MHz TDP 35W Intel Core i5 Prozessor i5 6600T 2 7GHz i5 6500T 2 5GHz i5 6400T 2 2GHz 6MB Smart Cache 14nm DDR3L 1600MHz TDP 35W LCD 15 6 39 62cm 16 9 HD 1366x768 FHD 1920x1080 BIOS AMI BIOS 128Mb SPI Flash ROM Core Logic Modell A Intel Q170 Chipsatz Modell B Intel H170 Chipsatz Speicher Zwei 204 Pin SODIMM Sockel Unterstützung von DDR3L 1600MHz Speicher Speicher a...

Page 51: ... 1 Modell B Werkseitige Option Intel Wireless AC 8260 WLAN 802 11ac und Bluetooth 4 1 Werkseitige Option Intel Wireless AC 3165 WLAN 802 11ac und Bluetooth 4 0 Werkseitige Option Intel Wireless N 7265 WLAN 802 11b g n und Bluetooth 4 0 Steckplätze Ein ExpressCard 54 34 Steckplatz Werkseitige Option Ein Steckplatz für Smart Card Leser M 2 Steckplätze Steckplatz 1 für Kombinierte Bluetooth und WLAN ...

Page 52: ...48 Deutsch ...

Page 53: ...blication ou de modifier son conte nu sans préavis Certains ou tous les éléments de l ordinateur peuvent avoir été déjà installés Si ce n est pas le cas ou si vous avez l intention de reconfigurer ou réinstaller des portions du système reportez vous au Manuel de l Utilisateur complet Le disque Device Drivers Utilities User s Manual ne contient pas de système d exploitation Informations de réglemen...

Page 54: ...on Si une odeur inhabituel de la chaleur ou de la fumée apparaissait sor tant de votre ordinateur Informations de sécurité Utilisez uniquement un adaptateur AC DC agréé avec votre ordina teur Utilisez uniquement le cordon d alimentation et les batteries indiqués dans ce manuel Ne jetez pas les batteries dans le feu Elles peuvent exploser Consultez la réglementation locale pour des instructions de ...

Page 55: ...atteries non utilisées pendant de longues périodes Elimination de la batterie avertissement Le produit que vous venez d acheter contient une batterie re chargeable Cette batterie est recyclable Quand elle n est plus utilisable en fonction des lois locales des différents états et pays il peut être illégal de s en débarrasser en la jetant avec les ordures ménagères normales Vérifiez auprès du respon...

Page 56: ...ns la Figure 1 maintenez la base de l ordinateur Remarque Ne soulevez jamais l ordinateur par le couvercle LCD 7 Pressez le bouton de mise en marche pour allumer Logiciel système Votre ordinateur peut être livré avec un logiciel système pré installé Si ce n est pas le cas ou si vous re configu rez votre ordinateur pour un système différent vous constaterez que ce manuel fait référence à Microsoft ...

Page 57: ...outons 8 Lecteur d empreintes digitales 9 Indicateurs LED 8 Remarquez que la zone d utili sation valide du Touchpad et des boutons est celle indiquée à l intérieur des lignes en poin tillé rouges ci dessus 2 4 1 3 5 6 8 7 9 3 Utilisation des appareils sans fil à bord d un avion L utilisation de tout appa reil électronique de trans mission est généralement interdite à bord d un avi on Vérifiez que ...

Page 58: ...la batterie avec un niveau de capacité supérieur à 20 ceci peut ne pas fonctionner avec certains appareils voir la page 69 Icône Couleur Description Orange L adaptateur AC DC est branché Orange clignotant L adaptateur AC DC est branché et le port USB alimenté est activé Blanc L ordinateur est allumé Blanc clignotant Le système est dans le mode de Veille configuré Orange La batterie est en charge B...

Page 59: ...u désactive le pavé numérique Il est également doté de touches fonction pour vous permettre de changer instantanément de mode opérationnel Clavier lumineux Optionnel Le niveau d éclairage du clavier peut être réglé ou allumé éteint à l aide des touches Fn F4 Figure 3 Clavier Touche du logo Windows Touche Menu Application Touches Fonction Touche Fn Pavé numérique Verr Num ArrêtDét ...

Page 60: ...se dans les programmes audio vidéo Fn Activer Désactiver le module caméra PC Fn Activer Désactiver le Touchpad Fn Activer Désactiver le Mode Avion Fn Eteindre le rétroéclairage LCD Appuyez sur une touche ou utilisez le Touchpad pour allumer Fn Permutation veille Fn Allume Éteind le son Fn Activer Désactiver le pavé numérique Fn Allumer ou éteindre l éclai rage du clavier Ajuster le niveau de lumin...

Page 61: ...s enfoncé et déplacez le curseur à l endroit approprié Certaines fonctions sont automatiquement ajustées lorsque le mode d alimentation est sélectionné Cliquez sur les rubriques du menu puis cliquez sur l un des boutons État d alimentation L icône État d alimentation indique si vous êtes actuellement alimenté par la batterie ou par l adaptateur AC DC branché à une prise de courant La barre d état ...

Page 62: ...Bouton Veille Cliquez sur le bouton Veille Prolongée ou Veille pour que l ordinateur entre dans le mode d économie d énergie sé lectionné Permutation d affichage Cliquez sur le bouton Permutation d affichage pour accéder au menu ou utilisez la combinaison de touches P et sélectionnez le mode d affichage joint approprié Fuseau horaire Cliquer sur le bouton Fuseau horaire permet d accéder au panneau...

Page 63: ... l espace réservé sur la station d accueil voir la documentation de l utilisateur qui accompagne la station d accueil pour tous les détails de la procédure d amarrage Figure 5 Vues de face arrière des sous et dessus 1 Indicateurs LED 2 Batterie 3 Port d interface 4 Ventilation 5 Couvercle de baie de composant 6 Haut parleurs 7 Station d accueil Optionnelle Face Arrière 3 5 1 2 4 6 6 2 4 4 4 7 ...

Page 64: ...lut pas la station d accueil un insert sera fourni pour empêcher l ouverture accidentelle du port d amarrage Ne tentez pas d ouvrir le couvercle ni d enlever l in sert de ce boîtier Surchauffe Afin de ne pas causer une surchauffe de votre ordinateur verifiez que rien ne bouche la les ventilation s quand le systeme est allumé Gauche Droit USB Les ports USB 3 0 sont colorés en bleu USB 3 0 transfère...

Page 65: ...uve en bas à droite de l écran Certains panneaux de configuration et certaines applications auxquels il est fait référence tout au long de ce manuel sont accessibles à partir d ici Tout au long de ce manuel vous verrez une instruction pour ouvrir le Panneau de Confi guration Pour accéder au Panneau de configuration faites un clic droit sur l icône du Menu Démarrer et sélectionnez Panneau de config...

Page 66: ...priétés gra phiques dans le menu OU 2 Cliquez sur l icône dans la zone de notification de la barre des tâches du bureau et sélectionnez Propriétés graphiques dans le menu Périphériques d affichage Vous pouvez utiliser des écrans externes connectés à la prise de sortie HDMI et ou au port moniteur externe Consultez le manuel de votre périphérique d affichage pour connaître les formats pris en charge...

Page 67: ...menu gauche et sélectionnez les options pour créer un nou veau mode Cliquez sur Modifier les paramètres du mode et cliquez sur Modifier les paramètres d alimentation avancés pour accéder à plus d options de configuration Caractéristiques audio Vous pouvez configurer les options audio sur votre ordinateur à partir du panneau de configuration de Sons dan Windows ou à partir de l icône du Gestionnair...

Page 68: ...di qué Directives générales pour l installation du pilote D une manière générale suivez les instructions par défaut à l écran pour chaque pilote par exemple Suivant Suivant Terminer à moins que vous ne soyez un utilisateur avancé Dans la plupart des cas un redé marrage est nécessaire pour installer le pilote Assurez vous que les mo dules par exemple WLAN ou Bluetooth sont allumés avant d installer...

Page 69: ...ez sur Ajouter sous Mot de passe 4 Après avoir ajouté le mot de passe vous devrez ajouter également un code PIN 5 Sous Windows Hello cliquez sur Configurer sous Empreinte digitale 6 L assistant vous guidera dans le processus de configuration pour scanner vos empreintes digitales 7 Vous serez alors invité à faire glisser le même doigt à travers le lecteur plusieurs fois 8 Cliquez sur Fermer lorsque...

Page 70: ...PM dans Windows Comme le TPM est généralement administré au sein de larges enterprises et organisations votre administrateur système devra vous assister pour la gestion des données Actions du TPM 1 Cliquez sur Préparer le module de plateforme sécurisée TPM et suivez les instructions de l Assistant pour préparer le TPM cela nécessitera probablement un redémarrage de l ordinateur et la confirmation ...

Page 71: ...e mot de passe suivantes pour le moteur Intel Management Engine Le mot de passe par défaut est admin sans les guille mets Si vous obtenez le message Erreur changement de mot de passe Intel R ME rejeté lorsque vous créez un nouveau mot de passe notez alors les paramètres suivants pour créer un mot de passe entre 8 et 32 caractères Contiennent les caractères latins à la fois en majuscules et en minu...

Page 72: ...votre fournisseur de ser vice Insérer la carte USIM 1 Eteignez l ordinateur retournez le et retirez la batterie faites glisser le loquet dans la direction indiquée en dessous et sortez la batterie Figure 16 Retirer la batterie 2 Insérez la carte USIM comme illustré ci dessous jusqu à ce qu elle se clique en position et remettez la batterie Figure 17 Insérer la carte USIM 1 1 ...

Page 73: ...pace substantiel sur le disque pour chaque fichier Notez que le système Windows nécessite un minimum de 20Go 64bit d espace libre sur la partition système du lecteur C Il vous est recommandé d enregistrer le fichier vidéo capturé dans un autre emplacement que le lecteur C limitez la taille du fichier de la vidéo capturée ou réduisez la résolution vidéo L ordinateur est éteint ou en mode Veille mai...

Page 74: ...seur Intel Core i7 i7 6700T 2 8GHz 8Mo Smart Cache 14nm DDR3L 1600MHz TDP 35W Processeur Intel Core i5 i5 6600T 2 7GHz i5 6500T 2 5GHz i5 6400T 2 2GHz 6Mo Smart Cache 14nm DDR3L 1600MHz TDP 35W LCD 15 6 39 62cm 16 9 HD 1366x768 FHD 1920x1080 BIOS AMI BIOS SPI Flash ROM de 128Mb Core logic Modèle A Chipset Intel Q170 Modèle B Chipset Intel H170 Mémoire Deux emplacements SODIMM 204 broches supportan...

Page 75: ... Modèle B Option d usine Bluetooth 4 1 et LAN sans fil 802 11ac Intel Wireless AC 8260 Option d usine Bluetooth 4 0 et LAN sans fil 802 11ac Intel Wireless AC 3165 Option d usine Bluetooth 4 0 et LAN sans fil 802 11b g n Intel Wireless N 7265 Logements Un logement d ExpressCard 54 34 Option d usine Un logement de lecteur de carte à puce Logements M 2 Logement 1 pour module combo Bluetooth et LAN s...

Page 76: ...72 Français ...

Page 77: ...visar esta publicación o cambiar su contenido sin previo aviso Algunas o todas las características del ordenador pueden haberse configurado de antemano Si no lo están o si desea reconfigurar o reinstalar partes del sistema consulte el Manual del usuario completo El disco Device Drivers Utilities User s Manual no contiene un sistema operativo Información de regulación y seguridad Por favor preste e...

Page 78: ...mación de seguridad Utilice solamente un adaptador de alimentación aprobado para su uso con este ordenador Utilice solamente el cable de corriente y las baterías indicados en este manual No tire las baterías al fuego Podrían explotar Con sulte los códigos locales para posibles instrucciones para desechos especiales Nunca utilice una batería que se haya caído o que parezca dañada p ej doblada o ret...

Page 79: ...temperatura ambiental alta y no guarde las baterías sin usar durante mucho tiempo Eliminación de la batería Cuidado El producto que usted ha comprado contiene una batería re cargable La batería es reciclable Terminada su vida útil se gún las leyes locales y estatales puede ser ilegal desecharla junto con los residuos ordinarios Verifique con las autorida des locales responsables de los desechos só...

Page 80: ...entras utiliza la otra mano como se muestra en la Figura 1 para sostener la base del ordenador Nota Nunca levante el ordenador por la tapa LCD 9 Presione el botón de encendido para encender Software de sistema Puede ser que su ordenador tenga instalado un software de sistema Si no es el caso o si desea reconfigurarlo con otro sistema este manual se refiere a Microsoft Windows 10 Diferencias de mod...

Page 81: ... en un avión ajustando el sistema al Modo de avión Tenga en cuenta que el área vá lida de operación del Touchpad y los botones es la indicada dentro de las líneas de puntos de arriba Figura 2 Vista frontal con panel LCD abierto 1 Cámara PC 2 LED de cámara PC Cuando la cámara PC esté en uso el LED se iluminará en rojo 3 Micrófono en línea incorporado 4 Panel LCD 5 Botón de encendido 6 Teclado 7 Tou...

Page 82: ...rga superior al 20 esto puede no funcionar con ciertos dispositivos vea la página 93 Icono Color Descripción Naranja El adaptador AC DC está conectado Naranja parpadeante El adaptador AC DC está enchufado y el puerto USB alimentado está acti vado Blanco El ordenador está encendido Blanco parpadeante El ordenador está en modo Suspen sión Naranja La batería se está cargando Blanco La batería está co...

Page 83: ...lita o inhabilita También incluye las teclas de función para permitirle cambiar las características operacionales al instante Teclado iluminado Opcional Puede ajustar el nivel de iluminación del teclado o apagarlo y encenderlo utilizando las teclas Fn F4 Figura 3 Teclado Tecla Menú Aplicación Teclado Tecla Fn Teclas de función numérico Bloq Num BloqDespl Tecla del logotipo de Windows ...

Page 84: ...Fn Reproducir pausar en los programas audio vídeo Fn Activar desactivar el módulo cámara PC Fn Activar desactivar el Touchpad Fn Activar desactivar el Modo de avión Fn Apagar luz de fondo del LCD presione una tecla o utilice el Touchpad para encenderlo Fn Cambiar modo Suspensión Fn Conmutación mudo Fn Activar disactivar el teclado numérico Fn Encender o apagar la ilu minación del teclado Ajus tar ...

Page 85: ...trol dial a la posición deseada Algunas funciones serán ajustadas automáticamente al seleccionar un modo de energía Haga clic en los menús y luego en cualquiera de los botones Estado de energía El icono Estado de energía mostrará si la alimentación actual viene dada por la batería o por el adaptador AC DC enchufado en una toma de corriente La barra de estado de energía muestra el estado actual de ...

Page 86: ...r del ventilador Botón Suspender Haga clic en el botón Hibernar o Suspender para que el equipo entre en el modo de ahorro de energía seleccionado Cambiar pantalla Haga clic en el botón Cambiar pantalla para acceder al menú o utilice la combinación de teclas P y seleccione el modo de pantalla apropiado Zona horaria Si hace clic en el botón Zona horaria accederá al panel de control Fecha y hora de W...

Page 87: ...la base de la estación soporte consulte la documentación del usuario de la estación soporte para más detalles sobre el proceso de conexión Figura 5 Vistas frontal posterior inferior y superior 1 Indicadores LED 2 Batería 3 Conector del soporte 4 Rejilla 5 Tapa de la bahía componente 6 Altavoces incorporados 7 Estación soporte opcional Parte frontal Parte posterior 3 5 1 2 4 6 6 2 4 4 4 7 ...

Page 88: ...l área de los contactos Si su opción de compra no incluye la estación soporte se incluye un accesorio para evitar que el puerto de conexión se abra por accidente No intente abrir la tapa ni quite el accesorio en este caso Recalentamiento Para evitar que su ordenador se recaliente compruebe que nada bloquea la s rejilla s con el equipo encendido Lateral izquierdo Lateral derecho USB El color de los...

Page 89: ...d etc El área de notificación de la barra de tareas está en la esquina inferior derecha de la pantalla Desde aquí se puede acceder a algunos de los paneles de control y aplicaciones a los que se hace mención a lo largo de este manual A lo largo de este manual verá una instrucción para abrir el Panel de Control Para acceder al Panel de control haga clic con el botón derecho en el icono del menú Ini...

Page 90: ... Propiedades de gráficos en el menú O 2 Haga clic en el icono en el área de notificación de la barra de tareas del escritorio y seleccione Propiedades de gráficos en el menú Dispositivos de pantalla Tenga en cuenta que puede usar pantallas externas conectadas al puerto de salida de HDMI y o al puerto para monitor externo Consulte el manual de su dispositivo de pantalla para ver qué formatos son co...

Page 91: ...izquierdo y seleccione las opciones para crear un plan nuevo Haga clic en Cambiar la configuración del plan y haga clic en Cambiar la configuración avanzada de energía para acceder a más opciones de configuración Características de audio Puede configurar las opciones de audio de su ordenador en el panel de control de Sonido o desde el icono de Administrador de sonido Realtek HD en el área de notif...

Page 92: ...erales para la instalación del controlador Como guía general siga las instrucciones predeter minadas en pantalla para cada controlador p ej Si guiente Siguiente Fi nalizar a menos que sea usuario avanzado En mu chos casos necesitará rei niciar para instalar el controlador Asegúrese de que los mó dulos p ej WLAN o Blue tooth estén ENCENDIDOS antes de instalar el controlador apropiado Windows Update...

Page 93: ...ón 3 Necesitará añadir una contraseña de Windows haga clic en Agregar bajo Contraseña 4 Tras añadir la contraseña deberá añadir también un PIN 5 En Windows Hello haga clic en Configuración bajo Huella dactilar 6 El asistente le guiará a través del proceso de configuración para escanear sus huellas digitales 7 Entonces deberá colocar el mismo dedo en el lector varias veces 8 Haga clic en Cerrar cua...

Page 94: ...istración de TPM 4 La ventana Administración del TPM le permite configurar el TPM desde Windows Como la TPM normalmente es administrada en empresas y organizaciones grandes su administrador de sistemas deberá asesorarle para administrar esta información Acciones TPM 1 Haga clic en Preparar TPM y siga las instrucciones del asistente para preparar el TPM esto probablemente requiera reiniciar el orde...

Page 95: ... en cuenta la información de contraseña siguiente para el Intel Management Engine La contraseña predeterminada es admin sin comillas Si obtiene el mensaje Error Intel R ME password change rejected al crear la contraseña tenga en cuenta los parámetros siguientes para crear una contraseña entre 8 y 32 caracteres de longitud Contiene caracteres latinos en mayúsculas y minúsculas Tiene al menos un car...

Page 96: ...r su proveedor de servicios Insertar la tarjeta USIM 1 Apague el ordenador y gírelo para quitar la batería deslice los pestillos en la dirección indicada abajo y saque la batería Figura 16 Quitar la batería 2 Inserte la tarjeta USIM como se ilustra a continuación hasta que haga clic en su posición y vuelva a colocar la batería Figura 17 Insertar la tarjeta USIM 1 1 ...

Page 97: ...re una cantidad sustancial de espacio en el disco para cada archivo Tenga en cuenta que el sistema Windows requiere un mínimo de 20GB 64bit de espacio libre en la partición del sistema unidad C Se recomienda que guarde el archivo de vídeo capturado en una ubicación distinta a la unidad C limite el tamaño de archivo del vídeo capturado o reduzca la resolución del vídeo El ordenador está apagado o e...

Page 98: ...he 14nm DDR3L 1600MHz TDP 35W Procesador Intel Core i5 i5 6600T 2 7GHz i5 6500T 2 5GHz i5 6400T 2 2GHz 6MB de Smart Cache 14nm DDR3L 1600MHz TDP 35W LCD 15 6 39 62cm 16 9 HD 1366x768 FHD 1920x1080 BIOS AMI BIOS SPI Flash ROM de 128Mb Núcleo logic Modelo A Chipset Intel Q170 Modelo B Chipset Intel H170 Memoria Dos zócalos de 204 pins SODIMM para memoria DDR3L 1600MHz Memoria expansible hasta 16GB L...

Page 99: ...Wireless AC 8260 Modelo B Opción de fábrica Bluetooth 4 1 y LAN inalámbrica 802 11ac Intel Wireless AC 8260 Opción de fábrica Bluetooth 4 0 y LAN inalámbrica 802 11ac Intel Wireless AC 3165 Opción de fábrica Bluetooth 4 0 y LAN inalámbrica 802 11b g n Intel Wireless N 7265 Ranuras Una ranura ExpressCard 54 34 Opción de fábrica Una ranura del lector de Smart Card Ranuras M 2 Ranura 1 para módulo co...

Page 100: ...96 Español ...

Page 101: ...nare la presente pubblicazione o di modificarne il contenuto senza preavviso È possibile che alcune o tutte le funzionalità del computer siano già state configurate In caso contrario o se si sta pianificando di riconfigurare o reinstallare componenti del sistema fare riferimento al Manuale per l utente completo Il disco Device Drivers Utilities User s Manual non contiene il sistema operativo Infor...

Page 102: ...Informazioni di sicurezza Utilizzare esclusivamente un adattatore approvato per l utilizzo di questo computer Utilizzare solo il cavo di alimentazione e le batterie indicate in que sto manuale Non gettare le batterie nel fuoco poiché potrebbero esplodere Fare riferimento alle normative locali per istruzioni spe ciali in tema di smaltimento rifiuti Non continuare a usare in alcun modo una batteria ...

Page 103: ...perature ele vate e non conservare le batterie inutilizzate per periodi di tempo prolungati Smaltimento della batteria Attenzione Il prodotto acquistato contiene una batteria ricaricabile La batteria è riciclabile Al termine della durata di uso in base alle diverse leggi locali e statali può essere illegale smaltire questa batteria insieme ai rifiuti comuni Controllare i requisiti previsti nella p...

Page 104: ...tra mano come illustrato nella Figura 1 si man tiene la base del computer Nota Non sollevare mai il computer tenendolo dal coperchio LCD 7 Premere il pulsante di alimentazione per accendere Software del sistema È possibile che il software sia già pre installato sul computer In caso contrario oppure in casi di riconfigurazione del computer per un sistema diverso questo manuale si riferisce a Micros...

Page 105: ...ndo si uti lizza il computer a bordo di un aereo inserendo il sistema nella modalità aereo Si noti che l area operativa va lida del touchpad e dei pulsanti è quella indicata all interno del le linee tratteggiate sopra Figura 2 Vista anteriore con pan nello LCD aperto 1 Camera PC 2 LED della camera PC Quando si utilizza la camera PC l indicatore LED si illumina in rosso 3 Microfono array integrato ...

Page 106: ... con un livello di capacità superiore al 20 potrebbe non funzionare con alcuni dispositivi vedere la pagina 117 Icona Colore Descrizione Arancione L adattatore AC DC è collegato Arancione lam peggiante L adattatore AC DC è collegato e la porta USB alimentata è attiva Bianco Il computer è acceso Bianco lampeg giante Il computer è in modalità Sospen sione Arancione La batteria è in carica Bianco Bat...

Page 107: ... tastiera numerica Dispone anche di tasti funzione che consentono di cambiare istantaneamente le funzionalità operative Tastiera illuminata Opzionale Utilizzando la combinazione di tasti Fn F4 è possibile attivare disattivare l illuminazione della tastiera e regolare il livello della luminosità Figura 3 Tastiera Tasto logo Windows Tastierino Tasti funzione Bloc Num Tasto Fn Bloc Scorr numerico Tas...

Page 108: ...ideo Fn Attiva disattiva la camera PC Fn Attiva disattiva touchpad Fn Attiva disattiva la modalità aereo Fn Spegne la retroilluminazione dello schermo LCD premere un tasto o utilizzare il touchpad per ripristi nare lo schermo Fn Attiva disattiva modalità Sospensione Fn Commutazione mute Fn Attiva disattiva il tastierino numerico Fn Attiva disattiva l illumina zione della tastiera regola il livello...

Page 109: ...bile Alcune funzioni saranno regolate automaticamente quando è selezionata una modalità di alimentazione Cliccare i titoli del menu e quindi cliccare qualsiasi dei pulsanti Stato di alimentazione L icona Stato di alimentazione viene visualizzata se attualmente il computer è alimentatore con la batteria oppure mediante l alimentatore collegato in una presa funzionante La barra dello stato di alimen...

Page 110: ...l pulsante di Ibernazione o Sospensione per consentire al computer di attivare la modalità di risparmio energetico selezionato Switch visualizzazione Fare clic sul pulsante Switch visualizzazione per accedere al menu o utilizzare la combinazione di tasti P e selezionare la modalità di visualizzazione appropriata Fuso orario Il pulsante Fuso orario consente di accedere al pannello di controllo di W...

Page 111: ...sto presente sulla stazione di alloggiamento vedere la documentazione utente fornita a corredo con la stazione di alloggiamento per i dettagli relativi alla procedura di alloggiamento Lato posteriore Lato anteriore Figura 5 Vista anteriore posteriore inferiore e dall alto 1 Indicatori LED 2 Batteria 3 Porta di alloggiamento 4 Ventola 5 Coperchio bay Component 6 Altoparlanti incorporati 7 Stazione ...

Page 112: ...cquistata non è inclusa la stazione di alloggiamento viene fornito un inserto per evitare l apertura accidentale della porta di alloggiamento In questo caso non provare ad aprire il coperchio o a rimuovere l inserto Surriscaldamento Per prevenire il surriscaldamento del computer accertarsi che non vi sia nulla che ostruisca la le ventola ventole durante l uso del computer Lato sinistro Lato destro...

Page 113: ...ioni di rete ecc L area di notifica della barra delle applicazioni è in basso a destra dello schermo Alcuni dei pannelli di controllo e applicazioni alle quali fa riferimento nel presente manuale sono accessibili da qui In questo manuale sarà richiesto di aprire il Pannello di controllo Per accedere al pannello di controllo fare clic con il mouse destro sull icona del menu Start e selezionare Pann...

Page 114: ... pulsante destro del mouse sul desktop e scegliere Proprietà grafiche dal menu O 2 Fare clic sull icona nell area di notifica della barra delle applicazioni desktop e scegliere Proprietà grafiche dal menu Dispositivi di visualizzazione Si prega di notare che è possibile usare display esterni connessi alle porte uscita HDMI e o per monitor esterno Vedere il manuale del display per vedere i formati ...

Page 115: ... menu di sinistra e personalizzarla per creare una nuova combinazione Fare clic su Modifica impostazioni combinazione quindi su Cambia impostazioni avanzate risparmio energia per accedere a ulteriori opzioni di configurazione Funzionalità audio È possibile configurare le opzioni audio del computer dal pannello di controllo Audio di Windows oppure dall icona Gestione Audio Realtek HD nell area di n...

Page 116: ...Come guida generale atte nersi alle istruzioni predefi nite visualizzate sullo schermo per ogni driver ad esempio Avanti Avanti Fine finché le proprie cono scenze non consentiranno di operare come utente più avanzato Per installare il driver spesso sarà necessa rio riavviare il computer Verificare che tutti i moduli ad esempio WLAN o Blue tooth siano ACCESI prima di installare il driver appro pria...

Page 117: ...dows cliccare su Aggiungi sotto Password 4 Dopo avere aggiunto la password sarà necessario aggiungere un PIN 5 Sotto Windows Hello fare clic su Configura sotto Impronta digitale 6 La procedura guidata vi guiderà attraverso il processo di configurazione per eseguire la scansione delle impronte digitali 7 Dopodiché vi verrà chiesto di strisciare lo stesso dito sul lettore diverse volte 8 Fare clic s...

Page 118: ...finestra di gestione TPM vi consente di configurare il TPM dall interno di Windows Dato che in genere il TPM è amministrato all interno delle organizzazioni e delle imprese di grandi dimensioni l amministratore di sistema dovrà assistere l utente nella gestione delle informazioni qui riportate Azioni TPM 1 Cliccare Prepara TPM e seguire le istruzioni della procedura guidata per preparare il TPM è ...

Page 119: ...mazioni sulla password di Intel Management Engine La password predefinita è admin senza virgolette Se si verifica un messaggio di errore Errore Intel R ME ha respinto la modifica della password quando si crea una nuova password tenere presenti i seguenti parametri per la creazione di una password compresa tra 8 e 32 caratteri Contiene caratteri latini maiuscoli e minuscoli Contiene almeno un carat...

Page 120: ...oprio operatore Inserimento della carta USIM 1 Spegnere il computer girarlo e rimuovere la batteria rilasciare i fermi nella direzione indicata sotto e sganciare la batteria facendola scorrere Figura 16 Rimozione della batteria 2 Inserire la carta USIM come illustrato sotto finché non scatta in posizione e installare nuovamente la batteria Figura 17 Inserimento della carta USIM 1 1 ...

Page 121: ...rare file di video ad altra risoluzione molto spazio disco disponibile per ogni file Nota Windows richiede un minimo di 20GB 64bit di spazio disco libero sulla partizione del disco C Si consiglia di salvare la cattura del file video in un ubicazione diversa dal disco C limitare la dimensione del file del video catturato o ridurne la risoluzione Il computer è spento o in modalità Sospensione ma ali...

Page 122: ...ore i5 i5 6600T 2 7GHz i5 6500T 2 5GHz i5 6400T 2 2GHz Smart Cache da 6MB 14nm DDR3L 1600MHz TDP 35W LCD 15 6 39 62cm 16 9 HD 1366x768 FHD 1920x1080 BIOS AMI BIOS SPI Flash ROM da 128Mb Logica del core Modello A Chipset Intel Q170 Modello B Chipset Intel H170 Memoria Due prese SODIMM 204 pin dotate di supporto per la memoria DDR3L 1600MHz Memoria espandibile fino a 16GB La frequenza operativa real...

Page 123: ...ooth 4 1 Opzione di fabbrica Intel Wireless AC 3165 Wireless LAN 802 11ac e Bluetooth 4 0 Opzione di fabbrica Intel Wireless N 7265 Wireless LAN 802 11b g n e Bluetooth 4 0 Slot Uno slot ExpressCard 54 34 Opzione di fabbrica Uno slot del lettore di smart card Slot M 2 Slot 1 per il modulo combo Bluetooth e Wireless LAN Slot 2 per il SSD SATA PCIe Gen3 x4 Opzione di fabbrica Slot 3 per il modulo 3G...

Page 124: ...120 Italiano ...

Reviews: