background image

MT-6320 User Manual 

- 12 - 


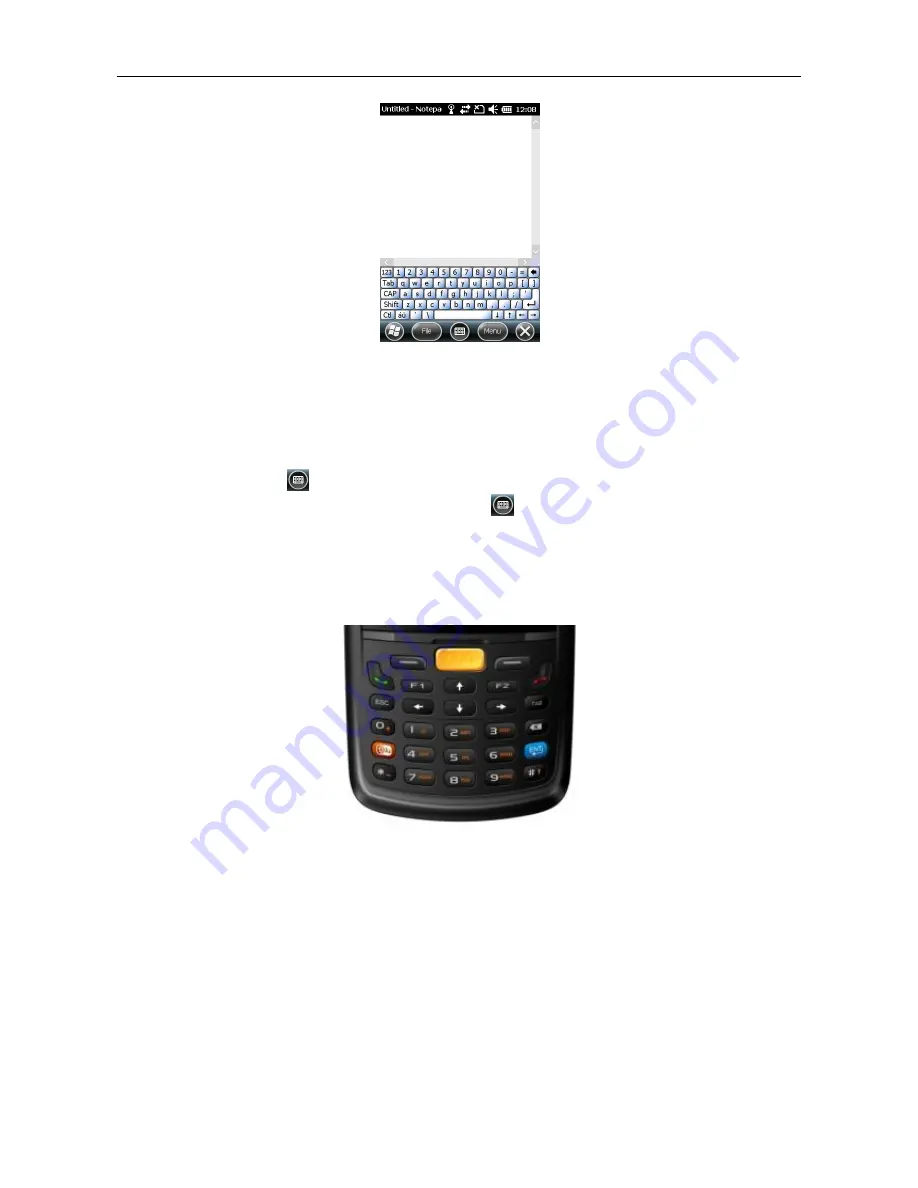
Figure 2-3 Screen keypad


Displaying Screen Keypad


Click any place where text can be entered. The screen keypad is displayed. 


Hiding Screen Keypad


In the text state, click 

  to hide the screen keypad.


To display the hidden screen keypad again, click 

  again

Using Physical Keypad


Figure 2-4 shows the physical keypad, which has 26 keys in total. In terms of function, the 

keys are divided into numeric/letter/symbolic keys, direction keys, and scan keys. 


Figure 2-4 Key layout on the physical keypad 


Installing the Notification Program of Physical Keypad


MC90KEY_Notify.CAB 

is the notification program of the physical keypad.


1.

  Copy 

MC90KEY_Notify.CAB

 to 

My Device\Program Files\SetupNotify

 (if the 

SetupNotify

 directory does not exist, create the directory). 


2.

  Run 

MC90KEY_Notify.CAB

.


3.

  After the 

MC90KEY_Notify.CAB

 program is installed, the MT-6320 automatically 

restarts. 


Summary of Contents for MT-6320

Page 1: ...V1 0 ...

Page 2: ...5 Keypad Operations 11 2 6 Adjusting Volume 13 2 7 Date and Time 13 2 8 Setting Ringtone 14 2 9 Setting Screen 14 3 Call Function 15 3 1 Making a Call 15 3 2 Answering Calls 15 3 3 Contacts 16 3 4 SMS 16 3 5 E mail 16 4 Connection and Synchronization 18 4 1 GPRS Data Connection 18 4 2 1 Wi Fi Network Connection 19 4 2 2 MT 6320 Wi Fi Optimization 20 4 3 Bluetooth 21 4 4 Connecting to a PC through ...

Page 3: ...1 6 1 Installing Software 31 6 2 Removing Installed Programs 31 6 3 Using Task Manager 31 6 4 Using File Explorer 32 6 5 Restoring Factory Settings 32 7 Precautions and Troubleshooting 34 7 1 Precautions 34 7 2 Troubleshooting 35 Appendix 38 ...

Page 4: ...MT 6320 User Manual 1 1 Introduction 1 1 Appearance of MT 6320 Figure 1 1 Front view of MT 6320 Figure 1 2 Rear view of MT 6320 ...

Page 5: ... install an SD card do as follows 1 Push the card cover along the direction marked on the cover and open the cover 2 Insert an SD card 3 Press the SD card downward and lock the card along the IN direction marked on the cover Figure 1 3 Insert a SD card ...

Page 6: ...ver Figure 1 4 Insert a SIM card 1 4 Installing a Battery To install a battery do as follows 1 Push the battery to the bottom of the battery compartment 2 Press the top of the battery downward to tighten the battery 3 Push the joint at the bottom of the battery cover into the back shell 4 Push the lock to the left and press the battery cover downward until the lock automatically returns to the loc...

Page 7: ... the battery cover 1 6 Charging You can charge a battery in the following ways 1 Charge the MT 6320 by using a charger 2 Connect the MT 6320 to a PC by using a USB cable to charge the MT 6320 In the charging status the LED is red When the LED becomes blue charging is complete If you charge the battery when the MT 6320 is powered on the battery icon on the upper right part of the screen changes ind...

Page 8: ...t automatically closed after being idle for a short time Set the backlight to make it automatically closed after being idle for a short time Stop all wireless activities when you do not use the MT 6320 1 7 Power on After installing a SIM card and a battery and charging the MT 6320 completely you can use the MT 6320 1 Press and hold the On Off key for several seconds 2 The power on page is displaye...

Page 9: ...0 is not at Home select Start Home to switch to Home Figure 2 1 Home Caution When the MT 6320 is switched to Home some applications may still run in the background If you do not wish the applications to run in the background close the opened applications through the task manager 2 2 Status Icons Status icons are in the status bar at the upper part of the screen and show device status and notificat...

Page 10: ...RS available Connecting EDGE GPRS available Using GPRS Using EDGE Missed call Dialing when a SIM card is not inserted Ongoing call Call transferred Call pending Handsfree on Antenna signal icon wireless call enabled good signal Antenna signal icon wireless call disabled Antenna signal icon no service Antenna signal icon searching service SIM card not inserted Roaming 2 3 Applications Window Click ...

Page 11: ...wses web pages and WAP websites and downloads new programs and files from the Internet ActiveSync Synchronizes information between the MT 6320 and the host or Exchange Server Camera Shoots photos or videos wpctsc Logs in to a remote computer and uses available programs in the remote computer through the MT 6320 after starting the remote desktop Google Maps Views the geographical location of a targ...

Page 12: ... Plays audio and video files Notes Creates notes drawings and recordings by writing or typing Tasks Tracks execution of tasks Internet Connects a laptop computer to the Internet through the data connection of the MT 6320 Task Manager Views ongoing processes and allocation of the memory and CPU and stops processes Help Views the help information about the current screen or program Setting Icons Tab...

Page 13: ... Regional Settings Sets the zone configurations to be used including numbers currencies date and time formats displayed on the MT 6320 Full screen Mode Sets the screen display mode Remove Programs Removes programs installed on the MT 6320 External GPS Sets an appropriate GPS communication port if required If a program needs to access GPS data or you have connected the GPS receiver to the MT 6320 t...

Page 14: ...ecordings Connections tab Wi Fi Sets wireless network connections and customizes settings Wireless Manager Enables or disables wireless communication of the MT 6320 and customizes the WLAN Bluetooth and phone settings Domain Enroll Registers the MT 6320 as a member in the AD domain for device management and security purposes USB to PC Enables or disables enhanced network connection Beam Sets the I...

Page 15: ...has 26 keys in total In terms of function the keys are divided into numeric letter symbolic keys direction keys and scan keys Figure 2 4 Key layout on the physical keypad Installing the Notification Program of Physical Keypad MC90KEY_Notify CAB is the notification program of the physical keypad 1 Copy MC90KEY_Notify CAB to My Device Program Files SetupNotify if the SetupNotify directory does not e...

Page 16: ...r phone volume by clicking the icon of speaker in the status bar 1 Click the status bar A drop down list box is displayed 2 Click the icon of speaker The volume dialog box is displayed 3 Click and move the scroll bar to adjust the system volume and phone volume Select On Off or Vibrate to open or close volume or enter the vibration mode You can set the system volume in the Sounds Notifications win...

Page 17: ...e screen do as follows 1 Select Start Settings System Screen 2 In the General tab set the screen direction to adjust the screen 3 In the ClearType tab set the screen font 4 In the Text Size tab adjust the font size 5 Click OK to exit the window To adjust the screen brightness do as follows 1 Select Start Settings System Backlight 2 In the Battery Power tab move the sliding block to adjust the scre...

Page 18: ...es 3 2 Answering Calls The MT 6320 displays a dialog box when receiving an incoming call If the phone is set to ringing the phone rings You can answer or ignore the call To answer the call click in the Call dial dialog box or press the green call key on the keypad of the MT 6320 During a call you can perform the following operations Figure 3 1 Call window 1 Click Record to record the current call ...

Page 19: ...messages to mobile data terminals or receive short messages from mobile data terminals The text may include combinations of characters digits or letters but cannot exceed 160 characters If text information is too long the text is sent through multiple short messages New 1 Select Start Tools Text Menu New Text Message and enter the number of the recipient or select Menu Add Recipient 2 Edit the con...

Page 20: ...orrect Email account setting For example you need to know whether the type of your Email account is POP3 or IMAP Deleting an Email Account 1 Select Start Tools Email 2 Select an Email account 3 Select Menu Delete 4 Click Yes Creating and Sending an Email 1 Select Start Tools Email 2 Select an Email account and click it to open the account 3 Select Menu New 4 Enter the address of the recipient and ...

Page 21: ...RS Data Connection 1 Click the status bar on the screen A drop down list box is displayed 2 Click A dialog box is displayed Figure 4 1 Connectivity dialog box 3 Click Settings 4 Click Manage Existing Connections under Internet 5 Click and press Mobile Internet until a shortcut menu is displayed Figure 4 2 Data connection 6 Select Connect 7 After the connection is established start the Internet Exp...

Page 22: ...n access the Internet Enabling and Setting Wi Fi 1 At Home click Wireless Manager 2 Click Wi Fi to enable Wi Fi 3 Select Menu Wi Fi Settings 4 Confirm the IP address In the Network Adapters tab select Marvell SDIO8686 Wireless Card and click Edit The IP Address setting page is displayed Ask your network administrator which IP address should be entered If IP addresses are assigned over DHCP select ...

Page 23: ...the latest version 2 Select Program Files iData open the Addons folder and open the WiFiConfig tool Figure 4 4 Path for storing the WiFiConfig tool Parameter settings 1 It is recommended to retain the value of Associate Retry Times 2 It is recommended to retain the value of Power mode 3 The value of Roaming mode ranges from 1 to 4 Roaming mode must be set to 4 4 The value of RoamSignalStrengthThre...

Page 24: ...of Bluetooth connections is good Enabling or Disabling Bluetooth Enable or disable Bluetooth using the following ways 1 At Home click Wireless Manager In the Wireless Manager window click on the right of Bluetooth to enable or disable Bluetooth 2 Select Start Settings Bluetooth Mode select or deselect the Turn on Bluetooth check box and click OK Figure 4 6 Bluetooth Mode tab Tips When you do not n...

Page 25: ... the Devices tab click Add new device to search for and connect to another Bluetooth device Figure 4 7 Bluetooth Devices tab 4 The MT 6320 starts to search for Bluetooth devices in the area The searched Bluetooth devices appear in the list box Figure 4 8 Searching for Bluetooth devices 5 Select a Bluetooth device to be connected and click Next ...

Page 26: ...10 Entering a password 7 In another device enter the same password and click Next 8 Click Finish The added device is displayed in the list in the Devices tab Figure 4 11 Device list 9 Select a device and establish partnership with the device by selecting the required service from the Partnership Settings service list ...

Page 27: ...ween MT 6320 and a Bluetooth Device 1 Ensure that the two devices have enabled Bluetooth and Bluetooth can be discovered 2 Select Start File Explorer 3 Navigate to the file to be transmitted 4 Click and hold the file until a shortcut menu is displayed or directly click Menu in the lower right part 5 Select Send file by wireless The MT 6320 starts to search Bluetooth device in the area 6 Click the ...

Page 28: ...option box does not appear the next time and a connection is established in the mode selected last time To set the mode of connecting to a PC through USB select Start Settings Connect USB to PC Figure 4 14 USB to PC window For the USB connection mode you can select Disk Driver or ActiveSync If you select Disk Driver file transfer is faster but the memory card is not displayed in the file explorer ...

Page 29: ... of the PC becomes and keeps rolling In this case the synchronization wizard is displayed 3 Select the options to be synchronized according to the synchronization wizard and establish partnership between the MT 6320 and the PC 4 Click Finish Changing the Type of Information to Be Synchronized and Setting In the ActiveSync software on the PC you can change the type of information to be synchronized...

Page 30: ...20 User Manual 27 Through the Bluetooth function you can also create a connection between the MT 6320 and a PC and synchronize the two devices For details see the help information about ActiveSync on the PC ...

Page 31: ...Scan program is started by default after the system is started You can also select Start iScan to start iScan After the iScan program is started the iScan icon is displayed in the lower area of the MT 6320 5 2 Using iScan 1 Click A menu is displayed 2 Select the functions to be enabled After a function is enabled is displayed in front of the function Figure 5 1 iScan menu 5 3 Description of iScan ...

Page 32: ...ng up key the system exits the current application and returns to Home After this function is enabled the default action of the system can be shielded Enable Keybd Through software some keys on the keypad are replaced by some keys that are originally unavailable on the keypad of the MT 6320 Simulate Mode Analog input involves keypad message and key action Message Fast Analog input is faster Event ...

Page 33: ...MT 6320 User Manual 30 5 After the label is read successfully the buzzer rings and the read label ID is sent to the relevant application ...

Page 34: ...rding to the installation wizard 4 After the software is installed successfully the software icon is displayed in the applications window Software in exe Format After the MT 6320 is synchronized with a PC directly copy the exe file to the storage space of the MT 6320 or a memory card open the file explorer on the MT 6320 and directly click the file to run it 6 2 Removing Installed Programs If too ...

Page 35: ...r to open the file explorer Figure 6 2 File Explorer 6 5 Restoring Factory Settings By restoring factory settings you can make the MT 6320 return to the original state Caution After the factory settings are restored all data on the MT 6320 will be deleted Therefore before performing the operation back up important data on the MT 6320 1 Select Start Settings System Restore Factory Defaults The Rest...

Page 36: ...MT 6320 User Manual 33 Figure 6 3 Restore Factory Defaults window You can also press and hold the left function key right function key power on power off key to restore factory settings ...

Page 37: ...not throw beat or violently collide the MT 6320 Otherwise the components of the MT 6320 may be damaged and the MT 6320 may be faulty Do not use strong chemical products or strong detergent to clean the MT 6320 If the MT 6320 become dirty clean the surface of the MT 6320 by using a soft cloth soaked with dilute glass detergent Please use the protective film to reduce wear as much as possible The sc...

Page 38: ...y by using lens paper or other articles suitable for cleaning optical materials 7 2 Troubleshooting Table 7 1 MT 6320 troubleshooting Fault Cause Solution After the power key is pressed the MT 6320 is not powered on The battery volume is too low or the battery is not charged Charge the battery or replace the battery The battery is incorrectly installed Correctly install the battery The system brea...

Page 39: ... to decode a barcode when reading it The scan application is not loaded Load the iScan program in the MT 6320 The barcode is defective and the scanner cannot read it Check that the barcode is not defective The battery volume is low If the scanner stops sending out laser beam after you turn on the switch check the battery volume Table 7 2 Bluetooth faults Fault Cause Solution The MT 6320 system can...

Page 40: ...e 7 4 Wi Fi faults Fault Cause Solution An AP cannot be connected A message is displayed showing that the AP is unavailable Start the WLAN device A message is displayed showing that the AP is being connected The DHCP function is not enabled on the AP router and the IP address cannot be set In this case set the IP address manually The password of the WLAN device is incorrect Too many devices access...

Page 41: ...rating System Microsoft Windows Mobile 6 5 Memory 512 MB ROM 256 MB RAM Expansion Slot Mini SD card up to 32 GB PSAM card optional Display 3 5 inch HVGA 320x480 high brightness TFT LCD LED backlight Display Material Toughened glass Touch Panel Resistive touch panel Camera Optional 5 Mega pixel autofocus lens LED flash Exit Window Corning Gorilla glass Keypad 31 key durable industrial keypad with i...

Page 42: ...andard battery included Communication Transmission Wireless Voice Communication GSM 900 1800 MHz CDMA 800 MHz Wireless WAN GPRS EDGE EVDO Wireless LAN Wi Fi 802 11b g Bluetooth Bluetooth 2 0 EDR GPS Optional A GPS and SiRF Star III IV GPS navigation chip available differential GPS optional Input Output Ports USB Port 1 Micro USB port Charger Port 1 DC port RS232 Port 1 Data Collection Specificatio...

Page 43: ...ng tubes meter reading distance of up to 5 meters fully supporting DL T645 protocol and communication protocols of worldwide mainstream meter manufacturers Interface Initial rate 1200 bps supported rates 1200 2400 4800 and 9600 bps RFID Frequency 13 56 MHz Reading Distance Within 50 mm Protocol ISO14443A 14443B 15693 ...

Page 44: ...ontent in this document is subject to update without notice Without written approval of Partner Tech Europe GmbH no one shall copy extract back up modify spread or translate any part of this document in any form or method or use the whole or part of this document for business purposes If you have any question you are free to send an email to info partner tech eu ...

Page 45: ...MT 6320 User Manual 42 ...

Reviews:

Related manuals for MT-6320