background image

Setting

 the BlackView

5.Setting 

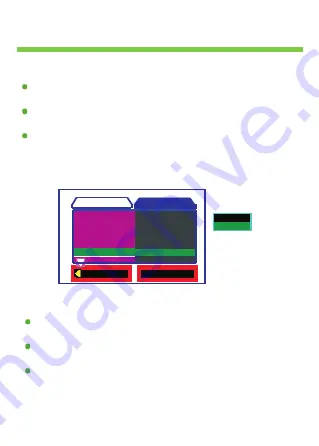
Sys.Reset

When System is turned on.Double click<Switching> button to display 
Setup page.
Press <Camera> or <Vedio>  button to select

Sys.Reset

,Then 

Press <Play> button to display subpage.
Subpage including

Cancel

】【

Execute

,Press <Camera> or 

<Vedio>  button to select the setting which you want,Then Press <Play> 
button to confirm.

6.Setting 

Light Fre.

When System is turned on.Double click<Switching> button to display 
Setup page.
Press <Camera> or <Vedio>  button to select

Light Fre.

,Then Press 

<Play> button to display subpage.
Subpage including

60Hz

】【

50Hz

,Press <Camera> or <Vedio>  

button to select the setting which you want,Then Press <Play> button to 
confirm.


O K   

Se t 

Sys.Re se t 


Bee p 


Auto off 

Language 


Ne xt Me nu 


Language 


Light Fre q. 

Date  Input 


  Exit 

Vide o output 


C ancel 
Exe cu te 

Format 


Ne xt Me nu 


Setup 

Summary of Contents for BlackView PL1751

Page 1: ...User manual V2 0...

Page 2: ...ce parameters are as follows CMOS sensor 5 000 000 pixels Viewing angle of lens Wide angle 140 Turning angle of lens 200 back and forth Screen 2 0TFT high resolution Quality vedio HD 1280 720 30fps Ni...

Page 3: ...uct and the accompanied accessories distributor If there is anyproblemoftheaccessories contactyourlocalproduct Checking the packing content BlackView Support Slot Power cable Driver disk User m aual n...

Page 4: ...Checkingthemainbodyof theBlackView Lens Enhanced night vision light Speaker Vedio Play Camera Microphone Switching Menu TF Card Slot USB Interface TFT LCD Reset Support slot...

Page 5: ...and moisture attached in the surface of the support slot 4 Connect the USB terminal of the BlackView and the cigarette jack of your car using the power cable 5 Tie the power cable Use the provided cab...

Page 6: ...ding function It will record and saves scenes at each specified period Press the Camera button again BlackView will exit Manual Recording function Using the Camera Function Using the Playback Function...

Page 7: ...dio button to select the setting which you want Then Press Play button to confirm 2 Setting EV When System is turned on Press Switching button to display video output page Press Camera or Vedio button...

Page 8: ...Sub page including Auto Daylight Cloudy Tungsten Fluorescent Press Camera or Vedio button to select the setting which you want Then Press Play button to confirm OK Set White Balance Size Vedio Time Ni...

Page 9: ...tton to select the setting which you want Then Press Play button to confirm OK Set Video Time White Balance Size Night Mode 1 Min Auto HD Off Exit Video output Setup Off 2 Min EV 0 0 1 Min When System...

Page 10: ...ng Format Double click Switching button to display Setup page Press Camera or Vedio button to select Format Then Press Play button to display subpage Subpage including Cancel Execute Press Camera or V...

Page 11: ...ng which you want Then Press Play button to confirm 3 Setting Language When System is turned on Double click Switching button to display Setup page Press Camera or Vedio button to select Language Then...

Page 12: ...itching button to display Setup page Press Camera or Vedio button to select Auto Off Then Press Play button to display subpage Subpage including 1 Min 3 Min 5 Min Off Press Camera or Vedio button to s...

Page 13: ...h you want Then Press Play button to confirm 6 Setting Light Fre When System is turned on Double click Switching button to display Setup page Press Camera or Vedio button to select Light Fre Then Pres...

Page 14: ...ick Switching button to display Setup page Press Camera or Vedio button to select Light Fre Then Press Play button to display subpage Subpage including 60Hz 50Hz Press Camera or Vedio button to select...

Page 15: ...ess Camera or Vedio button to select Screen Set Then Press Play button to display subpage Subpage including Always On 1 Min 3 Min Press Camera or Vedio button to select the setting which you want Then...

Page 16: ...Ballasoft...

Reviews: