background image

© 2016 SBOX


(4)

Ethernet Port 4 

(5)

Ethernet Port 6 (if equipped) 

(6)

Ethernet Port 5 (if equipped) 


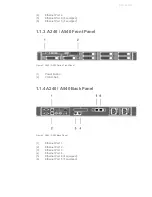
1.1.3  A240 / A540 Front Panel 


Figure 3. A240 / A540 Series Front­Panel 

 
(1)

Power Button 

(2)

VGA D­Sub 


1.1.4 A240 / A540 Back Panel 


Figure 4. A240 / A540 Back Panel 

 
(1)

Ethernet Port 1 

(2)

Ethernet Port 2 

(3)

Ethernet Port 3 

(4)

Ethernet Port 4 

(5)

Ethernet Port 6 (if equipped) 

(6)

Ethernet Port 5 (if equipped) 


Summary of Contents for A1040 Series

Page 1: ...Quick Start Guide SBOX Version 2 0 Hardware Version 2...

Page 2: ...ries Front Panel 1 1 6 A1040 A2510 A2540 Series Rear Panel 2 Getting Started with SBOX 2 1 Prerequisites 2 2 Power On 2 3 Appliance Log In 2 4 Network Configuration 2 4 1 DHCP Setup 2 4 2 Manual Netwo...

Page 3: ...S1000 S2000 Series Front Panel Figure 1 A140 F1000 F2000 S1000 S2000 Series Front Panel 1 Power Button 2 VGA D Sub 1 1 2 A140 F1000 F2000 S1000 S2000 Series Back Panel Figure 2 140 F1000 F2000 S1000 S...

Page 4: ...ed 1 1 3 A240 A540 Front Panel Figure 3 A240 A540 Series Front Panel 1 Power Button 2 VGA D Sub 1 1 4 A240 A540 Back Panel Figure 4 A240 A540 Back Panel 1 Ethernet Port 1 2 Ethernet Port 2 3 Ethernet...

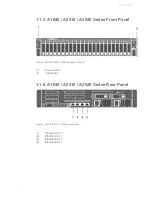
Page 5: ...Front Panel Figure 5 A1040 A2510 A2540 Series Front Panel 1 Power Button 2 VGA D Sub 1 1 6 A1040 A2510 A2540 Series Rear Panel Figure 6 A1040 A2510 A2540 Series Panel 1 Ethernet Port 1 2 Ethernet Por...

Page 6: ...splunk Linux x86_64 tgz 2 2 Power On a Plug and connect the power cables to SBOX s power supply unit b Connect a VGA monitor and USB keyboard c Connect the primary ethernet cable to ethernet port 1 d...

Page 7: ...0 valid_lft 68091sec preferred_lft 68091sec After running ip addr locate the output stanza for nic0 In that block there will be an ip address following the inet tag This is the ethernet address assign...

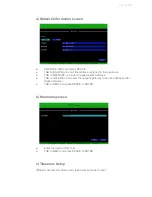
Page 8: ...TAB to NETMASK and enter the appropriate netmask TAB to GATEWAY and enter the network gateway to be used Required for Static networks TAB to NEXT and press SPACE or ENTER b Hostname screen Enter the...

Page 9: ...presents the timezone of this appliance SPACE to select the Region City TAB to DONE and press SPACE or ENTER After a few seconds the setup screen should go away and a success message will appear with...

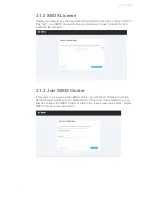
Page 10: ...ttps IP_ADDRESS_OF_APPLIANCE A security error may appear Depending on your browser you may have to choose proceed anyway or continue for the page to load 3 1 Activation 3 1 1 EULA During the first vis...

Page 11: ...choose Upload File and locate the file provided 3 1 3 Join SBOX Cluster If this node is joining an existing SBOX Cluster provide the IP Address and Token String that were assigned to the Master Node...

Page 12: ...for the admin SBOX Manager and sbox ssh users here By default both of these passwords are set to changeme 3 1 5 Completion The Completed screen lets you know that this appliance has been configured C...

Page 13: ...Splunk Enterprise Follow the on screen directions to install Splunk Enterprise 4 Additional Support To access the SBOX Support documentation and knowledge base or to open a support ticket please visi...

Reviews: