SHA-B4xx-00 | 009-1509-01 | 171018
45 Perseverance Way, Hyannis, MA 02601
Copyright © 2017 Savant Systems, LLC
2
of
2
| 508.683.2500
6.
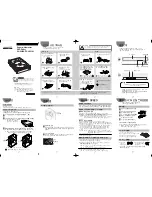
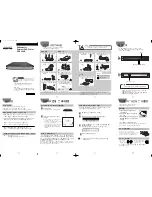
Prepare the wall and install the hanger bolt. Leave
½
inch of machine thread exposed.
HELPFUL!
Savant recommends using a hanger bolt installation tool (8-32 thread) to thread the hanger bolt into the wall.
DO NOT
use the provided sleeve to drive hanger bolts into wall as damage to the sleeve will occur.
7.
Install the supplied #6 flat head screw
9
/
16
inch directly above or below the hanger bolt (measurements are made from the center point of
the hanger bolt). When the shade mount is installed, this screw sits inside the opening in the rear of the mount and keeps the mount from
twisting.
8.
Using a
3
/
32
inch allen wrench, turn the hex head set screw in the 1 inch mounting sleeve so the set screw is not protruding from either
side of the sleeve. At this point, the shade mount sleeve should easily slide in and out of the hole in the rear of the shade mount. See
Horizontal
and
Vertical Mount
diagrams above for position of the hole in shade mount.
9.
Screw the mounting sleeve onto the hanger bolt until the hex head set screw
in the sleeve is positioned slightly offset from the hole in the shade mount
(see diagram). Leaving the set screw offset will allow the shade mount to be
pulled tight to the wall in the next step.
10.
Slide the shade mount over the sleeve until the set screw is visible through
hole on side of mount (Insert wires from step 5 above into wall as required).
With
3
/
32
inch allen wrench, turn the set screw counterclockwise to back off
the set screw a bit until it rests within the hole on the side of the mount. This
pulls the mount tight against the wall or ceiling.
11.
Verify the shade mount is tight to the wall or ceiling. If not, turn in the set screw, remove the shade mount, and adjust the mounting
sleeve to ensure the mount is pulled tight against the wall or ceiling.


