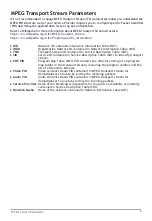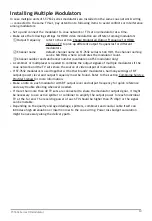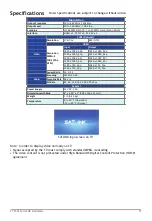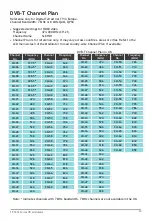
ISDB-T(b)
⇐
Over-the-Air TV with HDMI Modulation
If TV signal is originally coming from an indoor or an outdoor antenna,
follow the steps below to combine the HDMI video with ISDB-T(b) video.
The Modulator with default settings can work as a plug-and-play device
if it’s unsure about how to setup the output frequency of HDMI video.
If you plan to customize the settings, refer to the section
Choose
Modulated Output Frequency for HDMI Video on TV
to pick up the output
frequency and channel number of HDMI video.
The on-screen-display language can be changed by going to
Syatem Setup
→
OSD Language
.
①
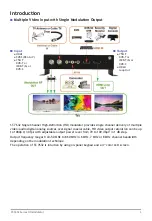
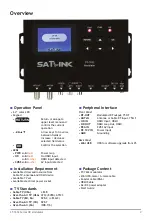
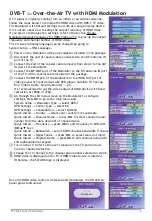
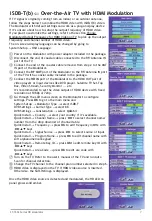
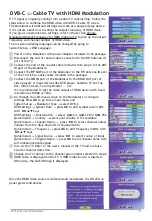
Power on the Modulator with power adapter included in the package.
②
Disconnect the end of coaxial cable connected to the RF/Antenna IN
port of the TV.
③
Connect the end of the coaxial cable removed from step 2 to the ANT
IN port of the Modulator.
④
Connect the RF OUT
port of the Modulator to the RF/Antenna IN port
of the TV with a coaxial cable included in the package.
⑤
Connect the HD IN
port of the Modulator to the HDMI OUT port of
video players or input devices like DVD player, Satellite TV Set-Top
Box, Video Stream, Security Monitor ... etc.
It’s recommended to set the video output of HDMI device with fixed
resolution at 1080p or 720p.
⑥
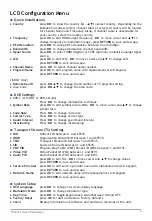
Go through the LCD menu screen on the Modulator to configure
settings. Press OK to go to the main menu and
System Setup
→
Modulator Type
→
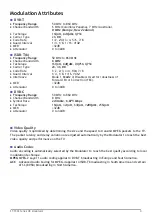
select ISDB-T
DVB Settings
→
Carrier Type
→
select 8K
DVB Settings
→
Constellation
→
select QAM-64
Quick Install
→
Country
→
select your country if it’s available
Quick Install
→
Channel Name
→
press
◄►
to select channel name/
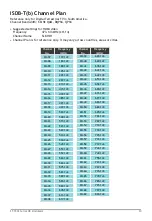
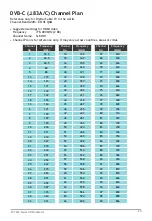
number from the drop down list of channel table
Quick Install
→
Frequency
→
press OK to edit frequency in MHz with
◄►▲▼
keys
Quick Install
→
Signal Source
→
press
◄►
to select source of input
Quick Install
→
Program Name
→
press OK to edit channel name with
soft alphanumerical keypad
Quick Install
→
Remote Key ID
→
press OK
to edit remote key ID with
◄►▲▼
keys
Quick Install
→
Area Code
→
press OK to edit are code with
◄►▲▼
keys
⑦
Turn on the TV. Refer to the user’s manual of the TV and run Auto
Scan for channel detection.
⑧
Change the TV channel to the channel plan number selected in step 6.
⑨
HDMI video is displayed on the TV if HDMI video source is inserted.
Otherwise, the SATLINK logo is displayed.
Once the HDMI video source is detected and modulated, the HD LED on
panel glows solid amber.
7
ST-7632 Series HD Modulator


