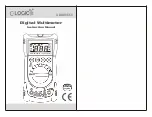
background image

-18-

05221 Users Manual

Measuring Diode

Insert the plug of the black test lead to the "COM" jack, the     plug of the red test lead to the 
"                  " jack( the polarity of the red test lead is "+"). 
Set the rotary switch to the "         " position.
Connect red test lead to the anode of the diode, black test lead to the cathode of the diode. 
Read the approximate forward voltage on LCD
( Note: Reading's unit is "mV" ).

BATTERY REPLACEMENT

When the symbol "           " or "        " is shown on LCD, it means the batteries are low and should be 
replaced. 


Summary of Contents for 05221

Page 1: ...Digital Clamp Multimeter 05221 EN...

Page 2: ...1 1 5 5 7 7 8 9 10 10 11 11 13 13 13 14 15 16 17 18 19...

Page 3: ...05221 1 3 1 2 A D IEC 61010 2 CATIII 300V...

Page 4: ...05221 2 1 2 3 4 5 6 7 8 30Vac 42Vac 60Vac 9 10...

Page 5: ...05221 12 13 14 15 16 17 CATIII CAIV 3...

Page 6: ...05221 4...

Page 7: ...05221 1 1999 3 1 2 2 LCD 3 A D A D 5...

Page 8: ...05221 4 LCD 1 5 3 6 1 7 AC 8 27mm 9 25mm 10 LCD 11 3V CR2032 3 12 0 C 40 C 75 13 20 C 60 C 85 14 151mm 65mm 34mm 15 127g 6...

Page 9: ...05221 18 C 28 C 75 RH 9M 40Hz 400Hz 300Vrms 7 300V 1V 1 2 3 1...

Page 10: ...05221 1 300V 8 9M 300Vrms 1 300V 300V 1V 1 0 2 1...

Page 11: ...05221 9 AC 50 60Hz 400A 1 400A 20A 10mA 3 0 5 200A 100mA 400A 1A 2 5 5 1 1 1...

Page 12: ...05221 10 1mV 3V 2000 200k 1 100 1 2 2 1 5 2 1...

Page 13: ...05221 1 2 3 3 1 2 1999 11 1 30...

Page 14: ...05221 4 COM 5 V 6 7 LCD HOLD HOLD 12 1 2 3 4 5 6 7...

Page 15: ...05221 13 1 COM V 2 300V 3 4 1 COM V 2 300V 3 4...

Page 16: ...05221 14 1 2 3...

Page 17: ...05221 15 1 COM V 2 2000 200k 3 2000 30...

Page 18: ...05221 16 1 COM V 2 3 LCD mV 1 COM V 2 3 30...

Page 19: ...05221 17 3V CR2032 3...

Page 20: ...05221 18...

Page 21: ...Y SAFETY INFORMATION CAUTION ELECTRICAL SYMBOLS GENERAL DESCRIPTION GENERAL SPECIFICATION SPECIFICATIONS AC Voltage DC Voltage AC Current Resistance Audible Continuity Diode Test FRONT PANEL 1 1 5 6 7...

Page 22: ...INSTRUCTION Measuring DC Voltage Measuring AC Voltage Measuring AC Current Measuring Resistance Measuring for continuity Measuring Diode BATTERY REPLACEMENT GENERAL MAINTENANCE ACCESSORIES 14 16 16 17...

Page 23: ...id will be repaired adjusted or replaced at no charge to the original purchaser This warranty does not cover expandable items such as batteries or fuses If the defect has been caused by a misuse or ab...

Page 24: ...eads for continuity Replace damaged test leads before you use the meter Do not use the meter if it operates abnormally Protection may be impaired When in doubt have the meter serviced Do not operate t...

Page 25: ...attery door or measure AC current Do not operate the meter with the battery door or portions of the case removed or loosened To avoid false readings which could lead to possible electric shock or pers...

Page 26: ...in the building installation Examples are measurements on distribution boards circuit breakers wiring including cables bus bars junction boxes switches socket outlets in the fixed installation and eq...

Page 27: ...ower and discharge all high voltage capacitors before testing resistance diode and continuity Use the proper function and range for your measurements Before moving the rotary switch to change function...

Page 28: ...ternating current Caution risk of danger refer to the operating manual before use Caution risk of electric shock Earth ground Terminal Conforms to European Union directives The equipment is protected...

Page 29: ...operate and are ideal instruments GENERAL SPECIFICATION Display 3 1 2 digit LCD with a max reading of 1999 Sampling rate Approximate 3 times per sec Error caused by improper position 1 of reading Not...

Page 30: ...ge temperature 20 C 60 C 85 RH Size 151mm X 65mm X 34mm Weight about 127g including battery SPECIFICATIONS Accuracy is specified for a period of one year after calibration and at 18 C 28 C with relati...

Page 31: ...wave Frequency range 40Hz 400Hz Max permitted input voltage 300Vrms 1 If the voltage being measured is 300V the display may show the value of the voltage but the measurement is dangerous Range Functi...

Page 32: ...permitted input voltage 300Vrms 1 If the voltage being measured is 300V the display may show the value of the voltage but the measurement is dangerous Range Functions Resolution 300V 1V 1 0 2 Accuracy...

Page 33: ...owable input current 400A 1 If the current being measured is 400A the display may show the value of the current but the measurement is dangerous 20A 10mA 3 0 5 200A 100mA 400A 1A 2 5 5 1 shown on disp...

Page 34: ...dication 1 shown on display Resistance Range Resolution The built in buzzer will sound If the resistance is less than about 30 Description Continuity test Functions 1 Range Resolution Approx forward v...

Page 35: ...o get more accurate reading the conductor should be in the center of the jaws 2 Trigger Used to open and close the jaws for AC current measurement 3 Display 3 1 2 digit LCD with a max reading 1999 4 C...

Page 36: ...ay as an indicator To exit Data Hold mode just press this button again HOLD disappears OPERATING INSTRUCTION Measuring DC Voltage Insert the plug of the black test lead to the COM jack the plug of the...

Page 37: ...o position Connect the test leads across the source or circuit to be tested Read the voltage value on the LCD Measuring AC Current Set the rotary switch to the desired AC current range position Press...

Page 38: ...play Measuring Resistance Insert the plug of the black test lead to the COM jack the plug of the red test lead to the jack Set the rotary switch to the desired resistance range position 2000 or 200k C...

Page 39: ...continuity Insert the plug of the black test lead to the COM jack the plug of the red test lead to the jack Set the rotary switch to the position Connect the test leads across the load to be tested Wh...

Page 40: ...olarity of the red test lead is Set the rotary switch to the position Connect red test lead to the anode of the diode black test lead to the cathode of the diode Read the approximate forward voltage o...

Page 41: ...e battery door replace the exhausted batteries with new batteries of the same type 3V battery CR2032 or equivalent Refer to the figure the Plus side of the batteris must face up Rejoin the battery doo...

Page 42: ...o not use abrasives or solvents Dirt or moisture in the jacks can affect readings Clean the jacks as follows Make sure that no object is clamped in the jaws Turn the meter off and remove all test lead...

Page 43: ...e Test leads 1 pair NOTE 1 This manual is subject to change without notice 2 Our company will not take the other responsibilities for any loss 3 The contents of this manual can not be used as the reas...

Page 44: ...177 3 201203 Tel 86 21 6061 1919 Fax 86 21 6061 1918 S A T A T O O L S H A N G H A I L I M I T E D Customer Service 3 F No 177 Bibo Road Shanghai 201203 UM_ET_05221_190508...

Reviews: