


6
The Sapling Company, Inc.
1633 Republic Road
Huntingdon Valley, PA 19006
USA
+1 215.322.6063 P.
+1 215.322.8498 F.
www.sapling-inc.com
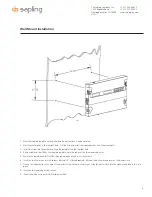
Before You Get Started
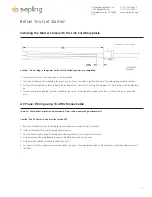
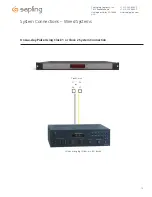
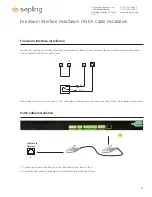
Installing the Master Clock with the Line Cord Receptacle
Remainder of cord not shown
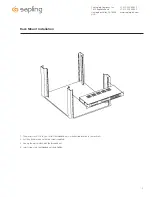
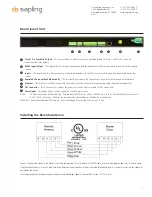
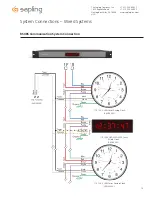
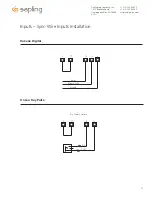
AC Power Wiring using 14 AWG Romex Cable
Caution! The AC Power Source must be turned OFF.
1. Remove a round knockout on the wiring chassis, preferably one near the AC Input Connector.
2. Install a standard ½” Romex Bushing and tighten in place.
3. Pass the Romex Cable through the Bushing and clamp in place. Do Not over tighten the screws.
4. Strip back the outside cable sheathing to expose the White, Black and Ground wires.
5. Strip back the insulation on the White and Black wire ¼”.
6. Put each wire into the supplied connector and tighten the screws. The wiring label located on the wiring chassis indicates where to connect
the wires.
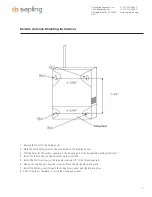
Caution! Do not plug in the power cord until the following steps are completed.
1. The square knockout on the wiring chassis must be removed.
2. The Heyco Bushing must be attached to the power cord as shown. Use pliers to push both halves of the bushing together while they lock.
3. Put the wires through the knockout and push the bushing into the metal until it locks tightly into place. The word Heyco on the bushing faces
up.
4. Put each wire into the supplied connector and tighten the screws. The wiring label located on the chassis will show where to connect the
wires.
*220-240 VAC
Disconnect
*Note: For CE Compliant installation, use minimum 0.75mm² cable or approved grounded cordset