


4
The Sapling Company, Inc.
1633 Republic Road
Huntingdon Valley, PA 19006
USA
+1 215.322.6063 P.
+1 215.322.8498 F.
www.sapling-inc.com
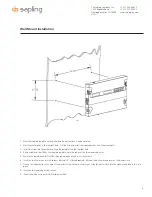
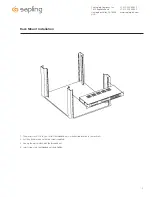
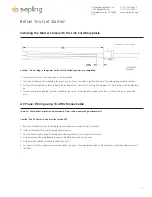
Wall Mount Installation
Fig 1
1. Place the supplied template on the wall where the master clock is being mounted.
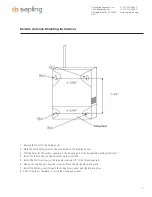
2. Mark the center point of the top right hole. Drill the hole and install the supplied anchor from the mounting kit.
3. Install the screw into the anchor and hang the template from the top right hole.
4. Using a level and the LINE on the supplied template, mark the center of the three remaining holes.
5. Remove the template and drill out the three remaining holes and insert the anchors.
6. Insert the two top screws into the anchors, leaving 1/8” of thread exposed. Unscrew the bottom wiring cover on the master clock.
7. Line up the top keyholes on the back of the master clock with the two top screws. Slide the master clock into the keyholes and then lock it into
place.
8. Insert the two remaining bottom screws.
9. Screw the wiring cover back into its original position.