68
The Sapling Company, Inc.
1633 Republic Road
Huntingdon Valley, PA 19006
USA
P. (+1) 215.322.6063
F. (+1) 215.322.8498
www.sapling-inc.com
1
3
4
5
2
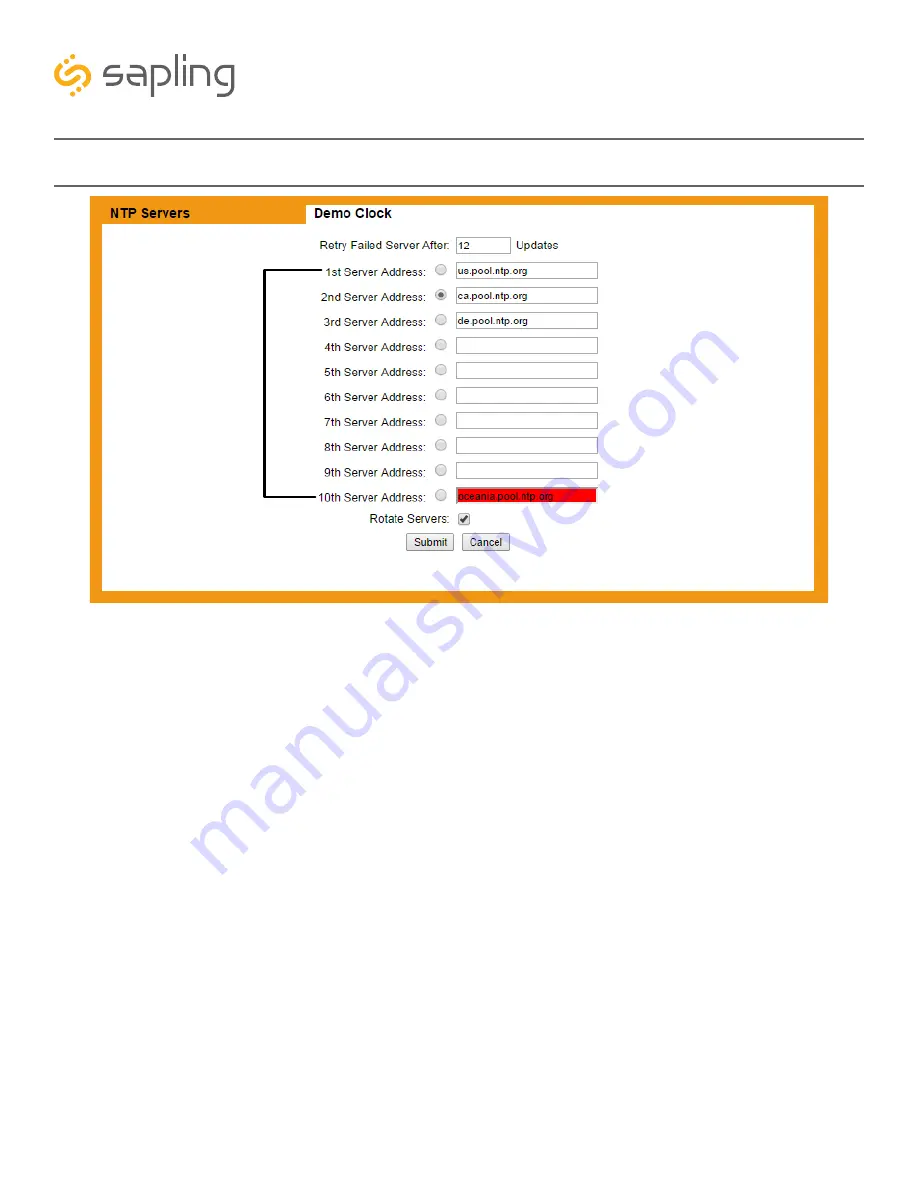
Web Interface - NTP Servers
1. Retry Failed Server After -
Under normal circumstances, if the master clock cannot get NTP time from
the selected server on the list, it will attempt to get NTP time through another one of the listed addresses.
This field allows the user to decide how many NTP data updates should pass before the master clock
retries a failed server address.
2. NTP Server Addresses -
These fields allow the user to create a list of servers to be used as sources for
NTP time. Each used field should have a URL or IP address for a functioning NTP server. At least one field
must be filled for the master clock to acquire NTP time. The master clock already comes pre-programmed
with ten third-party NTP server IP addresses that will allow the master clock to ping them on a regular
basis through a network with access to the Internet. A user may change an IP address of an NTP server. If
a user has an in-house NTP server, or wishes to use an NTP server other than the ten listed ones, they may
select one of the IP addresses, delete it, then enter the IP address of an NTP Server of the user’s choice. A
user may select which address the master clock should contact first by clicking on the white circle to the
left of the desired field. Addresses that fail to return NTP data when queried are highlighted in red.
3. Rotate Servers -
When the box is selected, the master clock will attempt to acquire NTP times by
rotating between the entered server addresses with each update. In other words, if Server addresses 1-5
have been entered, and the Rotate servers box has been selected, then the master clock will acquire time
from the first server address on the first update, the second server on the second update, and so on.
Empty fields are not treated as functioning addresses and are skipped. When using an in-house NTP server
as a time source, the Rotate Servers box should NOT be selected (empty).
4. Submit -
This button, when pressed, saves and applies all the selections to the master clock.
5. Cancel -
This button, when pressed, clears any changes made and does not save any data.


