Using your TV
17
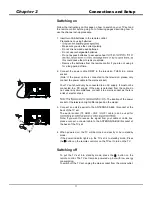
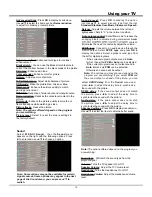
Select
MENU > Network
, then the
Network
menu
appears on the right with the following options. Press
Ź
to enter and use
Ÿź
to choose an option.
Internet connection:
1. Select
Internet connection
and press
OK
to enter.
2.
3UHVVŸź
to select
On
and press
OK
Interface:
1. Select
Interface
and press
OK
to enter.
2. Press
Ÿź
to select
Ethernet or Wireless
and
press
OK
•
Ethernet
IP settings:
Select
IP settings
and press
OK
to enter. You can
set
Address type
to
Auto
or
Manual
.
• Select
Auto
if you want the TV to acquire and
enter the needed IP address automatically.
• Select
Manunal
if you want to enter your IP
address manually, then:
-
-
Enter the
IP address. Subnet mask, Default
gateway, Primary DNS
and
Secondary DNS
values. Use the numeric buttons to enter
numbers and the
Ÿź
/ buttons to move
• Once
IP setting
is completed, press
Ÿź
to
select
OK
and press
OK
to confirm. The set
will try to connect to the network and inform
you about the result. Press
to return to the
Network
menu.
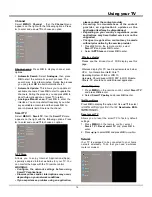
•
Wireless
Wireless settings:
Select
MENU > Network
, then select
Wireless
settings
to connect to a wireless network. You can
set the wireless network connection in 3 ways:
1.
Scan:
Select
Wireless settings > Scan
, then
press
OK
, the TV will scan all access points
within range. The access points found by the
TV will be displayed. Select an available access
point, then press
OK
to connect the TV to it.
Notes:
If you select a protected access point, you will
have to enter the corresponding password.
Press OK on the remote control to display
virtual keyboard to enable you to enter it.
This set has a memory function of available
access points, which enables your set to be
connected to the network even if you switch on
TV after power off.
2.
Manual:
Select
Wireless settings > Manual
,
then press
OK
, you will be prompted to enter the
correct SSID of an available wireless router to set
up the connection.
3.
A u t o :
I f y o u r A P ( A c c e s s P o i n t ) s u p p o r t s
WPS(WiFi Protected Setup), you can connect
to the network via PIN(Personal Identification
Number) or PBC(Push Button Configuration).
WPS will automatically configure the SSID and
WPA key in either mode.
Select
Wireless settings > Auto
and press
OK
to enter.
•
PIN
: Select
PIN
and press
OK
to enter. Choose
a random
PIN
code. Make sure this code is
installed on the AP. (For the procedures, refer
to your router manual.) Select
OK
and press
OK
to set up the connection.
•
PBC
: If your router has a PBC push button,
select
PBC
and press
OK
to enter. Press
the PBC push button on your router within 2
minutes before you select
OK
and press
OK
again. Your TV will automatically acquire all the
network setting values it needs and connect to
your network.
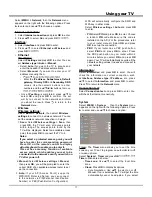
Information:
Select
Information
and press
OK
to enter. You will
check the information on current connection, such
as
Interface, Address type, IP address
, etc., press
Ÿź
to select
Information
and press
OK
to enter.
Press to return to the
Network
menu.
Connection test:
Select
Connection test
and press
OK
to enter. You
will check the Internet connectivity.
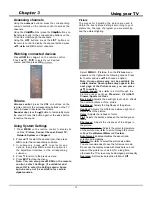
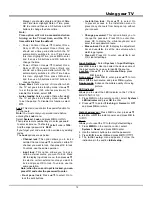
System
Select
MENU > System
, then the
System
menu
appears on the right with the following options. Press
Ź
WRHQWHUDQGXVHŸźWRFKRRVHDQRSWLRQ
Timer:
The
Timer
menu allows you to set the time
zone on your TV set, to program an automatic turn-off
or wake-up timer .
Select
System > Timer
and press
OK
Timer
options are as below:
•
Time zone:
Use
Ÿź
to select the local time
zone.
•
Clock:
Press
OK
to display its options:
• Synchronization: Use
Ÿź
to select on or off
Manual. If on is selected, the TV will get the time
automatically cannot be adjusted. If you select
Picture
Sound
Channel
Smart TV
Network
System
Support
Input settings
Location
Auto source
Sports mode
LED Indicator
Instant power on
Reset
Timer
Lock
...
...
...
...
Home
On
Off
Normal
Off

