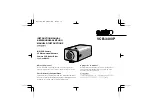


SETTINGS
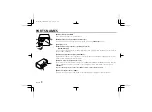
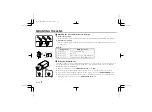
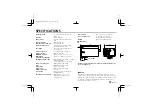
Camera setup section
Control name
Position
a
Internal/Line lock switch (SYNC) . . . . .
☞
P11
INT
b
Auto gain control switch (AGC) . . . . . .
☞
P10
ON
c
Mirror image switch (MIR) . . . . . . . . . .
☞
P10
OFF
d
Backlight compensation switch (BLC) . .
☞
P10
OFF
e
Electronic iris (EI) . . . . . . . . . . . . . . . . . . .
☞
P9
OFF
f
Auto-iris lens switch (A.I. LENS) . . . . . . .
☞
P
5
DC
g
Lens iris level volume (LEVEL) . . . . . . . .
☞
P10 about centre
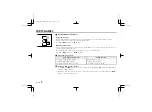
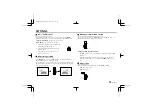
Electronic iris function setting
Use a manual or fixed iris lens and set the lens
aperture to the shortest F stop. Set the
EI
switch to
ON
position.
Note:
Please refer to the specifications for dynamic
range of the electronic iris.
CAUTION:
•
The electronic iris is suitable for normal indoor use. When the
EI
switch is set to the
ON
position, do not use an auto-iris lens.
•
If used under fluorescent light, the image may flicker. In such a
case, change to incandescent lighting or set the
EI
switch to the
OFF
position and use an auto-iris lens.
•
When shooting bright subjects, pay attention to the light angle in
order to avoid or minimize the smear phenomenon effect.
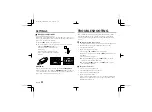
When using an auto-iris lens (for indoor/outdoor use)
Set the
EI
switch to the
OFF
position.
CAUTION:
If conditions are outside the electronic iris operation range or more
than the maximum illumination, it will cause saturation of the CCD. In
that case, use a manual iris lens.
DC
VIDEO
A. I.
LENS
L
H
VR301
OFF
ON
L-L
INT
AGC
SYNC
ON
OFF
BLC
EI
g
ab
c
e f
d
MIR
ON
OFF
ON
OFF
EI
L73T5/XE (VCB-3400P) GB 2000, 3, 14
English
9