41
Computer Input
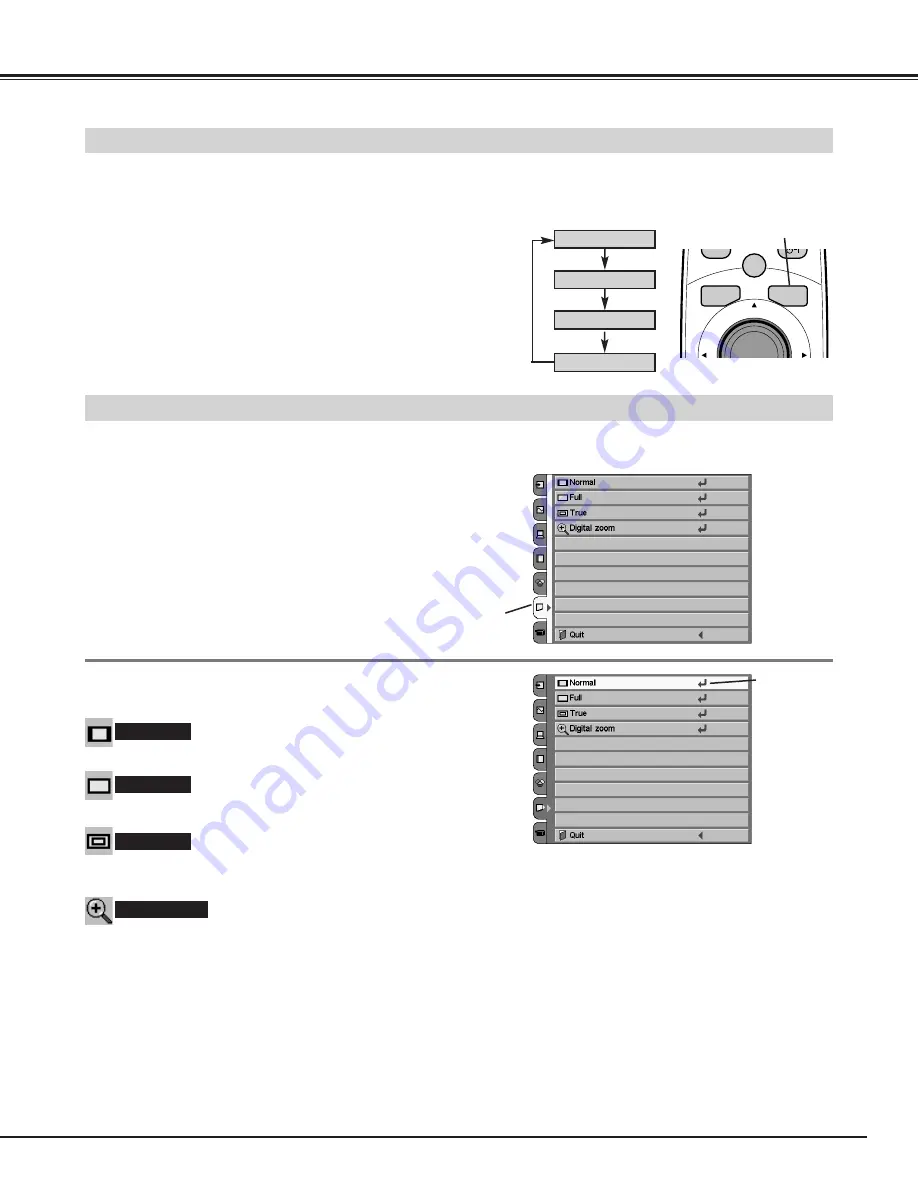
This projector has a picture screen resize function, which enables you to display the desirable image size.
When Digital zoom is selected, the on-screen menu disappears and the message “D.Zoom” is displayed. Press the SELECT
button to expand the image. And press the POINT UP/DOWN/LEFT/RIGHT button(s) to pan the image. Panning function
can work only when the original image is larger than screen size (964 X 544).
Digital zoom
Provides an image at the normal video aspect ratio of 4 : 3.
Normal
Press the MENU button, and the main menu appears. Select
the Screen Size Adjustment menu with the POINT UP/DOWN
button, and then press the POINT RIGHT button to enter the
sub-menu.
1
2
Choose the item that you want to set, and then press the
SELECT button to activate it.
Screen Size Adjustment menu
Press the
SELECT button
at this icon to
activate the
item.
Screen Size Adjustment menu
Provides an image to fit the horizontal size of the screen.
Full
Provides image in its original size. When the original image size is larger than screen size (964 X 544), this projector enters
"Digital zoom" automatically.
True
Screen Size Adjustment (Menu Operation)
NOTE
The Screen Size Adjustment menu cannot be operated when “1035i (HDTV)”, “1080i (HDTV)”, or "720p(HDTV)" is selected
in the Computer System menu (p32).
The True and Digital zoom cannot be selected when "RGB" is selected in the Computer System menu (p32).
Panning function may not operate properly if the computer system (Mode 1-5) stored in the Computer Adjustment menu is
used.
Screen Size Adjustment (Direct Operation)
Select the screen size among Normal, Full, True, and D.Zoom by
pressing the SCREEN button on the remote control. (See the next
section "Screen Size Adjustment (Menu Operation)" about each item.)
SCREEN button
Normal
Full
True
MENU
SCREEN
AUTO PC ADJ.
AUTO
LIGHT
SELECT
SCREEN button
D.Zoom


