35
Input Selection
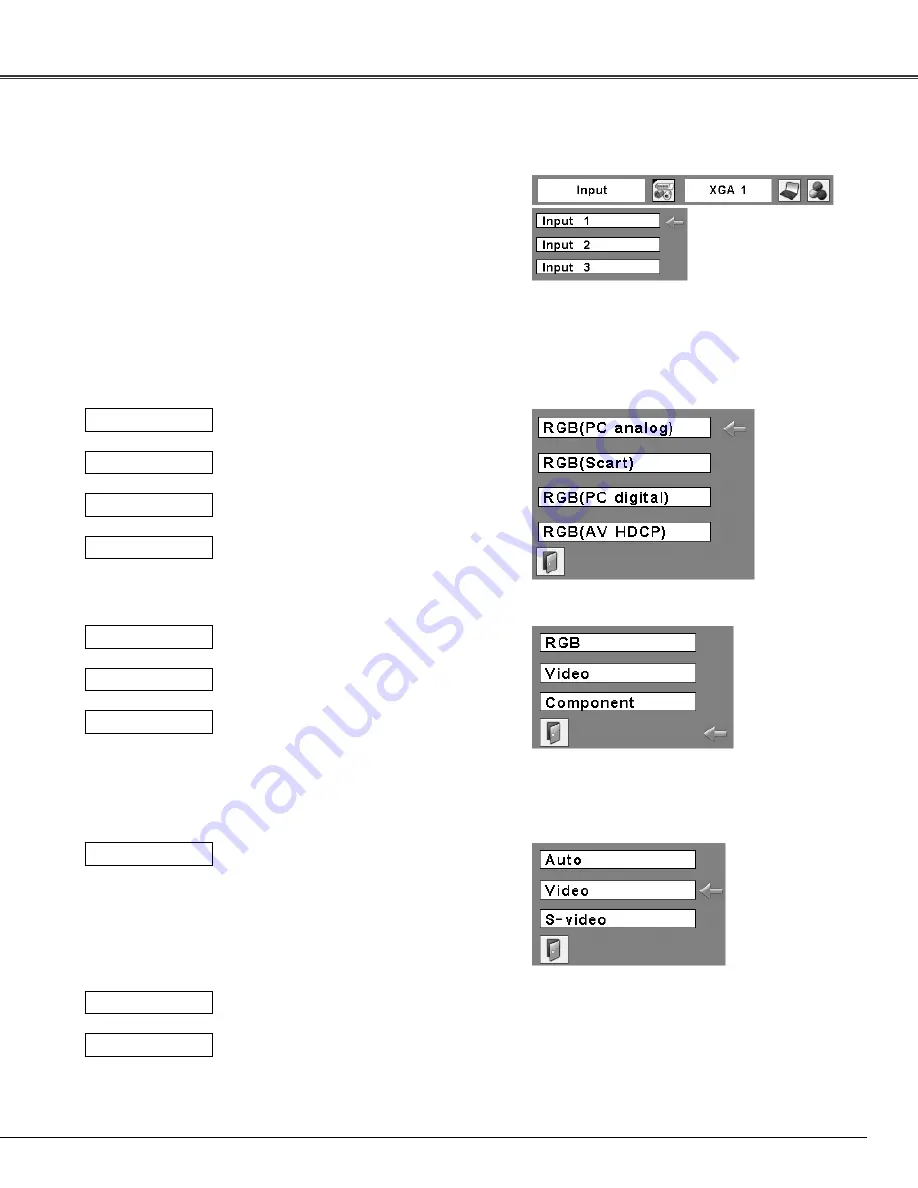
Press the MENU button to display the On-Screen
Menu. Use the Point
7 8
buttons to move the red
frame pointer to the Input Menu icon.
1
Use the Point
ed
buttons to move the red arrow
pointer to the desired input and then press the
SELECT button. The signal format menu appears.
2
Use the Point
ed
buttons to select the desired signal
format and then press the SELECT button.
3
Menu Operation
When the RGB PC (analog) signal is
connected
RGB (PC analog)
INPUT 1
When the RGB PC (digital) signal is
connected.
RGB (PC digital)
When the HDCP video signal is
connected.
RGB (AV HDCP)
When the RGB PC signal is connected.
RGB
INPUT 2
When the RGB video signal is
connected.
Video
When the component signal is
connected.
Component*
Auto
INPUT 3
When the video signal is connected.
Video*
When the S-video signal is connected.
S-video*
When selecting Auto, the projector
automatically detects an incoming video
signal and adjusts itself to optimize its
performance. The projector selects the
connection in the following order:
1. S-video
2. Video
Input Source Selection
*If the projector cannot reproduce proper video image, select a
system manually (see “Video System Selection” on page 36).
*If the projector cannot reproduce proper video image, select a
system manually (see “Video System Selection” on page 36).
When the RGB PC (scart) signal is
connected
RGB (Scart)
Input Menu
Summary of Contents for PLC XT21 - XGA LCD Projector
Page 42: ...42 Computer Adjustment MEMO ...
Page 83: ...SANYO Electric Co Ltd MZ7A B ...


