【
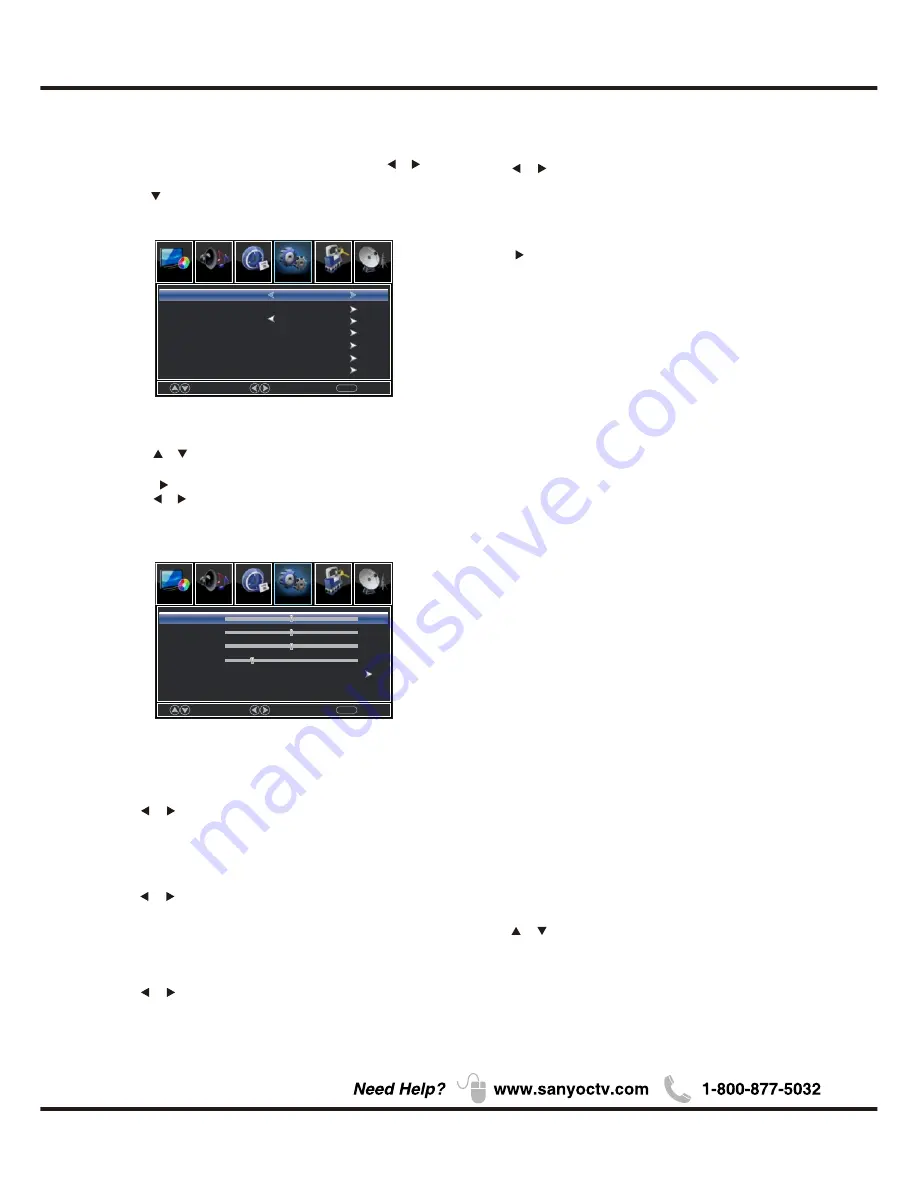
H-Pos
】
Adjust the horizontal position of the picture.
Press
button to adjust.
/
【
V-Pos
】
Adjust the vertical position of the picture.
Press
button to adjust.
/
【
Clock
】
Minimize vertical stripes in the screen image.
Press
button to adjust.
/
【
Phase
】
Minimize horizontal distortion.
Press
button to adjust.
/
【
Auto
】
Adjust to the PC signal timing automatically.
Press
button to enter.
*
Note
:
1. PICTURE menu and description are the same as that
for TV mode.
2. Audio Language in SOUND menu is invalid.
3. TIME menu and description are the same as that for
TV mode.
4.Close Caption in SETUP menu is invalid.
5.US, Canada, RRT Setting and Reset RRT in LOCK
menu is invalid.
6.PC mode has no CHANNEL menu.
PC
1.Press
to select PC source.
INPUT
2.Press
ENU
to enter the main menu, Press
M
/
button to select Setup menu.
3.Press to select PC Settings.
4.Press
/
button to select among H-Pos / V-Pos /
Clock / Phase / Auto .
5.Press
to enter.
6.Press
button to adjust.
/
7.Press
ENU
again or back to parent menu.
M
20
VIDEO / HDMI
1. PICTURE menu and description are the same as that
for TV mode.
2. Audio Language in SOUND menu is invalid.
3. TIME menu and description are the same as that for
TV mode.
4.The function of Close Caption is available only in AV/TV
mode.
5.US, Canada, RRT Setting and Reset RRT in LOCK
menu is invalid.
6.Composite/ COMPONENT / HDMI mode has no
CHANNEL menu.
*
Before operating Media menu, Plug in USB
Note
:
device, then press INPUT button to set the Input
Source to USB.
Press / button to select USB in the Source menu,
then press ENTER button to access.
USB
Move
Adjust
MENU
Return
Lock
Channel
Picture
Picture
Sound
Setup
Time
H-Pos
V-Pos
Clock
Phase
Auto
50
50
50
25
Menu Operation
Move
Select
MENU
Return
Lock
Channel
Picture
Picture
Sound
English
Off
Setup
Menu Language
Closed Caption
Over Scan
Other Settings
Input Label
Restore Default
Time
PC Settings
Summary of Contents for DP24E14
Page 1: ...DP24E14 720 ...
Page 6: ...5 Chapter 1 QUIK N EASY Setup Guide ...
Page 8: ...7 Buttons on the TV Take a certain model for an example 1 2 3 4 5 5 6 7 1 2 3 4 5 6 7 ENTER ...
Page 11: ...10 AUDIO VIDEO INPUT AUDIO VIDEO INPUT MHL List Video ...
Page 13: ...12 ...
Page 24: ...23 Other Information Chapter 3 ...
Page 26: ...25 Other Information Lock Enter Password System lock System lock ...
Page 28: ...27 ...


