


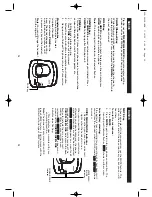


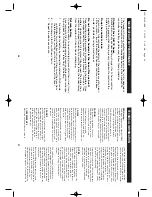


Mounting on a wall
Do not attempt to wall-mount the phone before initial 12-hour
charging is completed.
Follow steps 1– 3 above to charge the handset.
4.
Remove the handset from the base and set aside. T
u
rn the base
over and align the four slots on the bottom of the base with the
four hook-tabs on the bracket.
5.
Insert the hook-tabs into the slots and push up until the bracket
snaps securely into place.
6.
Plug the telephone line cord into the
TEL LINE
jack on the back of
the base and into a modular phone jack.
7.
Slip the mounting holes over the wall plate posts and slide the
unit down firmly into place. (W
all plate not included.)
8.
Place the handset in the base.
Note:
If desired, gather the extra AC adaptor cord and telephone line
cord together
, fasten with a wire tie, and store inside the wall
mounting bracket.
Digital Security System
Y
our cordless phone uses a digital security system to provide
protection against false ringing, unauthorized access and charges to
your phone line. When you place the handset in the base, the phone
verifies its security code. After a power outage or battery replacement,
you should place the handset in the base for about 20 seconds to reset
the code.
7
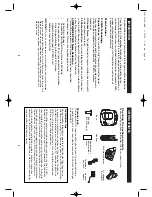
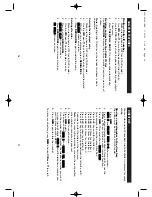
Battery setup
1.
Remove the battery compartment cover
on the handset, insert the battery
, plug
the cord into the jack (inside the
compartment) and replace the cover
.
2.
Set the handset
RINGER
switch to
ON
,
and place handset in the base.
3.
Plug the AC adpator into the
POWER DC
12V
jack on the back of base and the
other end into an electrical outlet. The
CHARGE/P
AGE
indicator comes on
verifying the battery is charging.
Charge the handset for 12 continuous
hours prior to first use. The initial battery
charge is important for best performance.
Note:
It is normal for the handset and base to get warm when the
handset is charging in the base.
Note:
For desktop charging only
, the handset is able to charge
facing up or down.
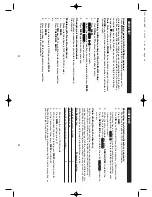
T
elephone line connection
4.
Plug the telephone line cord into the
TEL LINE
jack on the back of
the base and into a modular phone jack.
Caution:
Use only the Sanyo AC adaptor (A21220N) that is supplied
with this phone. Using another AC adaptor may damage the phone.
6
1
GETTING ST
ARTED
GETTING ST
ARTED
1
2
3
CLT-2412E-NEW 7/16/02 9:09 AM Page 6