


27
26
REN Number:
The Ringer Equivalence Number (REN)
assigned to each terminal device
provides an indication of the maximum
number of terminals allowed to be
connected to a telephone interface.
The REN number of this phone is
located on the bottom of the base unit.
The termination on an interface may
consist of any combination of devices
subject only to the requirement that the
sum of the Ringer Equivalence Numbers
of all the devices does not exceed 5.
CAUTION
This product is intended for use in
CANADA only
. Sale or use in other
countries may violate local laws.
Cordless telephones use radio
frequencies to allow mobility
. This
affects the performance of your phone.
1. NOISE
Electrical pulse noise is present in most
homes at one time or another
. This is
most intense during electrical storms.
Certain kinds of electrical equipment,
such as light dimmers, fluorescent
bulbs, motors, fans, etc., also generate
pulse noise.
Because radio frequencies are suscep-
tible to this, you may on occasion hear
pulse noise through the handset. This is
usually only a minor annoyance and
should not be interpreted as a defect of
the phone.
2. RANGE
Because radio frequencies are used, the
location of the base station can affect
the operating range of the phone. T
ry
several locations and choose the one
that gives the clearest signal to the
handset. (T
urning in a circle while
holding the handset may also increase
the operating range.)
3. INTERFERENCE
Electronic circuits activate a relay to
connect the unit to your telephone line.
These electronic circuits operate in the
radio frequency spectrum. While several
protection circuits are used to prevent
unwanted signals, there may be periods
when these unwanted signals enter the
base station. Y
ou may hear click or hear
the relay activate when you are not
using the cordless handset. If this occurs
frequently
, you can minimize or
eliminate the problem by lowering the
height of the base station or relocating
the base station. It may also be helpful
to change the operating channel and/or
the security code setting.
Operation is subject to the following two
conditions: (1) this device may not cause
interference, and (2) this device must
accept any interference, including
interference that may cause undesired
operation of the device.
NOTICE:
Privacy of communications may not be
ensured when using this telephone.
Other devices, including other cordless
telephones, may interfere with the
operation of this cordless telephone or
cause noise during operation. Units
without coded access may be accessed
by other radio communication systems.
Cordless telephones must not cause
interference to any licensed radio
service.
The Industry Canada Label identifies
certified equipment. This certification
means that the equipment meets certain
telecommunications network protective,
operational and safety requirements.
The ministry does not guarantee that the
equipment will operate to the user’
s
satisfaction.
Before installing this equipment, users
should ensure that it is permissible to be
connected to the facilities of the local
telecommunications company
. The
equipment must also be installed using
an acceptable method of construction. In
TECHNICAL INFORMA
TION
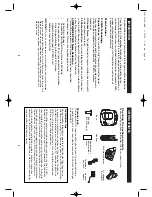
MAXIMIZE BA
TTER
Y PERFORMANCE
The freedom that your cordless telephone can offer is fully dependent
on the performance of the rechargeable battery in the handset. T
o
maximize the battery performance, follow these guidelines:
Charge it for a full 12 hours
Before initial use of your new battery
, charge it for 12 hours continu-
ously
. The proper initial charging is very important to maximize the
battery performance.
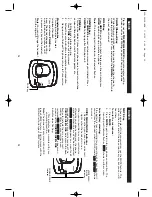
Keep the contacts clean
Y
ou can never fully recharge the battery if the contacts are dirty
. Clean
all the contacts – two at the bottom of handset and two in the base
cradle – periodically using a pencil eraser
.
Do not replace the handset in the base after each call
Repeated short charging creates a memory effect in the battery
. Once
a rechargeable battery acquires this “short memory”, it sends a “low
battery” signal even when it is almost fully charged. The battery then
needs to be charged frequently
. T
o
avoid this, leave the handset away
from the cradle until it really needs recharging.
Refresh battery
If your battery seems to need recharging more often than usual, it may
have lost part of its charging capacity because of premature recharges.
To
bring back its full capacity
, try “refreshing” the battery:
1.
First discharge the battery by leaving the handset in T
ALK mode
until Battery Low indication turns on. (Disconnect the base from
the telephone line, so that your line is not busy all the time.)
2.
Then charge it for 12 continuous hours.
3.
Repeat the above once more.
CLT-2412E-NEW 7/16/02 9:09 AM Page 26