


9
MENU OPERATION
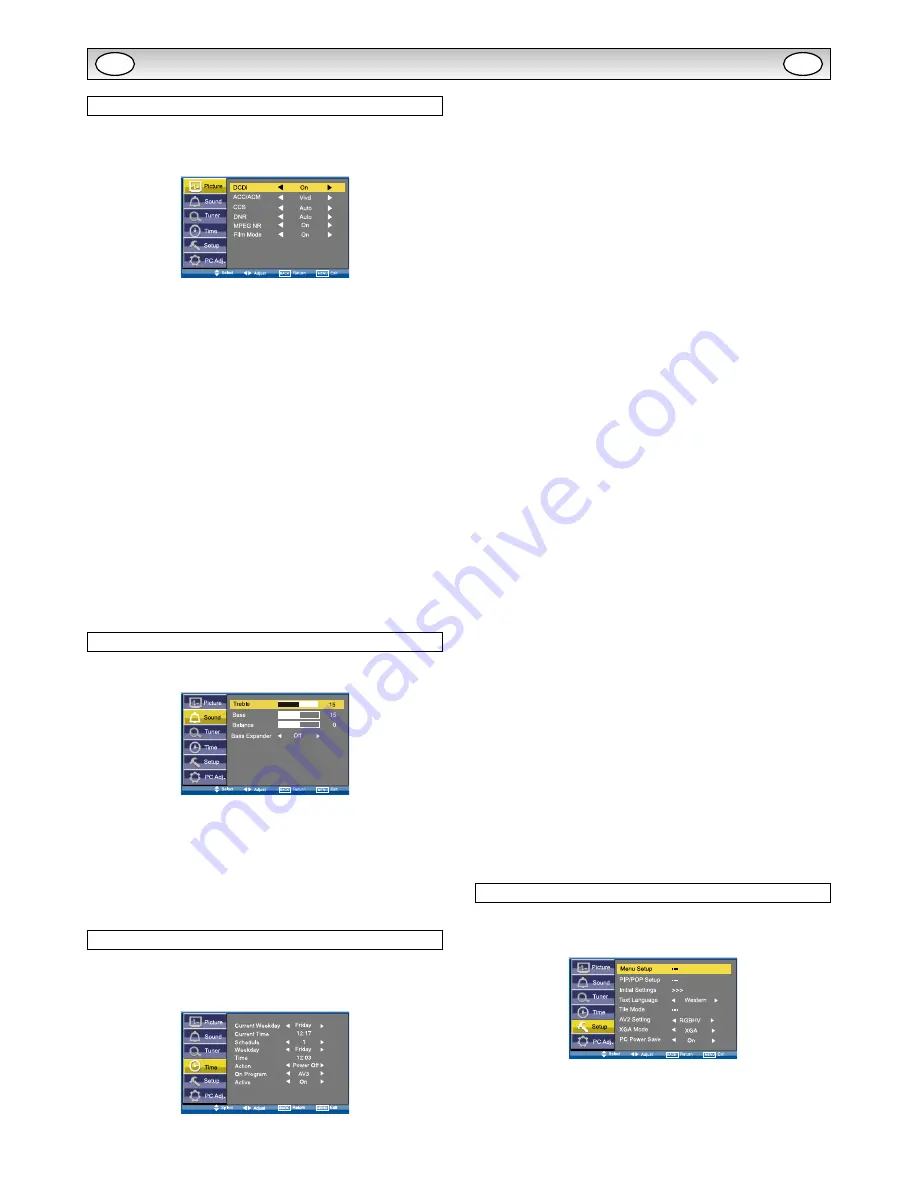
Picture menu
n
Advanced settings
Use the
5
or
6
button
to select
Advanced settings
and press
the
1
or
2
button
to enter the sub menu as follows .
DCDi
(Directional Correlational Deinterlacing) is used to process
moving angled edge in deinterlacing to get the smoothest and most
natural image . Press the
1
or
2
button
on the remote control to
select
On
or
Off
.
ACC/ACM
(ACC: Adaptive Contrast and Color; ACM-II: Active Color
Management-II) is used to select adaptive Brightness, Contrast and
tone control . Press the
1
or
2
button
on the remote control to
select suitable mode either
Vivid
,
Cinema
,
Sport
or
Off
.
CCS
(Cross Color Separation) is used to remove residual chroma
information from luminance signal which is the result of imperfect
decoding of composite video . Press the
1
or
2
button
on the
remote control to select either
Auto
,
Standard
or
Off
.
DNR
(Digital Noise Reduction) is available for noise reduction . Press
the
1
or
2
button
on the remote control to select either
Auto
,
Low
,
Mid
,
High
or
Off
.
MPEG NR
(MPEG Noise Reduction): Removes unwanted ringing and
block noise from images that have undergone MPEG or JPEG com-
pression and decompression . Press the
1
or
2
button
on the
remote control to select
On
or
Off
.
Film Mode
(Inverse 3:2 pulldown): Film vs.Video-Detect film. Performed
on material which underwent technologic conversion to video . Press the
1
or
2
button
on the remote control to select
On
or
Off
.
Sound menu
Press the
MENU button
and select Sound using the
5
or
6
but-
tons
, press the
1
or
2
button
to enter .
Select and adjust to obtain the best sound settings for your environ-
ment using the
5
or
6
button
to select
Treble
,
Bass
or
Balance
and the
1
or
2
button
to adjust levels .
Bass Expander
can also be selected using the
5
or
6
button
and pressing the
1
or
2
button
to select
On
or
Off
.
These settings automatically store when you exit the menu .
Press the
BACK button
to return to the previous menu .
Press the
MENU button
to exit menu operation .
Time menu
Press the
MENU button
and select Time using the
5
or
6
but-
tons
, press the
1
or
2
button
to enter . Press the
BACK but-
ton
to return to the previous menu . Press the
MENU button
to exit
menu operation .
n
Current Weekday
Use to set current weekday using the
1
or
2
button
.
n
Current Time
Use to set the current time using the Numeric buttons .
✐
Other items in Time Menu should not be selected until Current
Time has been set .
n
Schedule
Use to set up to 20 separate time schedules for “Power On” or “Power
Off”, select 1 ~ 20 using the
1
or
2
button
.
n
Weekday
Use to set the schedule for “Power On” or “Power Off” of any weekday
from Sunday through to Saturday or Everyday using the
1
or
2
button
.
n
Time
Use to set the schedule for “Power On” or “Power Off” of any time us-
ing the Numeric buttons .
n
Action
Use to set the schedule for “Power On” or “Power Off” active using
the
1
or
2
button
.
You can set Power On timer in Time menu selecting “ON” in “On
Timer Function” in Installation Mode . If it is selected “OFF”, Power On
display in Time menu does not functional .
n
On Program
Use to select
AV1
,
RGB
,
AV2
,
AV3
,
PC
,
DVI
or
Network
for the
schedule of “Power On” using the
1
or
2
button
.
n
Active
Use to select ON or OFF using the
1
or
2
button
. When set
“OFF” the above items “Schedule”, “Weekday”, “Time”, “Action” or “ON
Program” will be inactive .
Use
NUMERIC buttons [0 ~ 9]
to set
On Time
. (Action “Power On”
– 00:00 ~ 23:59)
✐
Once On Time has been set, when the set time is reached, the
monitor will leave the stand-by status and enter to the source
automatically .
✐
After On Time has been set, you can go on watching other pro-
grams . When the set time is reached, the monitor will automatically
switch to the preset program .
✐
On Program can only be selected whenAction (Power On) has
been set .
✐
Action (Power Off) can be set to turn the monitor into standby at a
selected time
Once On Program has been set, when the set time is reached, the
monitor will enter to the preset source automatically .
Use the
1
or
2
button
to select
On program
,
AV1
,
RGB
,
AV2
,
AV3
,
PC
,
DVI
or
Network
.
Setup menu
Press the
MENU button
and select Setup using the
5
or
6
but-
tons
, press the
1
or
2
button
to enter . Press the
BACK but-
ton
to return to the previous menu . Press the
MENU button
to exit .
n
Menu Setup
Whenever Setup menu is accessed initially, Menu Setup will be the
default selection . Press the
1
or
2
button
to enter the sub menu .
GB
GB


