background image

English

- 9 -

Insert:

Select the programme which you want to insert by
navigation buttons. Press the GREEN button. By navi-
gation buttons move the selected programme to the
decided programme space and press the GREEN but-
ton again.

Delete:

To delete a programme, press the YELLOW button.
Pressing the YELLOW button again erases the se-
lected programme from the programme list, and the
programmes below shift one up.

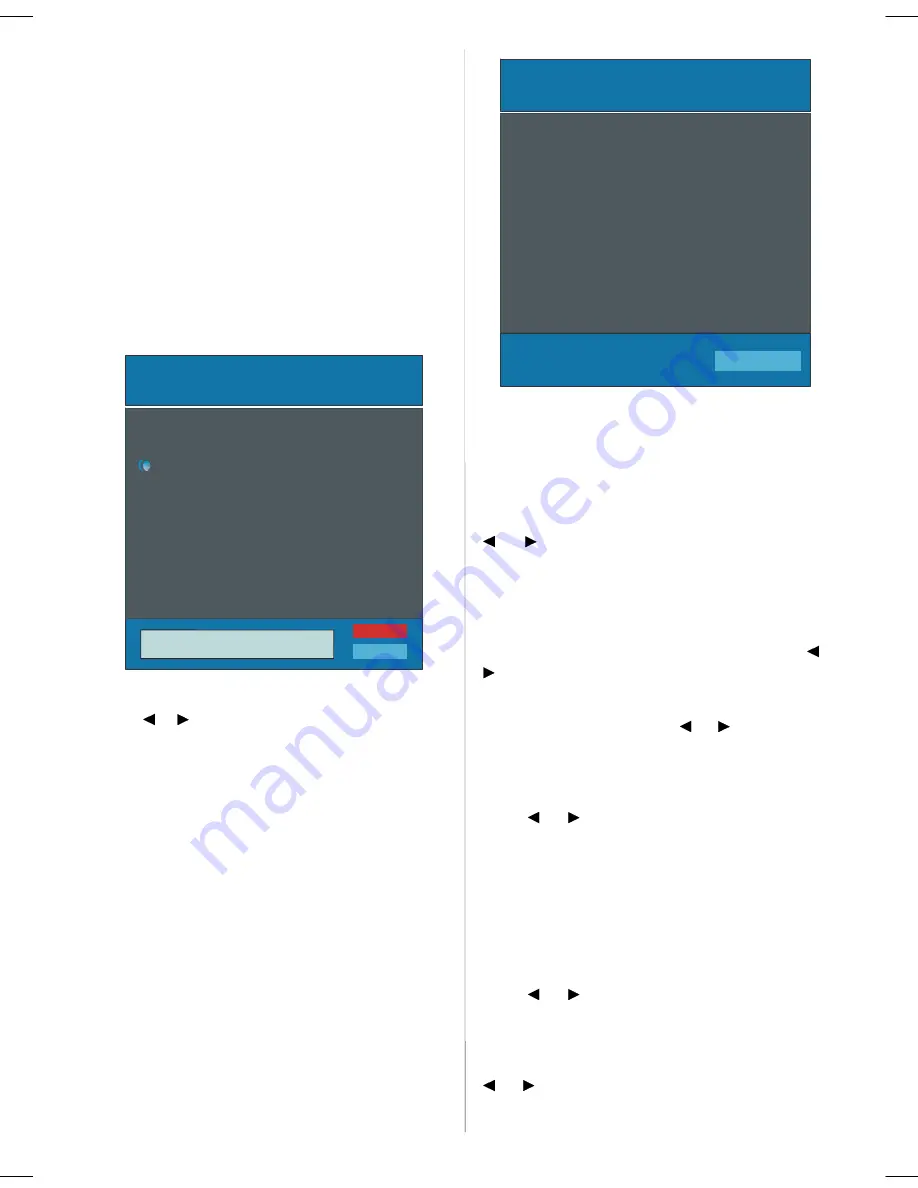
APS (Auto Programming System)

When you press the BLUE button for APS, Auto Pro-
gramming System Menu will appear on the Screen.

Country

WARNING!

All Prestored Programs

will be deleted

UK

Ok

Cancel

Auto Program

A.P.S. (Auto Programming System) Country

Press

/

button to select your country. If you

want to exit from A.P.S. function, press the “

BLUE

button.

When you press OK

or RED

button for starting APS,

all stored programs will be erased and the following
screen will be displayed:

UK

P 03 - C 04

63.75 MHz

6%

63.75 MHz

Cancel

APS is running...

Whenever you press the “

BLUE

” button, A.P.S. func-

tion stops and Program Table appears on the screen.

If you wait until the end of A.P.S., Program Table is
displayed with the programmes found and located.

Program

By pressing

/

button, select Program. Press

“ ” / “

button to select the program number. You

ou

can also enter a number via digit buttons on the re-
mote control. There are 100 program storage between
0 and 99.

Band

Band can be selected either “C” or “S” by press“

” /

button.

Channel

Channel can be changed by “

” / “

” button or Digit

Buttons.

Colour System

By pressing

/

button, select Colour System.

Press “

” / “

” button to change the colour system

to PAL, SECAM, PAL60 or AUTO.

If Sound System is set to I, SECAM is not available for
the Colour System.

Note: In EXT mode, you can choose NTSC 3.58 and
NTSC 4.43 as well.

Sound System

By pressing

/

button, select Sound System.

Press “

” / “

” button to change the sound system

to BG, I, L, L’, DK.

Fine Tune

By pressing

/

button, select Fine Tune. Press

“ ” / “

” button to adjust the tuning.

ENG-26781W-1050UK-26 INCH 17MB22-(WO PC-WO PIP)-50103275.p65

02.04.2007, 12:42

9

Summary of Contents for CE26LC81-B

Page 1: ... MANUAL Colour television Please read this Instruction book before using your television We wish you many hours of pleasure from your new television ENGLISH 1 16 CE26LC81 B Problems with set up Call 0870 240 7475 ...

Page 2: ......

Page 3: ... On Your TV 5 Switching The TV ON OFF 5 Navigating the Menu System 6 Menu System 6 Other Features 10 Teletext 12 Connect Peripheral Equipment 13 Tips 14 Specifications 14 Appendix A Aerial Connection 15 Appendix B Connect Peripheral Equipment 15 Peripheral Equipment Connections 16 Important Instruction 17 ...

Page 4: ...DE Electronic Programme Guide Reveal Expand WIDE Image Size Mix No function Teletext Time Red button Sound Menu Green button Picture Menu P P SWAP Previous Programme I II Mono Stereo Dual I II P Programme Down Volume Down PP Personal preferences OK SELECT Okay Store Cursor Down Cursor Left 31 M Menu 32 Mute TV DTV INFO 1 2 3 4 5 6 7 8 9 0 EXIT SWAP P P I II SOURCE AV GUIDE WIDE PP OK SELECT ABC DE...

Page 5: ...nd dry cloth 5 Ventilation The slots and openings on the back cover are in tended for ventilation and to ensure reliable opera tion To prevent overheating these openings must not be blocked or covered in anyway 6 Heat and Flames The set should not be placed near to naked flames and sources of intense heat such as an electric heater Ensure that no naked flame sources such as lighted candles are pla...

Page 6: ...egal regu lations which apply in your area Cold cathode fluoresant lamp in LCD PANEL con tains a small amount of mercury please follow lo cal ordinates or regulations for disposal The mains plug is used to disconnect the TV from the mains and therefore it shall remain readily op erable Warning To prevent injury this device must be se curely attached to the floor wall in accordance with the install...

Page 7: ... be used for a long period Other wise it can be damaged due to any leakage of bat tery Switching The TV ON OFF To switch the TV on Your TV will switch on in two steps 1 Connect the power supply cord to the system Press Power On Off button Then the TV switches itself to stand by mode Optional 2 To switch on the TV from stand by mode either Press a digit button on the remote control so that a progra...

Page 8: ...sing button select the desired Option Press button to set the level Hint Hue is displayed in picture menu when the TV receives an NTSC signal Colour Temp By pressing button select Colour Temp Press to choose from one of these options Cool Normal and Warm Noise Reduction By pressing button select Noise Reduction Press to choose from one of these options Low Medium High or Off Film Mode Films are re...

Page 9: ... button to return to the previous menu Sound Mode By pressing select Sound Mode Press button you can select Mono Stereo Dual I or Dual II mode only if the selected channel supports that mode AVL By pressing select AVL VL Press button to set the AVL as on or off Effect By pressing select Effect Press button to set Effect as on or off Dynamic Bass Dynamic Bass is used to increase bass effect of the ...

Page 10: ...c 30 sec or 60 sec Teletext Language By pressing button select Teletext Language Press button to change Teletext Language to West East Turk Gre Cyrillic or Arabic Default Zoom By pressing button select Default Zoom You ou can set Default Zoom to Panoramic 4 3 14 9 Zoom or 16 9 by pressing button Install Menu INSTALL Program Table Program Band Channel Colour System Program Table By pressing button ...

Page 11: ...ng screen will be displayed UK P 03 C 04 63 75 MHz 6 63 75 MHz Cancel APS is running Whenever you press the BLUE button A P S func tion stops and Program Table appears on the screen If you wait until the end of A P S Program Table is displayed with the programmes found and located Program By pressing button select Program Press button to select the program number You ou can also enter a number via...

Page 12: ...rs on the screen SOURCE TV EXT 1 EXT 2 EXT 2 S FAV In source menu highlight a source by pressing button and switch to that mode by pressing or OK button Source options are TV EXT 1 EXT 2 EXT 2 S FAV S VIDEO HDMI andYPBPR Note You can mark desired source options by press ing OK button Therefore when AV button is pressed only the marked source options will be avail able Other Features TV Status Prog...

Page 13: ...l the wide TV screen For 16 9 aspect ratio pictures that have been squeezed into a normal picture 4 3 aspect ratio use the Fullmode to restore the picture to its original shape Cinema This zooms up the wide picture 16 9 aspect ratio to the full screen 16 9 Zoom This zooms up the wide picture 16 9 aspect ratio to the full screen Subtitle This zooms up the wide picture 16 9 aspect ratio with subtitl...

Page 14: ...utton If the programme does not have teletext transmission no information will be displayed When button is pressed while in teletext mode the screen will be splitted into two windows one displaying the teletext and the other displaying the current channel Press the button or TV DTV button to exit from teletext To exit text press Note If the signal becomes insufficient the teletext mode will be qui...

Page 15: ...ket of the decoder you may attain a better dis play resolution TV And Video Recorder Connect the aerial cables Better picture quality can be obtained if you also con nect a Scart cable to SCART sockets Playback NTSC Connect NTSC VCR player to a Scart socket of the TV Then press the AV button to select EXT1 or EXT2 Copy Facility Source selection for VCR recording Select Feature menu Select SCART 2 ...

Page 16: ... connect the aerial If you are in doubt consult your dealer No Picture means that your TV is not receiving a transmission Have you selected the correct button on the remote control Try once more Sound You can not hear any sound Did you perhaps inter rupt the sound pressing the button Sound is coming from only one of the speakers Is the balance set to one extreme See Sound menu Remote Control Your ...

Page 17: ...ct Peripheral Equipment ANT IN AUDIO IN R L VIDEO IN IN OUT IN OUT HEADPHONE AUDIO VIDEO SATELLITE RECEIVER ANTENNA CAMCORDER VHF UHF 75 Round 75 ohm coaxial cable Rear of TV Outdoor Aerial Connection Appendix A Aerial Connection ...

Page 18: ... R are connected parallelly the picture may blend if the two peripherals are used at the same time Thus these two are not to be used at the same time S VHS Input Video Input Audio Inputs s Headphone Audio Line Outs s Power Cord Input Power On Off Switch For Service Use Only HDMI Input SCART 2 SCART 1 Component Audio Inputs s Component Video Inputs YBPbr RF PCAudio Input Subwoofer out 220V 240V AC ...

Page 19: ...the mains lead of this appliance may not correspond with the coloured markings identifying the terminals in your plug proceed as follows The wire which is coloured green and yellow must be connected to the terminal which is marked with the letter E or by the earth symbol or coloured green or green and yellow The wire which is coloured blue or black must be connected to the terminal which is marked...

Page 20: ...own to be due to faulty materials or workmanship within a period of 12 Months from the date of sale to the original purchaser it will be repaired or at the vendors sole option replaced free of charge always providing that The equipment has at all times been used in accordance with the operating instructions issued by the manufacturer and has not been connected to an electrical supply for which it ...

Reviews: