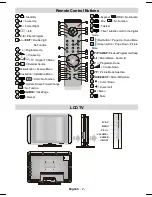


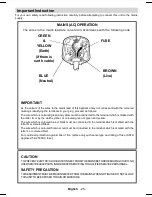
English
- 13 -
IDTV tunes to each frequency that have been stored
in its database and looks for the new software.
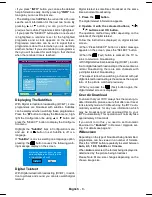
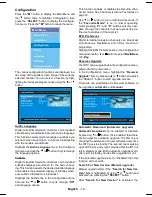
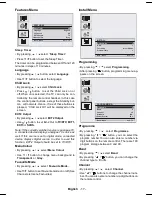
Software Upgrad e
Searching for upgrade. Please wait, or
press MENU to c ancel.
Searc h Progress:
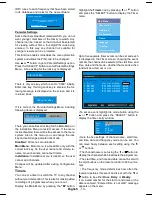
Parental Settings
Some channels broadcast material which you do not
want younger members of the family to watch. Any
channel can be ‘locked’ so that it cannot be selected
for viewing without first a four-digit PIN code being
entered. In this way any channel not suitable for
younger viewers can be protected.
This function enables or disables the menu protection
system and allows the PIN code to be changed.
Use
or
button to go to Parental Settings option.
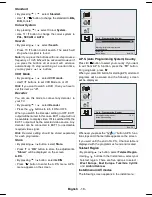
Press the “SELECT” button to enter Parental Settings
Menu. A box asking for the lock key is displayed.
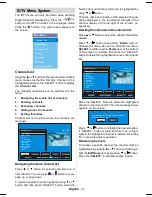
Enter Lock Key
There is only one key which is set to “0000” initially.
Enter lock key. If wrong Lock key is entered, the fol-
lowing message is displayed on the screen and it is
returned back.
Wrong Loc k Key
If it is correct, the Parental Settings Menu including
following items is displayed:
Menu Lock
Installation
Set Lock Key
There you can set/reset locking for the Main Menu, or
the Installation Menu to restrict access. If the menu
lock is disabled, there will be free access to the menu
system. Also in this menu you can change the lock
key and set/change parental lock mode.
Disabled:
All menus are unlocked.
Main Menu:
Main menu is accessible only with the
correct lock key. So the user cannot add, delete, re-
name, move channels, cannot set timers.
Installation:
Installation menu is locked, so the user
cannot add channels.
Changes will be updated after exiting Configuration
Menu.
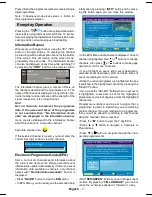
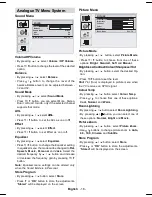
Timers
You can set a timer to switch the TV to any channel
without your intervention. This is also for making video
recordings of programmes when you are out.
Display the Main Menu by pressing the
"M"
button.
Highlight the
Timers
line by pressing
or
button
and press the “SELECT” button to display the Timer
menu.
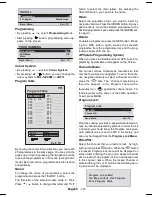
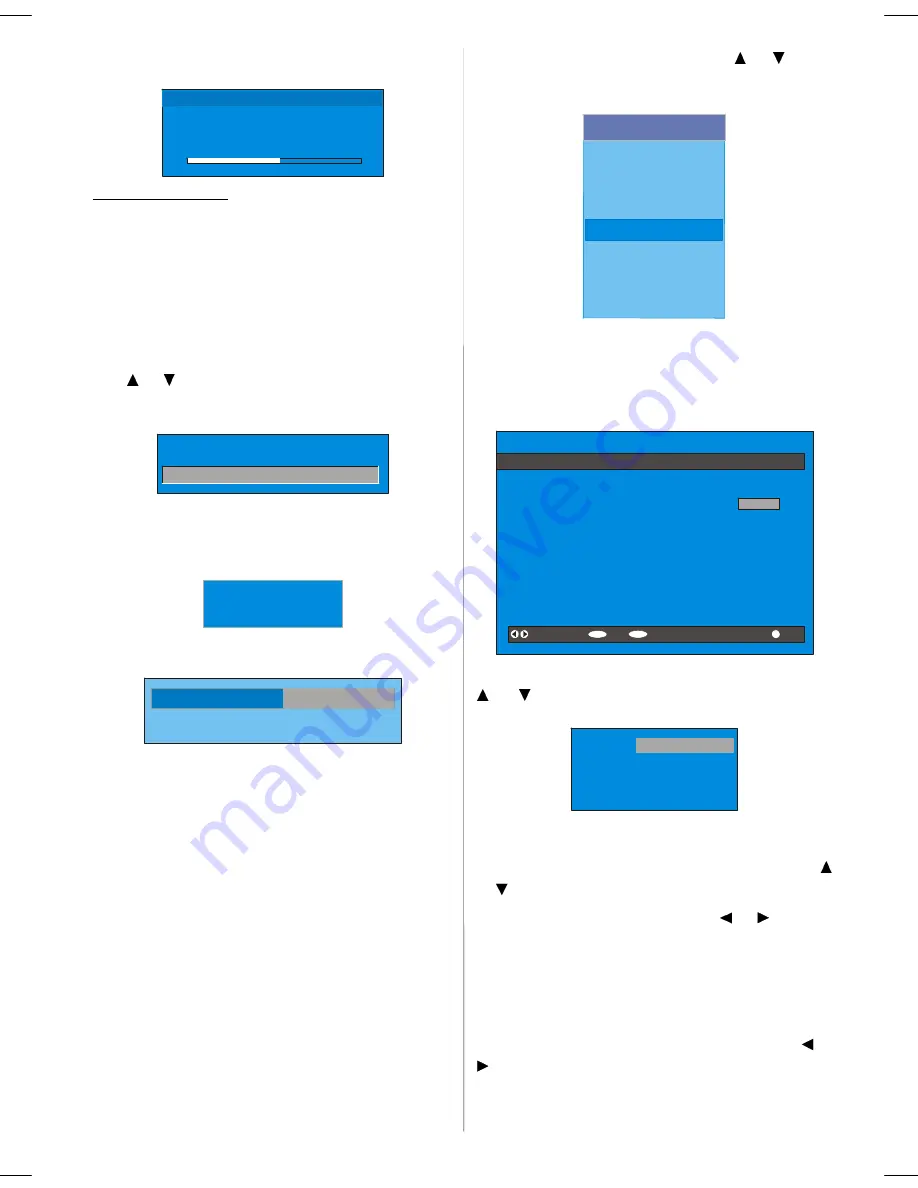
Main Menu
Channel List
Installation
Configuration
Timers
Language
TV Setup
Common Interface
Up to five separate timer events can be set and each
is displayed in the Timer screen, showing the event
number, the channel to be selected, the start time, end
time, date and the mode - whether that event is active
(and will be acted on) or not.
SELECT
i
MENU
TIMER MENU
No Channel Name
Start
End
Date
Mode
1.
ITV 1
20:00 21:00 12/05/2005
Active
2.
BBC ONE
00:00 00:00 01/01/2005
Inactive
3.
BBC ONE
00:00 00:00 01/01/2005
Inactive
4.
BBC ONE
00:00 00:00 01/01/2005
Inactive
5.
BBC ONE
00:00 00:00 01/01/2005
Inactive
6.
BBC ONE
00:00 00:00 01/01/2005
Inactive
Toggle Mode
Exit
Edit Timer
More
• To set an event, highlight its mode button using the
or
button and press the “SELECT” button to
display the timer entry window.
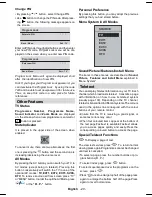
Name:
Start:
End:
Date:
Mode:
3. ITV 1
00:00
00:00
03/06/2005
Once
• Here the five settings of channel name, start time,
end time, date and frequency mode can be set. You
can move freely between each setting using the
or
buttons.
• The channel name is set using the
or
button to
display the channel which broadcasts the programme.
• The start time, end time and date are each set with
the digit buttons on the remote control in 24-hour for-
mat.
• The frequency mode determines how often the
receiver operates this event and is set with the
or
button to be either
Once
,
Daily
, or
Weekly
.
If an invalid number for the start or end times or the
date is entered, “Entered time is not valid” message
appears on the menu.
ENG-20725-1050UK-20 INCH TFT 17MB24-UK IDTV-(LINE OUT)(WO PC-WO YPbPr)(LIPS)-50107492.p65
26.06.2007, 14:36
13