background image

46

1

2

POWER

CHANNEL

MENU

ENTER

AUTO

TRACKING

SLOW

PAUSE/STILL

STOP

PLAY

REW/

REC/OTR

SKIP

SEARCH

3

4

5

6

7

8

9

0

/F.FWD

SET

SLOW

TIMER REC

TV MONI.

CALL

TV/VCR

AUDIO

SPEED

EJECT

COUNT

RESET

ZERO

RETURN

INPUTSELECT

INDEX

CANCEL

STEREO RECORDING AND PLAYBACK

When a MTS STEREO broadcast is received, the STEREO will appear on the screen and the program can be
viewed or recorded in stereo (refer to pages 36 and 37 for recording procedures). The Hi-Fi STEREO recording
procedure is the same as for normal recordings.

NOTE: When using a CATV system, stereo TV programs may be transmitted over a mono cable channel.

In this case the STEREO will not appear and the sound will be in mono.

OUTPUT SELECTION

RECORDING STEREO BROADCASTS

The VHS Hi-Fi audio system permits high fidelity recording of MTS STEREO TV broadcasts.

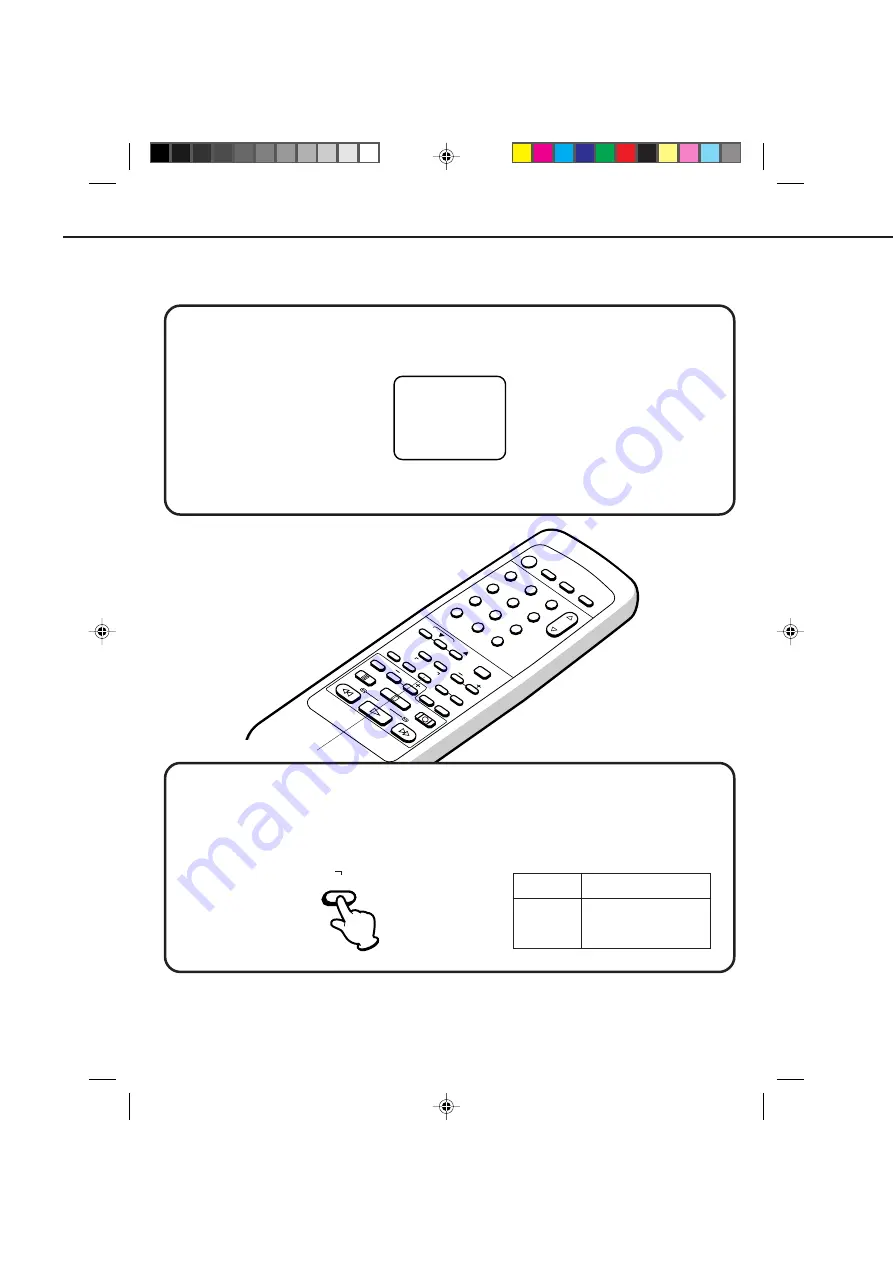
When viewing an MTS STEREO TV program, or playing a prerecorded VHS Hi-Fi STEREO videotape, press
this button to select that the audio be heard through both speakers. Normally set to the Hi-Fi STEREO position,
this button can be set to the MONO position if the stereo broadcast or videotape audio is of poor quality. The "R"
and "L" positions allow the audio from the Right or Left Hi-Fi channel to be heard over both TV speakers. This
button has no effect when viewing a MONO videotape or TV program. Each time when you press the button,
OUTPUT SELECTION display appears on the screen for several seconds. Refer to the chart below.

OUTPUT
SELECTION
STEREO
L CH
R CH
MONO

SOUND HEARD ON BOTH
SPEAKERS
STEREO
LEFT CHANNEL AUDIO
RIGHT CHANNEL AUDIO
MONO

NOTES:

When playing back a tape that is not recorded in Hi-Fi stereo mode, the audio will automatically be monaural.

When listening to a VHS Hi-Fi video tape or MTS broadcast through the VHF/UHF jack (Audio/Video cord not
connected), the sound will be monaural.

STEREO

SELECT
           AUDIO

  4C94001A/E/P44-49

08*12*99, 11:35

46

Summary of Contents for VHF6010

Page 1: ...i Fi 4 T TES OWNER S MANUAL MANUEL D INSTRUCTIONS Before operating the unit please read this manual thoroughly Avant d utiliser l appareil veuillez lire attentivement ce manuel VHF6010 TV CATV MODE SE...

Page 2: ...d used in accordance with the instructions may cause harmful interference to radio communications However there is no guarantee that interference will not occur in a particular installation If this eq...

Page 3: ...s should never be blocked by placing the unit on a bed sofa rug or other similar surface This unit should never be placed near or over a radiator or heat source This unit should not be placed in built...

Page 4: ...he National Electrical Code ANSI NFPA 70 provides information with respect to proper grounding of the mast and supporting structure grounding of the lead in wire to an antenna discharge unit size of g...

Page 5: ...INSTALLER This reminder is provided to call the CATV system installer s attention to Article 820 40 of the NEC that provides guidelines for proper grounding and in particular specifies that the cable...

Page 6: ...rect speed Automatic Rewind Stop Eject Power Off When a tape reaches its end during playback and recording it will automatically stop rewind stop eject the tape and the VCR will turn off Automatic Rep...

Page 7: ...TR 39 SETTING THE TIMER RECORDING 40 LOADING AND UNLOADING VIDEO CASSETTE TAPES 30 PLAYBACK 31 SPECIAL PLAYBACK 33 ON SCREEN FUNCTION DISPLAY 43 USING ZERO RETURN 44 VIDEO INDEX SEARCH SYSTEM INDEX 45...

Page 8: ...F Avoid extreme cold Do not place the VCR on or near appliances which may cause electromagnetic interference e g TV speakers etc Doing so may cause erratic operation of the VCR including picture and...

Page 9: ...u leave your home for a long time unplug the AC power cord To protect the VCR from a lightning storm unplug the AC power cord from the wall outlet and disconnect the antenna POWER SOURCE TO USE AC POW...

Page 10: ...power on and off 6 REC OTR button Press once to start normal recording Additional presses activate One Touch Recording 7 STOP EJECT button Press once to stop the tape in any mode Press again to eject...

Page 11: ...ignals to a TV amplifier or VCR 2 VHF UHF IN ANT Jack Connect a VHF UHF antenna or CATV cable to this jack 3 VHF UHF OUT TV Jack Used to output VHF UHF or CATV signals to a TV 4 3 4 Channel Selector S...

Page 12: ...es between TV and VCR 19 MENU button Press to display the on screen menu function 20 ZERO RETURN button Used to stop the tape when the counter reaches 00 00 00 21 SET buttons Used to set or adjust in...

Page 13: ...he device is not to be used for a long period of time remove the batteries to prevent damage or injury from possible battery leakage Do not try to recharge batteries not intended to be recharged they...

Page 14: ...irst disconnect the antenna from the TV and connect it to the VCR Then connect the VCR to the TV Below are 3 common methods of connecting an antenna system to a VCR Find the type of antenna system you...

Page 15: ...nnas to the VCR NOTE If a VHF or UHF antenna is used set the TV CATV menu option to the TV mode NOTE If a VHF or UHF antenna is used set the TV CATV menu option to the TV mode NOTE If a VHF or UHF ant...

Page 16: ...V Below are 3 common methods of connecting your VCR to a TV Find the type of TV you are using and follow the connection diagram 2 3 VCR VCR VCR BASIC CONNECTIONS CONTINUED 75 ohm Coaxial Cable supplie...

Page 17: ...antenna inputs numbers 2 and 3 below use a splitter to connect the VCR to the TV for VHF and UHF reception NOTE If a VHF or UHF antenna is used set the TV CATV menu option to the TV mode NOTE If a VHF...

Page 18: ...r box for proper reception VCR VCR VCR CATV CABLE TV CONNECTIONS Make sure the TV CATV menu option is set to the CATV mode Make sure the TV CATV menu option is set to the CATV mode IMPORTANT Make sure...

Page 19: ...d unscrambled Using the programmable timer to record only the channel selected at the converter box Recording one channel while watching another Using the VCR tuner to select channels To record from c...

Page 20: ...itter Converter Descrambler Incoming Cable Make sure the TV CATV menu option is set to the CATV mode Converter Descrambler Converter Descrambler Converter Descrambler Incoming Cable Whenever a Convert...

Page 21: ...a scrambled or unscrambled channel while watching another scrambled or unscrambled channel Using the programmable timer to record only the channel selected at the converter box Using the VCR tuner to...

Page 22: ...o AUDIO L IN To ANT IN To VHF UHF OUT TV VCR To AUDIO L OUT To AUDIO R OUT To VIDEO OUT To VIDEO IN To ANT IN To VHF UHF OUT TV AUDIO Cord Not supplied AUDIO VIDEO CONNECTIONS AUDIO VIDEO CONNECTION 1...

Page 23: ...a push button TV tuner If CH 3 or 4 corresponding to the video channel cannot be tuned on your TV proceed as follows set the VCR 3 4 channel selector and the TV to CH 3 or 4 play back a prerecorded ta...

Page 24: ...tor button to select the VCR mode When a TV is connected with an audio video cable turn the TV and this VCR on and select the video input mode on the TV Press the SET or button to select the desired l...

Page 25: ...he CLOCK SET Press the SET or button to set the month then press the ENTER button 1 2 3 NOTES After a power failure or disconnection of the power the timer settings will be lost In this case reset the...

Page 26: ...to select the TV CATV mode ENTER MENU CH SET UP TV CATV AUTO CH MEMORY ADD DELETE TV VHF UHF channels CATV CABLE TV channels 2 1 This VCR is equipped with a channel memory feature which allows channel...

Page 27: ...nput mode on the TV 1 ENTER MENU CH SET UP TV CATV AUTO CH MEMORY ADD DELETE Press the MENU button Press the SET or button to select the CH SET UP option then press the ENTER button Press the SET or b...

Page 28: ...Press the SET or button to select the CH SET UP option then press the ENTER button Press the SET or button to select the ADD DELETE mode then press the ENTER button Select the desired channels to be m...

Page 29: ...mode on the TV 3 Press the MENU button again Press the ENTER button to select the ON position Press the MENU button then press the SET or button to select the NO NOISE BACKGROUND option NOISE ELIMINA...

Page 30: ...An inverted cassette cannot be inserted To unload a cassette press the EJECT button on the remote control or press the STOP EJECT button on the VCR twice The first press will stop Pull the cassette ou...

Page 31: ...to the video channel 3 or 4 When a TV is connected with an audio video cable turn the TV and this VCR on and select the video input mode on the TV Press the PLAY button Playback will start Load a pre...

Page 32: ...h picture will be seen on the screen Release the button to return to the REW or F FWD mode When a tape is played the Digital Auto Tracking System automatically adjusts the tracking to obtain the best...

Page 33: ...on and then press the REW or F FWD button Press the PLAY button to resume normal viewing speed Press the PLAY button to resume normal viewing speed REW F FWD Press the SLOW button during STILL playbac...

Page 34: ...ion playback down to 1 30 normal playback speed SKIP SEARCH SPECIAL PLAYBACK CONTINUED Press the PLAY button again to resume normal playback NOTE SLOW TRACKING AND VERTICAL LOCK ADJUSTMENT If noise ba...

Page 35: ...ll play over and over until the repeat mode is canceled 3 CHECK BEFORE YOU BEGIN Turn ON the TV and set to the video channel 3 or 4 Turn ON the VCR Press the TV VCR selector button to select the VCR m...

Page 36: ...lect the video input mode on the TV Press the SPEED selector button to select the desired tape speed SP LP or SLP Load a cassette tape with the erase preven tion tab intact The VCR will automatically...

Page 37: ...to stop recording TO STOP RECORDING TO STOP RECORDING TEMPORARILY AUTO REWIND FEATURE This VCR will automatically rewind the tape when the tape has ended except during OTR and TIMER REC It will also e...

Page 38: ...d past the edges of the cassette housing TAPE SPEED AND MAXIMUM RECORDING PLAYBACK TIME TAPE SPEED SP Standard Play LP Long Play SLP Super Long Play VIDEO CASSETTE TAPE Erase prevention tab Adhesive t...

Page 39: ...on to begin recording Press the button again to stop recording after 30 minutes Each additional press of the REC OTR button will increase recording time as shown in the chart below up to a maximum of...

Page 40: ...ress the TV VCR selector button to select the VCR mode Load a video cassette with the erase prevention tab intact The VCR will automatically turn on Check that the clock and date are correct see page...

Page 41: ...he VCR stands by for recording To cancel timer recoreding press the button again and the T REC indicator will go out T REC TIMER REC NOTES The VCR cannot be used while the T REC indicator is lit After...

Page 42: ...TTINGS TO SET DAILY WEEKLY TIMER Press the SET or button to select the TIMER REC SET option in the MENU Then press the SET or button to select the unnecessary program and press the CANCEL button to ca...

Page 43: ...will be displayed in front of the time When you load a tape the counter will change to 00 00 00 The counter does not function on nonrecorded blank sections of the tape When you rewind fast forward or...

Page 44: ...on when playback or recording is finished The zero return function provides a convenient method of rapidly returning to the starting point of recording or playback The starting point can be indexed fo...

Page 45: ...go to the beginning of the 4th programme 4th index mark VIDEO INDEX SEARCH SYSTEM INDEX The VIDEO INDEX SEARCH SYSTEM INDEX enables you to locate the beginning of any recording made on the VCR The In...

Page 46: ...TS STEREO TV broadcasts When viewing an MTS STEREO TV program or playing a prerecorded VHS Hi Fi STEREO videotape press this button to select that the audio be heard through both speakers Normally set...

Page 47: ...MENU button again When the VCR is turned on or a channel selection is made make certain the SAP is appeared on the screen This means that the Separate Audio Program broad casting is available STEREO...

Page 48: ...VCR to another VCR or camcorder you can duplicate a previously recorded tape Make all connections before turning on the power Press the INPUT SELECT button twice to select AUDIO VIDEO input position...

Page 49: ...g use only good quality VHS tapes Discard worn out tapes VIDEO HEAD CLOGGING AUTO HEAD CLEANING NOTES Snowy Picture Good Picture The AUTO HEAD CLEANING system cleans the video heads automatically when...

Page 50: ...VCR indicator will light Press the INPUT SELECT button to select the TV mode Set the TV CATV menu option to select TV or CATV mode Place a piece of vinyl tape over the gap Press the INPUT SELECT butto...

Page 51: ...ynthesized VHF UHF CATV Channel 3 or 4 Switchable Video Audio Antenna 20Hz to 20 000Hz More than 90dB Approx 1 min 48 sec with T 120 Cassette Tape SP 3 5 X Normal Speed LP 7 9 X Normal Speed SLP 9 15...

Reviews: