24
3.
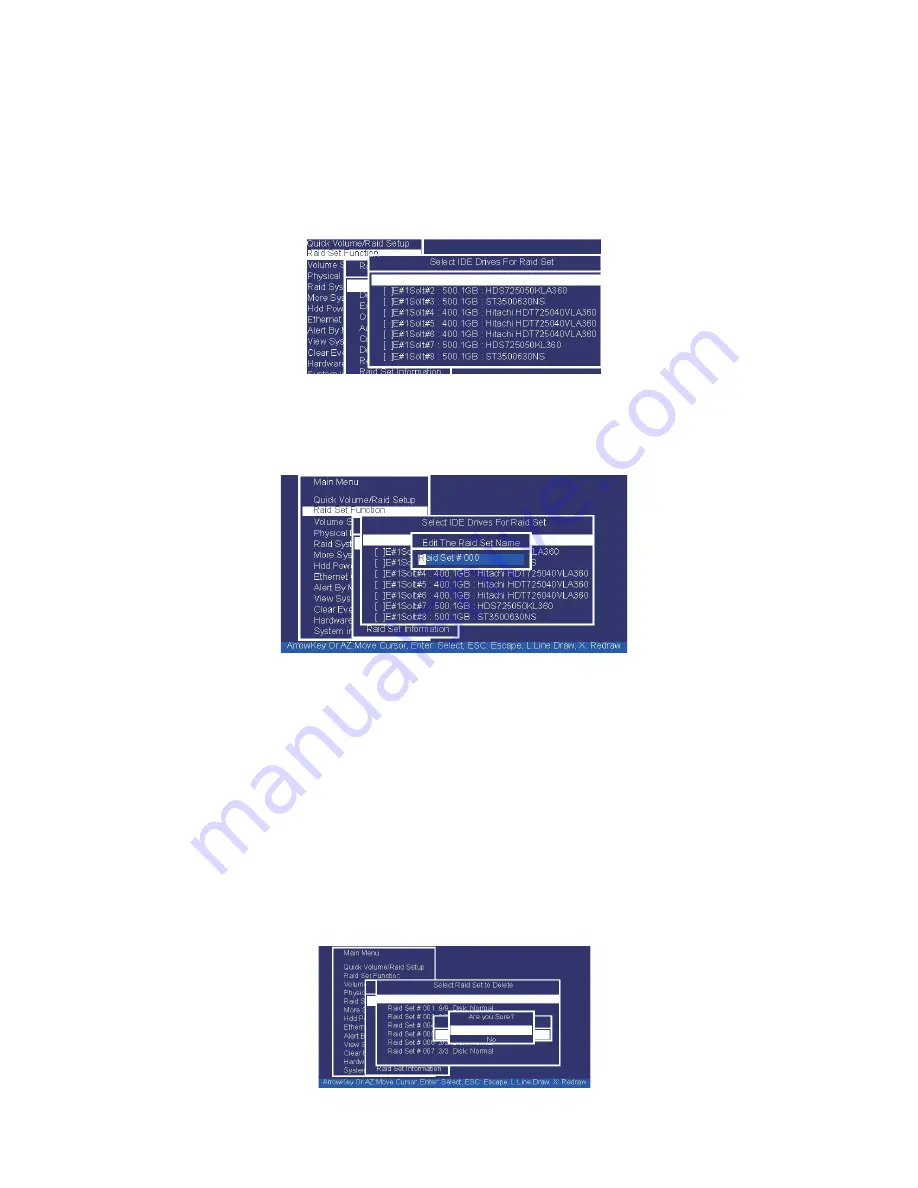
A “Select IDE Drive For Raid Set” window is displayed showing the SAS/SATA drives
connected to the current controller. Press the UP and DOWN arrow keys to select
specific physical drives. Press the Enter key to associate the selected physical drive with
the current RAID set. Repeat this step; the user can add as many disk drives as are
available to a single RAID set. When finished selecting SAS/SATA drives for RAID set,
press Esc key. A “Create Raid Set Confirmation” screen will appear, select the Yes option
to confirm it.
4.
An “Edit The Raid Set Name” dialog box appears. Enter 1 to 15 alphanumeric characters
to define a unique identifier for the RAID set. The default RAID set name will always
appear as Raid Set. #.
5.
Repeat steps 3 to define another RAID sets.
Note:
To create RAID 30/50/60 volume, you need create multiple RAID sets (up to 8 RAID sets)
first with the same disk numbers on each RAID set. The max no. disk drives per volume set is 32
for RAID 0/1/10/3/5/6 and 128 for RAID 30/50/60.
3.7.2.2.
Delete Raid Set
To completely erase and reconfigure a RAID set, you must first delete it and re-create the RAID
set. To delete a RAID set, select the RAID set number that you want to delete in the “Select Raid
Set To Delete” screen. Then “Delete Raid Set” dialog box will appear, press the Yes to delete it.
Warning, data on RAID set will be lost if this option is used. But for deleting RAID set with the
Raid 30/50/60 volume, firstly, you need to delete the volumes belong to those RAID sets.
Summary of Contents for ES208X12HP
Page 1: ......


