5.
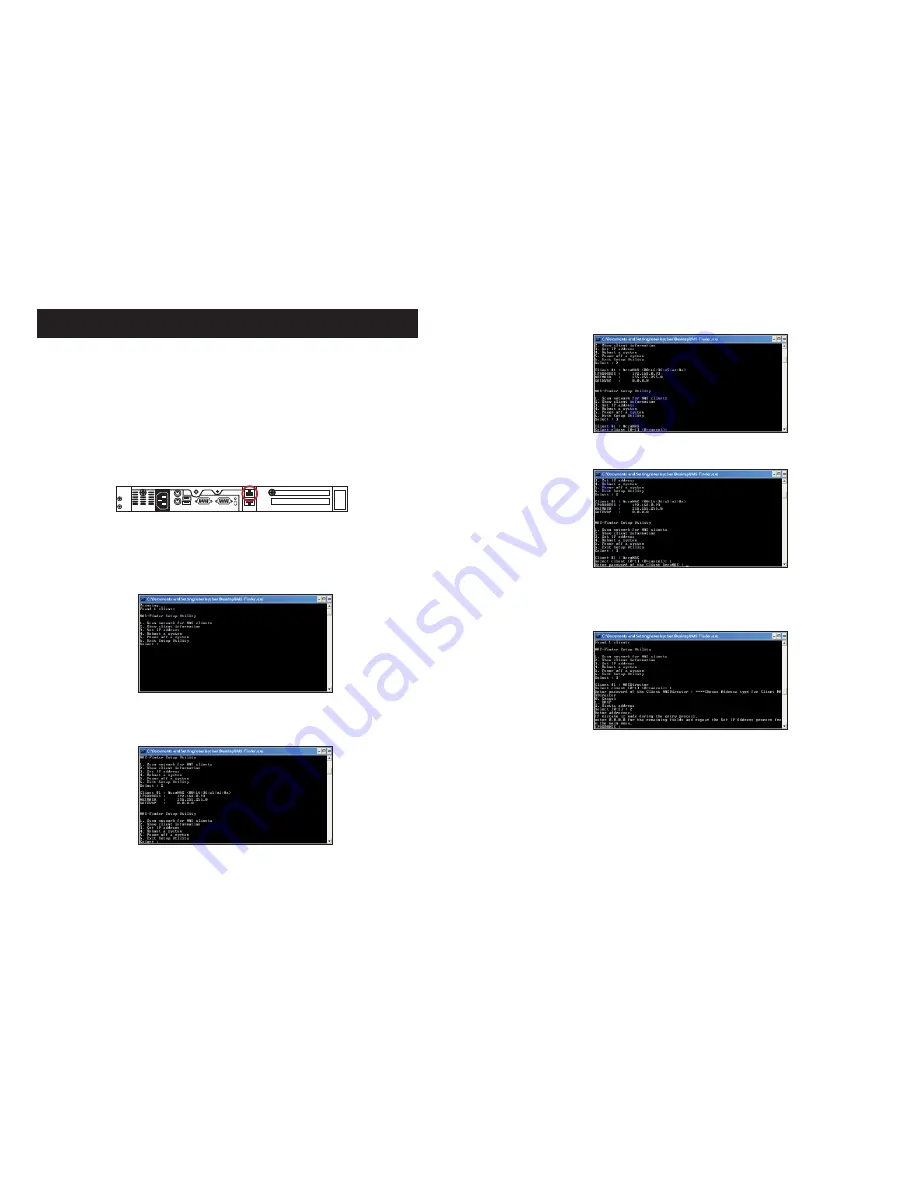
To setup the TCP/IP, type ‘3’ and press ‘enter’.
Enter ‘1’ to select Client #1: AN104LS or ‘0’ to cancel. Once selected, enter the
default password for the NAS unit: 0000 (4 zeros).
NOTE:
DHCP is pre-defined for LAN port-1. DHCP is used to quickly assign a local
IP to the NAS unit. Changing the IP address to a static IP address is strongly recom-
mended for daily operations.
Enter ‘2’ to change the IP address to a static IP address.
Enter an IP address, a Subnet Mask and a Gateway. When finished, the setup software
will return to the main menu. Select ‘4’ to reboot the unit.
NOTE: The unit must reboot in order for the new IP address to become
effective.
6.
The NAS-Finder Utility could also be used to reboot or power down a AccuNAS unit
within the network. From the main menu, selecting ‘4’ and ‘5’ respectively will perform
these actions. For security reasons, administrator password for each NAS unit must
be entered to execute the command. An incorrect password will result in “Reboot
failed” or “Power Down Failed” errors and the Utility will return to the main menu.
7.
To exit from the NAS-Finder Utility, select ‘6’ from the main menu.
INTEGRATION AND SETUP
DEFAULT SETTINGS:
LAN Port#1 IP address:
DHCP
Administrator
Username:
root
Password:
0000
(4 zeros)
INITIAL SETUP – Assigning IP to the Unit
1.
Connect the NAS unit to your network (connect the RJ45 network cable to the LAN
port 1 as shown in the diagram below), power the unit on and allow it approximately
two (2) minutes to boot up.
2.
Go to a computer that connected to the same network as the NAS unit. Insert the in-
cluded AN104LS CD into the CD-ROM drive of the computer. Copy the “NAS-Finder.
exe” to the computer and run “NAS-Finder.exe” to locate the NAS unit. This software
will allow you to assign an IP address to the NAS unit.
3.
After executing the NAS-FINDER program, a DOS dialog box will appear with the
main menu.
4.
To view client (NAS unit) information, typing ‘2’ within the main menu and press
‘enter’. The dialog box will display each detected NAS unit along with their network
settings. A number is assigned to each detected unit, starting from #1. In the example
below, Client #1, AN104LS is detected, with IP address 192.168.0.93.
NOTE:
Information, such as MAC address, IP address, NETMASK and etc, may be
different from system to system.
7
8


