background image

Table of contents

Important safety instructions ............................................ 2-3
Controls ........................................................................... 4-6
Operating your radio – Search tuning AM / FM .................... 8
Manual tuning – AM / FM / Setting up the tuning step incre-

ment ............................................................................... 9-10
FM stereo / mono .............................................................. 11
Presetting stations / Recalling preset station ............... 12-13
Setting the clock manually / Setting the time format .... 14-15
Display and Audio ............................................................. 16
Information ........................................................................ 17

Summary of Contents for PR-D9CL

Page 1: ...GB Version 1 PR D9CL...

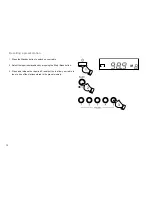
Page 2: ...perating your radio Search tuning AM FM 8 Manual tuning AM FM Setting up the tuning step incre ment 9 10 FM stereo mono 11 Presetting stations Recalling preset station 12 13 Setting the clock manually...

Page 3: ...w through the ventilation openings 9 10 11 12 13 Power sources The radio should be operated only from the type of power source indicated on the marking label If you are not sure of the type of power s...

Page 4: ...points or short out parts that could result in a fire or electric shock Never spill liquid of any kind of product The appliance should be serviced by qualified service personnel when A The power suppl...

Page 5: ...6 7 8 9 Speaker Band step button LCD display Backlight Display Stereo mono Volume down Volume up Standby Lock switch 10 11 12 13 14 15 16 17 Tuning up Tuning down Scan Clock time Preset 5 Preset 4 Pre...

Page 6: ...18 FM antenna 19 Headphone jack 20 DC in socket 21 Battery compartment Controls...

Page 7: ...GB Display icon A B C D E F G H I Stereo indicator Lock switch icon Volume icon Battery capacity indicator Memory preset FM 50kHz display Time indicator Frequency display AM FM band icon PM display...

Page 8: ...on flashing on the display are all signs that the batteries need replacing 5 If the radio is not to be used for any extended period of time it is recommended that the batteries are removed from the ra...

Page 9: ...radio will scan in an upwards direction low frequency to high frequency and stop automatically when it finds a station of sufficient strength 4 Press the Scan button or any other buttons not included...

Page 10: ...r best reception 3 Press and release the Tuning up down button to tune to a station The FM frequency will change in steps of 100 200kHz and AM frequency will change in steps of 9 10kHz 4 When the wave...

Page 11: ...ng begins to flash 3 Press the Tuning Up Down buttons to select either 100kHz or 200kHz for FM radio and press and release the Band step button to confirm the setting And the AM tuning step setting wi...

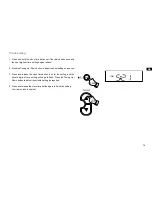
Page 12: ...FM stations as previously described 2 The display will show the current setting of the station being listened to The stereo indicator will show on the LCD display when the FM station tuned to has ste...

Page 13: ...tions are preserved in the event of a power failure 1 Press the Standby button to switch on your radio 2 Tune to the required station as previously described 3 Press and hold the required Preset butto...

Page 14: ...ress the Standby button to switch on your radio 2 Select the required waveband by pressing the Step Band button 3 Press and release the required Preset button to allow your radio to tune to one of the...

Page 15: ...the Tuning Up Down button to adjust the hour setting as required 3 Press and release the clock time button to enter the setting and the minute digits of time setting will begin to flash Press theTunin...

Page 16: ...he radio beep once and the display will show Software version 2 Keep pressing and holding the Band step button FM tuning step setting will flash Press and release the Band step button to enter AM tuni...

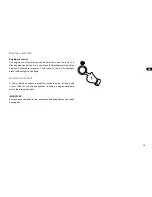
Page 17: ...the display will iluuminate for approx 10 seconds To turn off the backlight press the Backlight button again Headphone socket A 3 5mm stereo headphone socket is provided on the left hand side of your...

Page 18: ...in 6V 0 4 A Frequency Range FM 87 5 108 MHz AM 520 1710 kHz USA version Battery 4 X 1 5V Size AA UM 3 LR6 Circuit Features Loudspeaker Output Power Headphone socket Aerial System 2 25 8 ohm full rang...

Reviews: