03
GB
F
E
NL
D
Before you insert the batteries, if you use non-rechargeable
batteries, make sure the NiMH / NiCad / Alkaline switch
which located inside the battery compartment is
switched to Alkaline position. If you use rechargeable
batteries, make sure to switch NiMH / NiCad / Alkaline
switch to NiMH / NiCad postion.
NOTE
2.
Insert four LR6 (AA size) batteries into the spaces in
the compartment. Take care to ensure all batteries are
inserted with the correct polarity as shown on the rear
of your recorder. Close the battery compartment door.
3.
When the battery capacity drops below a certain level
the low battery indicator will light. When you see this
indicator you should change the batteries as soon as it
is convenient to do so. Reduced power, distortion and a
“stuttering” sound are also signs that the batteries may
need replacing.
4.
If the recorder is not to be used for any extended
period of time it is recommended that the batteries are
removed from the recorder.
We would recommend for economy that the DAR-101
is used via the mains adaptor whenever possible with
battery operation for occasional or stand-by use only.
The batteries should not be exposed to excessive heat
such as sunshine, fire or the like. After use, disposable
batteries should if possible be taken to a suitable
recycling center. On no account should batteries be
disposed of by incineration.
IMPORTANT
Using the AC adaptor
Your recorder is supplied with a Mains Adaptor.
1.
Place your recorder on a flat surface.
2.
Insert the adaptor plug into the AC socket located on
the right handside of the rear panel.
3.
Plug the adaptor into a mains socket outlet. Whenever
the adaptor isused, the batteries are automatically
disconnected.
The AC adaptor should be disconnected from the
mains supply and the recorder when not in use.
1.
The mains adaptor is used as the means of
connecting the recorder to the mains supply. The
mains socket used for the recorder must remain
accessible during normal use. In order to disconnect
the recorder from the mains completely, the mains
adaptor should be removed from the mains socket
outlet completely.
2.
Noise may occur when recording with a microphone
if the unit is too close to the AC adaptor. In such
a case, keep sufficient distance between the AC
adaptor and the unit.
3.
When both batteries are installed and the AC adaptor is
connected, power will be supplied from the AC adaptor.
IMPORTANT
Charging the batteries
Reduced power, distortion and a “stuttering sound” or
low battery sign “
” flashing on the display are all the
signs that the batteries need to be recharged if you use
rechargeable batteries to power the recorder.
The batteries can be charged only when the recorder
is off. Be sure the battery type switch is set to NiMH /
NiCad position. Charge new batteries fully the first time
before first use. This can take longer depending on the
capacity of the rechargeable batteries.
NOTE
Do not use a mix of old and new rechargeable batteries.
Do not use a mix of full and empty rechargeable batteries.
Do not use batteries that have a different mAh capacity.
Do not use damaged or leaking batteries.
Setting the Clock and Date
Setting the clock time
It is important to set the clock time / date before
recording, as all the name of recorded files are created
based on the recording time and date.
NOTE
The clock display of DAR-101 can be set to 12 or 24 hour
format.
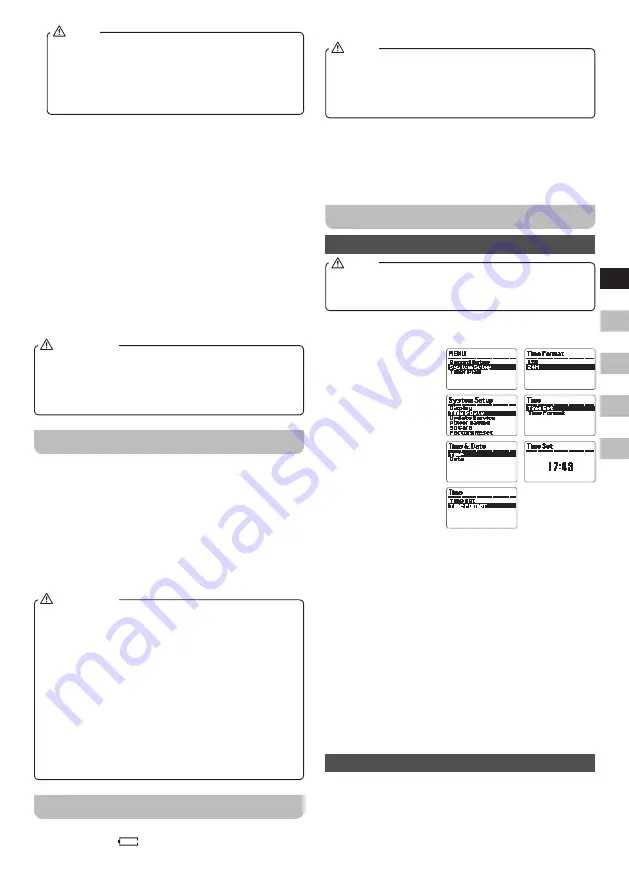
1.
Press the Menu button
while the recorder is
switched on.
2.
Rotate the Tuning
control until SYSTEM
SETUP is highlighted,
and press the Enter
button to enter the
setting.
3.
Rotate the Tuning
control until TIME &
DATE is highlighted,
and press the Enter
button to enter the
setting. Rotate the
Tuning control until TIME is highlighted, and press the
Enter button to enter the setting.
4.
Rotate the Tuning control until TIME FORMAT is
highlighted, and press the Enter button to enter the
setting. Rotate the Tuning control to select either 12
or 24 hour format as desired. Press the Enter button
to confirm the setting, and the display will revert to the
previous setting.
5.
Rotate the Tuning control until TIME SET is highlighted,
then press the Enter button to enter the setting. While
the hour digit is flashing, rotate the Tuning control to
select the appropriate hour as shown on the display.
Press the Enter button when you finish the setting.
6.
Rotate the Tuning control to select the appropriate
minute as shown on the display while the minute digit is
flashing. Press the Enter button to confirm the setting.
Setting the date
1.
Press the Menu button while the recorder is switched
on.
2.
Rotate the Tuning control until SYSTEM SETUP is
highlighted, and press the Enter button to enter the
setting.
Summary of Contents for DAR-101
Page 1: ...DAR 101 Revision 2 GB...


