13
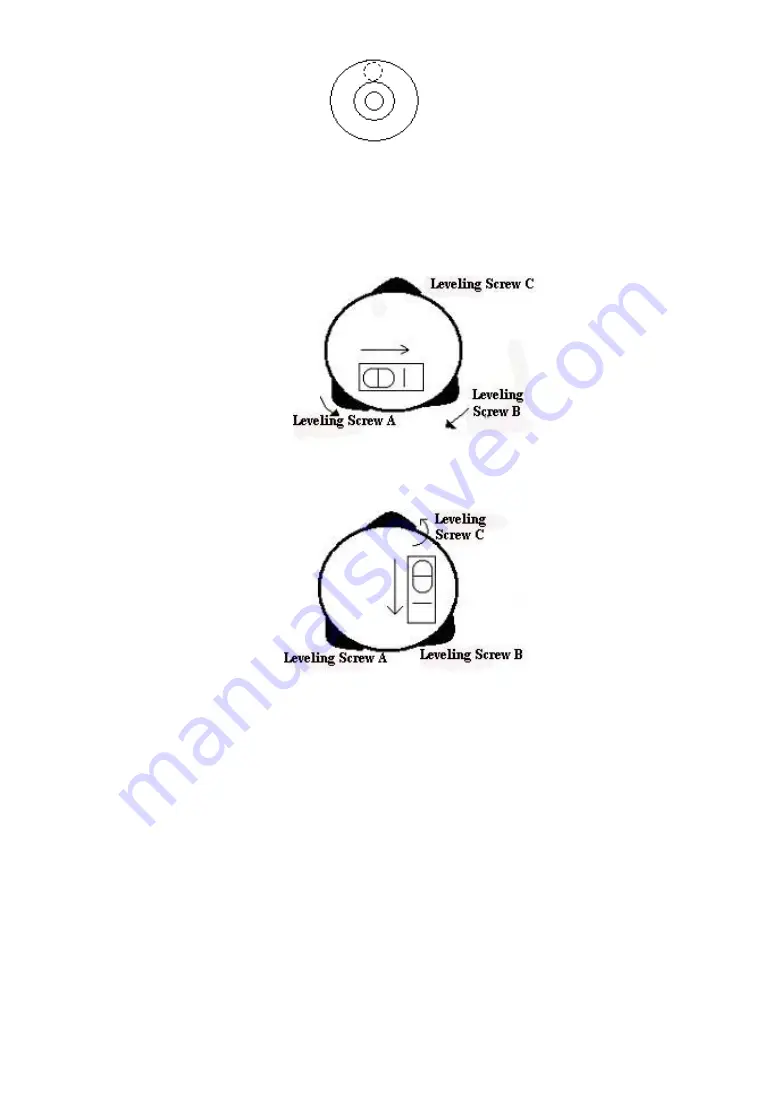
4) Precisely leveling by using the plate vial
①
Rotate the instrument horizontally by loosening the Horizontal Clamp Screw
and place the plate vial parallel to the line connecting leveling screw A and B,
and then bring the bubble to the center of the plate vial by turning the leveling
screws A and B.
②
Rotate the instrument 90º(100g) around its vertical axis and turn the remaining
leveling screw or leveling C to center the bubble once more.
③
Repeat the steps
①②
for each 90º(100g) rotation of the instrument and
check whether the bubble is correctly centered in all directions.
b. Center by using the optical plummet
1) Set tripod
Lift tripod to suitable height, ensure equal length of three legs, spread and make
tripod head parallel to the ground, and place it right above the measurement
station point. Prop up tripod on the ground and fix one leg.
2) Install instrument and collimate the point
Set instrument carefully on tripod, tighten the central connecting screw and
adjust optical plummet to make the reticle distinctly. Hold the other two unfixed
legs with both hands and adjust position of these two legs through observation of
optical plummet. As it approximately aims at the station point, make all three
legs fixed on the ground. Adjust three leg screws of the instrument to make
optical plummet collimate precisely to the station point.
Summary of Contents for STS-752RC
Page 1: ......
Page 12: ...11 1 8 MENU TREE Menu F1 F4 Confirms the selected menu Press PAGE to view the next page...
Page 152: ......


