Samsung Electronics
3-5
Setting Playlist
Listening to FM Radio
Recording FM
1
Press the NAVI button to move to Navigation
mode.
2
Move to the file you want and press the A
↔
B
button.
●
The selected file will be marked and added to
[playlist]
→
[MYLIST].
Press the MENU button in the MUSIC mode and
select Playlist to view [MYLIST].
●
To exit the playlist setting, move to the marked file in
Navigation mode and press the A
↔
B button again.
I
Setting Playlist
1
Press and hold the MENU button to move to
Menu and then select the playlist from the
menu.
●
The playlist(s) you set will be displayed.
2
Move to the playlist you want and press the
NAVI button.
●
The selected playlist will be played.
I
Playing Playlist
Navigation
ROOT
02-Come with..
02-Hollywood..
04-Tears in H....
05-Smooth (F...
01-American L..
MYLIST.SPL+
A
↔
B
Playlist
MYLIST.SPL
Back
❙
œœ
Press and hold the “MENU” button.
Select FM Radio from Menu and then press the NAVI button.
I
Switching to FM Radio Mode
KOREA/US
14
12:58 AM
89.1MHz
STEREO MANUAL
Preset Mode
NAVI
87.5MHz 108.0MHz
Setting Main Functions in FM Mode
●
You can manually preset desired FM frequencies.
●
You can store up to 30 frequencies.
1
Press the MENU button in the FM mode.
2
Move to [Add to Preset] and press the NAVI button.
●
The current frequency is added to preset.
I
Add to Preset
1
Press the MENU button in
the FM mode.
2
Move to [Auto Preset] and
press the NAVI button.
●
Frequencies are automatically
stored, starting from 1.
I
Auto Preset
Preset Mode
KOREA/US
07
87.5MHz 108.0MHz
01:41 AM
105.8MHz
Auto Searching..
STEREO MANUAL
NAVI
KOREA/US
14
12:58 AM
89.1MHz
STEREO MANUAL
Preset Mode
NAVI
KOREA/US
14
12:58 AM
89.1MHz
STEREO MANUAL
Preset Mode
NAVI
Add to Preset
Auto Preset
FM Region
FM Search Level
Timer FM Rec.
01
02
03
04
05
06
07
Add to Preset
Auto Preset
FM Region
FM Search Level
Timer FM Rec.
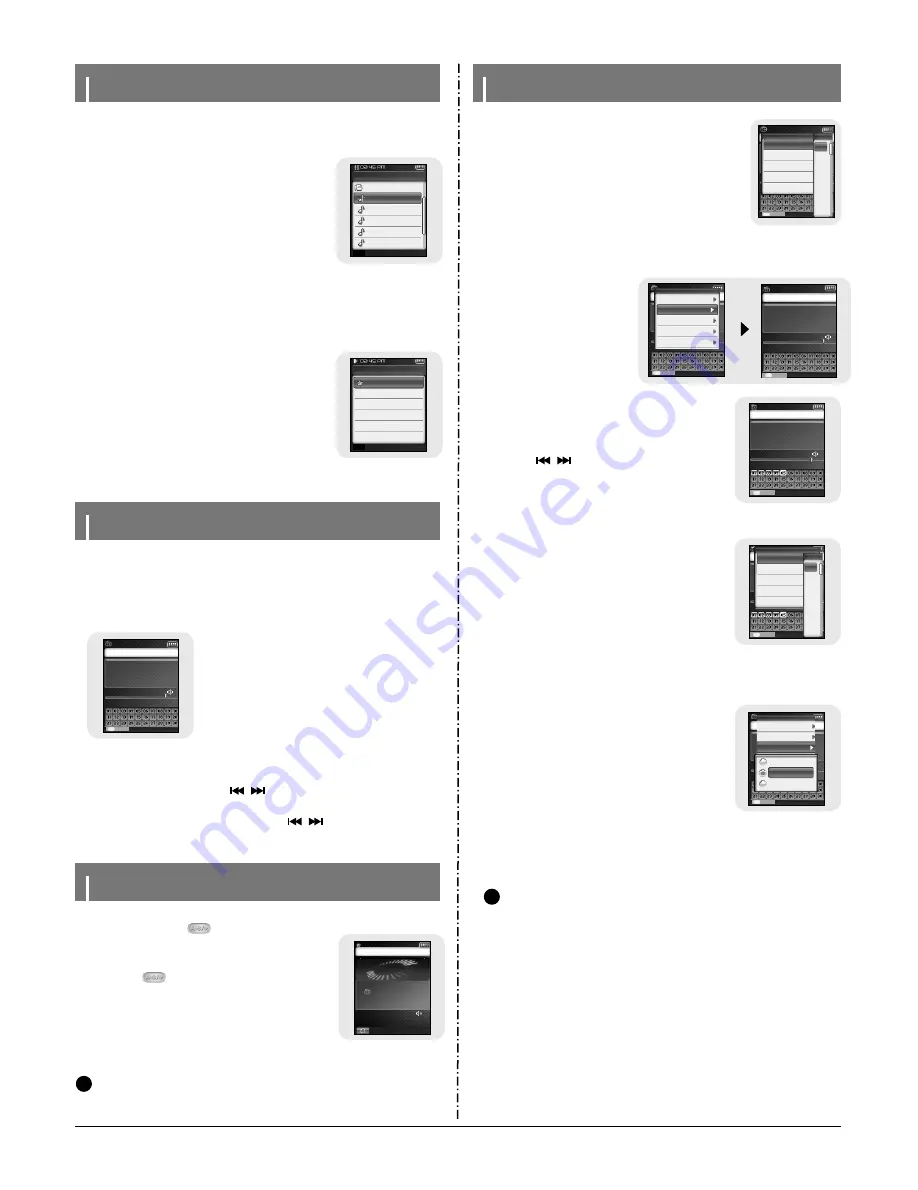
1
Press and hold the NAVI button in the FM mode.
●
Move to the preset mode.
2
Use the
,
button to move to
the preset number you want.
I
Searching Preset
Manual Mode
K O R E A / U S
0 7
87.5MHz 108.0MHz
01:41 AM
106.1MHz
STEREO PRESET
N A V I
1
Press the MENU button in the FM mode.
2
Move to [FM Region] and press the NAVI button.
3
Move your FM region and press the NAVI but-
ton.
●
U.S/Korea : Search FM frequencies between 87.5MHz
to 108.0MHz in increments of 100 kHz.
●
Japan: Search FM frequencies between 76.0MHz to
108.0MHz in increments of 100 kHz.
●
Other Countries : Search FM frequencies between
87.50MHz to 108.00MHz in incre-
ments of 50 kHz.
I
FM Region
N
N
N
o
o
t
t
e
e
- The default FM region setting may vary depending on the target region of the player.
✍
KOREA/US
14
12:58 AM
89.1MHz
STEREO MANUAL
Preset Mode
NAVI
Add to Preset
Auto Preset
FM Region
FM Search Level
Timer FM Rec.
Korea/US
Japan
Other Country
1
Press and hold the NAVI button in the FM mode.
●
Move to the preset mode.
2
Move to [Delete Preset] and press the NAVI but-
ton.
3
After moving to the preset number you want to
delete, press the NAVI button.
●
The saved preset number will be deleted.
I
Delete Preset
Manual Mode
K O R E A / U S
0 7
87.5MHz 108.0MHz
01:41 AM
106.1MHz
STEREO PRESET
N A V I
89.1MHz
Delete Preset
Auto Preset
FM Region
FM Search Level
Timer FM Rec.
01
02
03
04
05
06
07
●
Manual Search: Press the
,
buttons to
change the frequency up or down.
●
Automatic Search: Press and hold the
,
buttons
to automatically search for receiving frequencies.
I
Search for a Frequency
1
Press and hold the
button while receiving FM.
●
Recording of the current FM frequency begins.
2
Press the
button again.
●
A recording file is created and the recording stops.
●
Files are recorded in the order F****001, F****002....
and saved as MP3 files in [RECORDED]
→
[FM].
3
When the Confirm screen appears, select [Yes] or
[No].
●
When selecting [Yes], the recorded file will be played.
N
N
o
o
t
t
e
e
- Beeps are disabled while recording.
- You can record FM broadcast only at 64kbps.
✍
F O413001.M P 3
87.5MHz
Recording..
MP3 128Kbps 14
O N - A I R R E C O R D I N G
00:00:28
S t o p
0 0 : 5 0 A M
Summary of Contents for YP-T8
Page 26: ...5 4 Samsung Electronics 12 Disassembled parts Order Description Picture ...
Page 27: ...Samsung Electronics 6 1 6 Troubleshooting 1 It keeps being turned off ...
Page 28: ...6 2 Samsung Electronics 2 No Sound can be heard ...
Page 29: ...Samsung Electronics 6 3 3 when you cannot record LINE IN signal ...
Page 30: ...6 4 Samsung Electronics 4 It can not record voice ...
Page 31: ...Samsung Electronics 6 5 5 The buttons does not work ...
Page 32: ...6 6 Samsung Electronics 6 When you cannot connect the player to the PC ...
Page 39: ...Samsung Electronics 9 1 9 Block Diagram ...
Page 40: ...Samsung Electronics 10 1 10 Wiring Diagram ...
Page 42: ...11 2 Samsung Electronics This Document can be used without Samsung s authorization 2 Bottom ...
Page 43: ... 11 3 This Document can be used without Samsung s authorization 3 SUB ...
Page 46: ...Samsung Electronics 12 3 ...
Page 49: ...14 2 Samsung Electronics Yepp Block Diagram ...
Page 57: ...14 10 Samsung Electronics Small Form factor Cards Comparison ...


