46
ENG
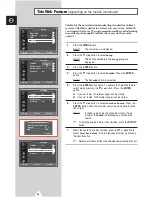
DVR converts analog video and sound signal to digital signal and
saves to HDD.
1
Press the
MENU
button.
Result:
The main menu is displayed.
2
Press the
†
or
…
button to select
DVR
. Press the
ENTER
button.
Result:
The options available in the
DVR
group are displayed
with the
Power On Record
selected.
3
Press the
ENTER
button again. Select
On
by pressing the
†
or
…
button. Press the
ENTER
button.
- On :
DVR will turn ON at the same time as the power for the
TV (Standby Indicator: Orange color will be lit up).
- Off :
Default is
Off
. Only the TV will turn ON when power is
supplied.
4
Press the
†
or
…
button to select
Timer Record
. Press the
ENTER
button.
Result:
The options available in the
Timer Record
group are
displayed.
➢
If you have not yet set the clock, the message
Set the
clock first
is displayed, and then the
Clock
menu is
displayed to set the clock.
5
You can set the month, date, time, and channel for timer recording.
Select the
Prog.No
,
Month
,
Date
,
Start
,
Stop
or
Store
by pressing
the
œ
or
√
button. Set these by pressing the
†
or
…
button.
◆
Prog.No :
Set to required channel.
◆
Month
/
Date :
Set to record start month and date.
◆
Start :
Set to record start time (hour and minute).
◆
Stop :
Set to record stop time (hour and minute).
➢
◆
You can also set the
Prog.No
,
Month
,
Date
,
Start
and
Stop
directly by using the numeric buttons.
◆
A warning notice will be displayed if the recording time
overlaps with another program.
➠
Time-conflict
with another programme!!. Please refer to
Programme List.
6
Press the
†
or
…
button to select
Record List
. Press the
ENTER
button.
Result:
The timer record lists are displayed.
➢
◆
If you have not yet set the timer record, you can not
enter.
◆
The items for which recording has finished or been
stopped will be automatically deleted from the
Record
List
.
7
To delete the record list, select the required list and press the
Red
button.
DVR (Digital Video Recorder) Feature
Power On Record : Off
√
√
Timer Record
√
√
Record List
√
√
DVR
Move
Enter
Return
Off
On
Power On Record : Off
√
√
Timer Record
√
√
Record List
√
√
DVR
Move
Enter
Return
Power On Record : Off
√
√
Timer Record
√
√
Record List
√
√
DVR
Move
Enter
Return
Timer Record
Move
Enter
Return
Prog. No
P 1
Month
Date
2
14
Start
Stop
Store
20 30
21 30
?
Record List
Move
Erase
Return
01 *
02, 14 20:30
21:30
03 *
02, 15 17:30
18:20
04 *
02, 16 18:00
21:40
Prog. No
Date
Start
Stop


