background image

21

20

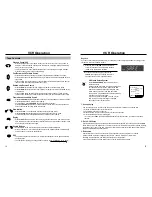
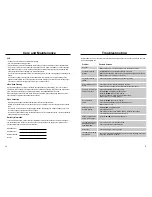
Problem

No power

A cassette cannot be
inserted. 

A cassette cannot be 
ejected.

A timer recording did not
record. 

No picture, or a distorted
picture on playback

No TV broadcast 
picture

Streaks (noise) on a
recorded program

Streaks or jitter with the
VCR in P/STILL mode

The VCR will not PLAY,
RECORD, REWIND or
FAST FORWARD 

No function

The VCR will not rewind
automatically

Possible Solution

• Make sure the VCR is on and plugged into an operating wall outlet. 

• Press EJECT to see if a cassette is already in the VCR. 
• Make sure the cassette is window side up, with the arrow facing toward the VCR.
• Make sure the VCR is not in Key Lock mode. 

• Check if the VCR is in stand-by mode for timer recording.

• Check that your Timer Record settings are accurate.
• Check if there was a power failure or broadcast scheduling change.

• Check if the cassette recorded any picture. 
• Press CH/TRK to adjust the playback picture.
• Press the TV/VCR button for VCR viewing. 
• Set the TV channel to match the VCR Output channel. 
• Make sure the TV is working properly.

• Press the TV/VCR button for TV viewing. 
• Check all cabling between VCR Antenna/Cable and TV. 
• Make sure the TV is on.

• Press CH/TRK to adjust the picture. 
• Check all connections. 
• View another cassette. If the problem persists, clean the video heads. 
• Copy protection schemes can distort the picture. 

• Press the CH/TRK button to adjust the picture.

• Check if the VCR is in record pause mode. 
• Check if the cassette has been rewound.

• Check if the VCR is in Key Lock mode.

• The VCR will not rewind autonatically to protect the tape according to the kinds

of the tape. Press REW to rewind.

Before calling for service, check this list of possible problems and solutions to see if the problem can be solved

with a simple adjustment. 

Troubleshooting

VCR

• Unplug your VCR from the wall outlet before cleaning.
• Use a dry cloth when dusting your VCR.
• Proper ventilation ensures that overheating will not damage electronic circuits. Don’t block ventilation holes. 
• Take care of your remote control. Keep the remote with your VCR, where it is unlikely to be lost or damaged.
• Keep liquids away from your VCR, including beverages and cleaning liquids. Spilling any liquid on the VCR

can damage the electronics, resulting in an electric shock or fire.

• Do not use liquid or aerosol cleaners that can accidentally get into the VCR, causing damage or creating a fire

hazard.

• Do not allow any object to be pushed into the cabinet slots. This includes coins, dusters, cleaning cloths,

papers and other objects. Any such objects can connect with a voltage point inside the VCR, causing danger-
ous shocks, or may short out parts and cause a fire or an electric shock.

Video Head Cleaning

If poor pictures appear on a variety of cassettes, the video heads may need cleaning. This is not a common
problem and unless it appears, the heads should not be cleaned. If necessary, purchase a head-cleaning cas-
sette. If the picture quality does not improve after cleaning, call 1-800-SAMSUNG for service.

When cleaning the video heads, read all the instructions provided with the head-cleaning cassette. Incorrect
head cleaning can permanently damage the video heads.

Video Cassettes

• High quality, brand-name cassettes often last longer and provide a better picture.
• Rewind your cassettes all the way so that the tape is not at a midpoint. This can extend the life of a cassette

tape.

• Do not touch or splice the tape. This can damage the tape, and playing such a tape can damage your VCR.

Do not take apart any cassette you plan to use again. 

• Do not put any object inside a video cassette case and do not clean inside the cassette. This can permanently

damage the tape, making it unusable.

Warranty Information

To ensure proper warranty,  please return your registration card within two weeks. Record the model number
and serial number from the back of the VCR and the date of purchase in the space on the right. Keep your 
purchase receipt with this manual for easy reference.

Model Number

Serial Number

Date Purchased

Dealer

Care and Maintenance

Summary of Contents for VR5260

Page 1: ...he ENERGY STAR guidelines for energy efficiency Features Hi Fi Stereo sound VR8260 only Plug and Play 24 Hours x 7 Days Timer Back up Record File Recording information storage and display 400x Rewind Rewinds a T 120 in about 1 minute One Touch Recording OTR up to four hours Tri lingual on screen programming English Spanish French Auto Clock Set Auto Line Input Detect ...

Page 2: ...djustment of other controls may result in damage and will often require extensive work by a qualified technician to restore the product to its normal operation e If the product has been dropped or damaged in any way f When the product exhibits a distinct change in performance this indicates a need for service 22 Replacement Parts When replacement parts are required be sure the service technician h...

Page 3: ...move a cursor to the left on the menu screen 10 CHANNEL Press to change channels or press to move a cursor up or down on the menu screen 11 LINE IN Input signal from another VCR or camcorder Model VR5260 has only one AUDIO LINE IN jack VCR TIMER Front Panel and Display Check to make sure the following items have been included with your VCR Accessories 1 2 3 4 5 POWER TV VCR SHUTTLE PSC SLOW F ADV ...

Page 4: ...LE Press to change speed during playback NUMBER BUTTONS Press to select channels by assigned numbers PSC Press to adjust the sharpness of the image during playback F ADV SKIP In play mode press to skip ahead 30 seconds In still mode press to advance one frame REC Press to start VCR recording STOP PLAY REW FF Press to control cassette playback or to move a cursor in the on screen menu MENU Press to...

Page 5: ...TV channel to the output channel of the cable box Premium Cable TV Connection 2 This set up will enable you to Record an unscrambled channel Watch an unscrambled channel while recording it Record an unscrambled channel while watching another scrambled or unscrambled You will need to Set TV channel to the output channel of the cable box Turn on the cable box and select cable channel 3 according to ...

Page 6: ... the time does not set within 20 minutes set the time and date manually VCR Setup Timer recording Clock set adjust Channel setup VCR function setup Language Lengua Langue MENU EXIT AUTO MANUAL Select and press MENU EXIT Clock data CH AUTO Time zone AUTO Do you observe AUTO DST in summer MENU EXIT MAIN MENU CLOCK SET ADJUST CLOCK SET ADJUST 1 Press the MENU button on your remote control The Main Me...

Page 7: ...d or delete channels that have been memorized with the Automatic Channel Memory function The Auto Channel Memory function must be performed before Channel Add Delete can be used Note A deleted channel can be accessed with the number buttons but the CH TRK buttons skip past it To add the LINE input to channel memory select LINE using the INPUT SEL button on the remote control then press button on t...

Page 8: ...is poor select MONO for sound without noise To Record SAP Programs 2 Press in the AUDIO output on the menu until SAP is displayed on screen SAP will be displayed on the TV screen when a SAP broadcast is received Press the REC button for SAP recording When MAIN is displayed stereo is selected Selecting Playback Sound with Hi Fi Tapes 3 During playback select AUDIO output to set the Audio to Hi Fi L...

Page 9: ... off to 1Hr or 2Hr Auto power off sets the VCR to turn off automatically Note VCR will shut off 1 or 2 hours after the last button is pressed Record speed SP Audio output MAIN Tape length T120 Auto play ON Auto repeat OFF Auto power off OFF VCR output CH 3CH MENU EXIT Record speed SP Audio output MAIN Tape length T120 Auto play ON Auto repeat OFF Auto power off OFF VCR output CH 3CH MENU EXIT Reco...

Page 10: ...till Press the PLAY button on the remote control or on the front of the VCR to play a video If Auto play is selected and the video tape has no safety tab it will begin playing automatically when you insert it in the VCR In play or slow motion mode press the STILL button to stop the tape on a single still frame Press the button again to resume normal viewing Fast Forward and Forward Search Press th...

Page 11: ...ime Press once Record Not timed Press 2 times R 0 30 30mins Press 3 times R 1 00 1 hour Press 4 times R 1 30 1 hour 30 mins Press 5 times R 2 00 2 hours Press 6 times R 3 00 3 hours Press 7 times R 4 00 4 hours Press 8 times Record Not timed One Touch Recording OTR Record length 0 30 11 SP VCR Operation 16 Accessing the DISPLAY screen 1 Press the DISPLAY button while the cassette is playing or rec...

Page 12: ... you are not sure the tape is long enough for timer program recording in the SP tape speed set the recording tape speed to AUTO Recording starts in the SP tape speed If the tape length is not long enough the tape speed automatically changes from SP to SLP Daily Weekly Date Programming Weekly SUN S SAT S You can record TV programs on the same channel at the same time every week Daily MO FR You can ...

Page 13: ... not damage electronic circuits Don t block ventilation holes Take care of your remote control Keep the remote with your VCR where it is unlikely to be lost or damaged Keep liquids away from your VCR including beverages and cleaning liquids Spilling any liquid on the VCR can damage the electronics resulting in an electric shock or fire Do not use liquid or aerosol cleaners that can accidentally ge...

Page 14: ...iga este diagrama para conectar el VCR a un básico de TV por cable con un cable coaxial de 75 ohms Conexión para ver los canales pagos Con caja decodificadora Algunas compañías de TV por cable proporcio nan una caja decodificadora para descifrar o decodificar los canales pagos y o los canales básicios Siga el diagrama para conectar el VCR auna caja decodificadora Coloque el interruptor de Canal de...

Page 15: ...e e g g e e g g e e g g e e g g e e g g e e g g e e g g e e g g e e g g e e g g e e g g e e g g e e g g e e g g e e g g e e g g e e g g e e g g e e g g e e g g e e g g e e g g e e g g e e g g e e g g e e g g e e g g e e g g e e g g e e g g e e g g e e g g e e g g e e g g e e g g e e g g e e g g e e g g e e g g e e g g e e g g e e g g e e g g e e g g e e g g e e g g e e g g e e g g e e g g e e g g ...

Page 16: ...g g e e g g e e g g e e g g e e g g e e g g e e g g e e g g e e g g e e g g e e g g e e g g e e g g e e g g e e g g e e g g e e g g e e g g e e g g e e g g e e g g e e g g e e g g e e g g e e g g e e g g e e g g e e g g e e g g e e g g e e g g e e g g e e g g e e g g e e g g e e g g e e g g e e g g e e g g e e g g e e g g e e g g e e g g e e g g e e g g e e g g e e g g e e g g e e g g e e g g e e ...

Reviews: