English _
17
BASIC HD CAMCORDER OPERATION
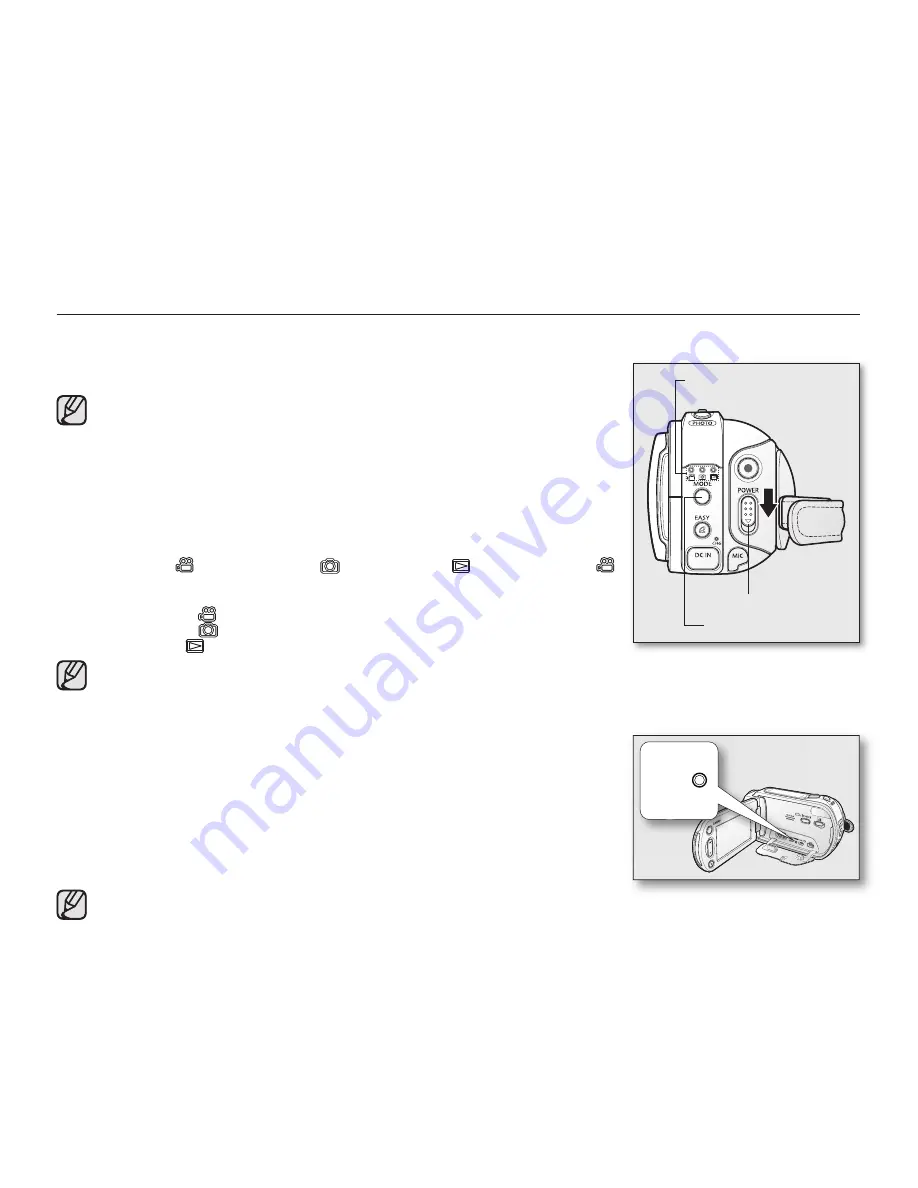
Set the appropriate operation mode according to your preference using the
POWER
switch and
MODE
button.
Turning the HD camcorder on and off
You can turn the camcorder on or off by sliding the
POWER
switch downward.
• Set the date and time when using your HD camcorder for the first time.
page 25
• When you use your HD camcorder for the first time or you reset it, you will
see the “
Date/Time Set
” menu for the startup display. If you do not set
the date and time, the date and time setting screen appears every time
you turn on your camcorder.
Setting the operating modes
• You can switch the operating mode in the following order each time you press
the
MODE
button.
Movie mode (
)
Photo mode (
)
Play mode (
)
Movie mode (
)
• Each time the operational mode changes, the respective mode indicator
lights up.
- Movie mode (
): To record movie images.
page 31
- Photo mode (
): To record photo images.
page 33
- Play mode (
): To play movie or photo images, or edit them.
page 38
• When the HD camcorder is turned on, the self-diagnosis function
operates and a message may appear. In this case, refer to “Warning
indicators and messages” (on pages 96-99) and take corrective action.
• Movie mode is set by default with the power on.
System Reset
If the HD camcorder does not operate normally, perform “System Reset”: The HD
camcorder may recover to normal. “System Reset” will reset all settings to factory
defaults. The date and time will also be reset: Set the date and time again before
using the HD camcorder.
1.
Turn the HD camcorder off.
• Remove the battery pack or AC adaptor.
2.
Use a fine tipped pen to hold down the
RESET
button.
• All settings will be reset.
Do not press the
RESET
button with undue force.
MODE
button
POWER
switch
Mode indicator
�����


