


7
Tape Playback
✤
The playback function works in PLAYER mode only.
Playback on the LCD monitor
✤
It is practical to view a tape using the LCD monitor when in a car or outdoors.
Playback on a TV monitor
✤
To play back a tape, the television must have a compatible colour system.
✤
We recommend that you use the AC Power Adapter as the power source for the camcorder.
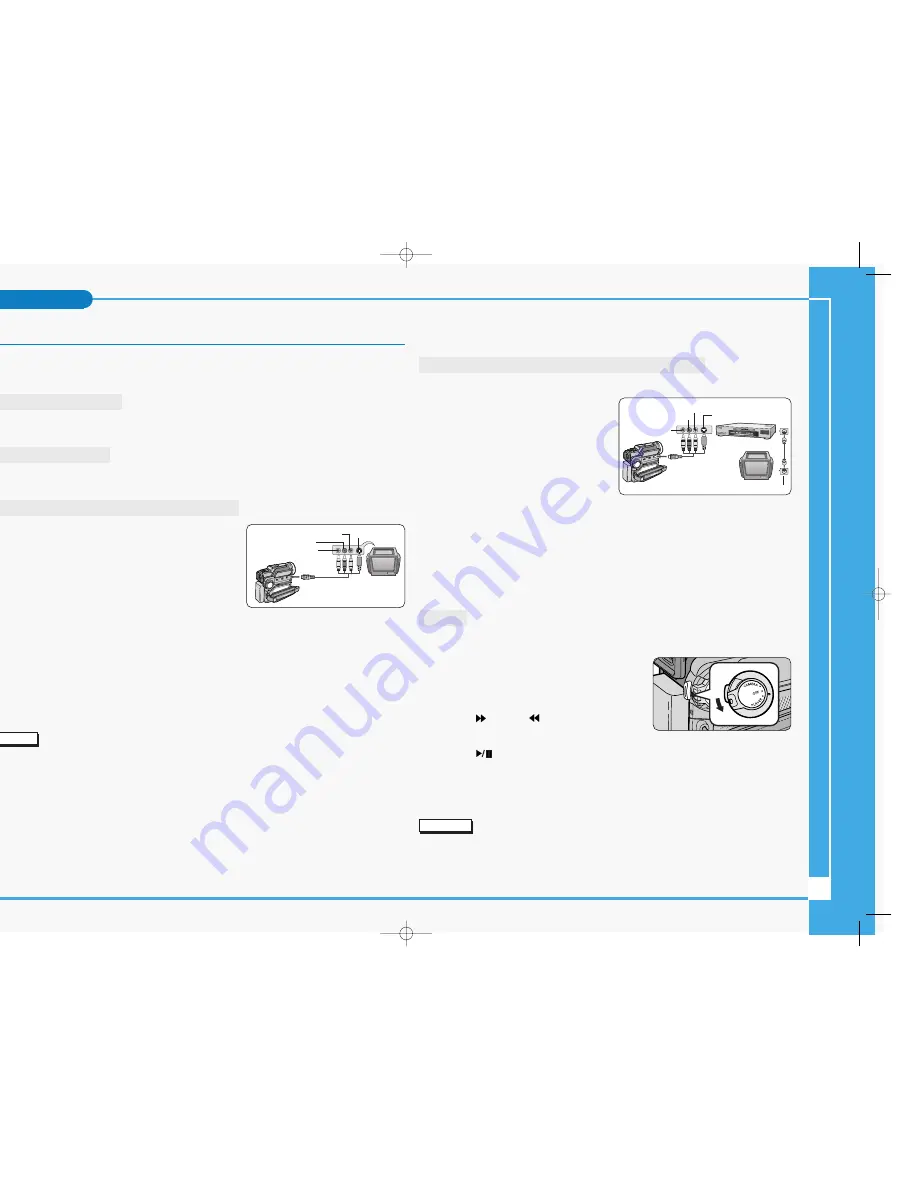
Connecting to a TV which has Audio/Video input jacks
1. Connect the camcorder and TV with the Multi-AV cable.
■
The yellow plug : Video
■
The white plug : Audio(L)
■
The red plug : Audio(R) - STEREO only
- If you connect to a monaural TV or VCR, connect the
yellow plug (Video) to the video input of the TV or
VCR and the white plug (Audio L) to the audio input
of the TV or VCR.
✤
You may use the SCART adapter. (optional)
2. Set the power switch on the camcorder to PLAYER mode. (see page 29)
3. Turn on the TV and set the TV/VIDEO selector on the TV to VIDEO.
■
Refer to the TV or VCR user’s manual.
4. Play the tape back.
Notes
■
Use an S-VIDEO plug to obtain better quality pictures if you have an S-VIDEO connector on your
TV.
■
If you use an S-VIDEO plug, you will need to connect an audio cable.
■
If you connect the cable to the Multi-AV Jack, you will not hear sound from the Camcorder’s
speaker.
Playback
Connecting to a TV which has no Audio and Video input jacks
✤
You can connect your camcorder to a TV through a VCR.
1. Connect the camcorder and VCR with the
Multi-AV cable.
■
The yellow plug : Video
■
The white plug : Audio(L) - Mono
■
The red plug : Audio(R)
2. Connect a TV to the VCR.
3. Set the power switch on the camcorder to
PLAYER mode. (see page 29)
4. Turn on both the TV and VCR.
■
Set the input selector on the VCR to LINE.
■
Select the channel reserved for your VCR on the TV set.
5. Play the tape back.
Playback
✤
You can play the recorded tape in PLAYER mode.
1. Connect a power source and set the power switch
to PLAYER mode.
2. Insert the tape you wish to play back.
3. Using the
(FF) and
(REW) buttons, find the
first position you wish to play back.
4. Press the
(PLAY/STILL) button.
■
The images you recorded will appear on the TV after a few seconds.
■
If a tape reaches its end while being played back, the tape will rewind
automatically.
Note
■
The playback mode (SP/LP) is selected automatically.
Camcorder
A/V OUT
Audio input
(left)-White
Audio input
(right)-Red
Video input-
Yellow
TV
S-VIDEO input
ANTENNA
S-VIDEO input
A/V OUT
TV
VCR
CAMCORDER
Video input-
Yellow
Audio input
(left)-White
Audio input
(right)-Red
∞
£¥‹º
≥∏
̺
≠
(D907) 11/18/04 8:57 AM Page 7


