background image

Introduction

Package Contents

 Note

Please make sure the following items are included with your monitor.

If any items are missing, contact your dealer.

Contact a local dealer to buy optional items.
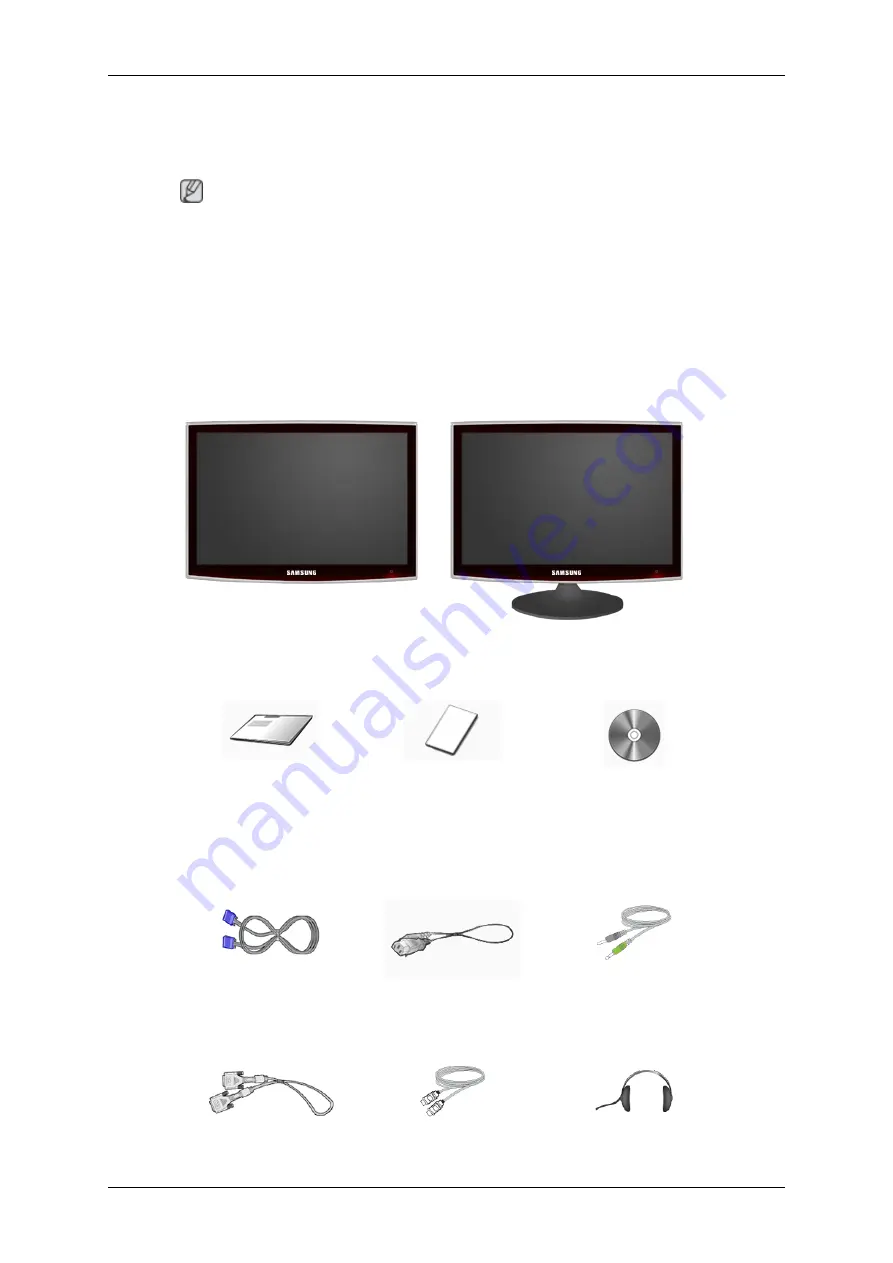
Unpacking

Without stand

With stand

Monitor

Monitor

Manuals

Quick Setup Guide

Warranty Card

(Not available in all loca-

tions)

User's Guide

Cables

D-Sub Cable

Power Cord

Stereo Cable

Sold separately

DVI Cable

HDMI Cable

Headphones

9

Summary of Contents for T240MD

Page 1: ...LCD MONITOR quick start guide T260MD T240MD ...

Page 2: ...items are missing contact your dealer Contact a local dealer to buy optional items Unpacking Without stand With stand Monitor Monitor Manuals Quick Setup Guide Warranty Card Not available in all loca tions User s Guide Cables D Sub Cable Power Cord Stereo Cable Sold separately DVI Cable HDMI Cable Headphones 9 ...

Page 3: ...Audio Cable Digital audio optic output ca ble Others Remote Control Batteries AAA X 2 Not available in all loca tions Cleaning Cloth Cable holding ring Stand Body Stand Base Note Cleaning Cloth is only provided for highly polished black products as a product feature Introduction 10 ...

Page 4: ...here to see an animation clip MENU Use this button to open the on screen menu and to exit from the on screen menu or to close the screen adjustment menu VOL Moves from one menu item to another horizontally or adjusts selected menu val ues Adjusts the audio volume CH Moves from one menu item to another vertically or adjusts selected menu values In TV DTV mode selects TV DTV channels Power button Us...

Page 5: ... See PowerSaver described in the manual for further information regarding power saving functions For energy conservation turn your monitor OFF when it is not needed or when leaving it unattended for long periods Speaker Rear Note The configuration at the back of the product may vary from product to product POWER POWER Connect the power cord for your monitor to the POWER port on the back of the pro...

Page 6: ... OPTI CAL terminal of your product to the digital sound output or standard sound output terminal of the DVD home theater or amplifier using a digital audio optical output cable EX LINK This is a reserved terminal used for servicing EXT RGB Connect the EXT RGB port of the monitor to the DVD Player using a SCART jack As for EXT RGB port of the monitor it makes TV or Video signal input and output DVI...

Page 7: ...ing the Anti Theft Kensington Lock 1 Insert the locking device into the Kensington slot on the Monitor and turn it in the locking direction 2 Connect the Kensington Lock cable 3 Fix the Kensington Lock to a desk or a heavy stationary object HDMI IN 1 HDMI IN 1 Connect the HDMI IN 1 terminal at the back of your monitor to the HDMI terminal of your digital output device using a HDMI cable COMPONENT ...

Page 8: ...o inserting is about the CI CARD You can install the CAM anytime whether the TV is ON or OFF HDMI IN 2 HDMI IN 2 Connect the HDMI IN 2 terminal at the back of your product to the HDMI terminal of your digital output device using a HDMI cable Connect your headphones to the Headphone con nection terminal Note See Connecting Cables for further information regarding cable connections Cable holding rin...

Page 9: ... MENU P EXIT INFO TTX MIX COLOR BUTTON P MODE M B MagicBright S MODE AUTO P SIZE DUAL SUBTITLE SOURCE PIP 1 POWER Turns the product On Off 2 Number buttons Press to change the channel 3 One Two Digit channel selection Use to select a channel numbered ten or over Press this button and the symbol is displayed Introduction 16 ...

Page 10: ...OURCE button You can only watch TV using the TV or DTV button 13 PRE CH This button is used to return to the immediately previous channel 14 GUIDE Electronic Program Guide EPG display 15 D MENU DTV menu display 16 P In TV mode selects TV channels 17 EXIT Exits from the menu screen 18 INFO Current picture information is displayed on the upper left corner of the screen 19 TTX MIX TV channels provide...

Page 11: ...r of the screen The monitor has a built in high fidelity stereo amplifier Then press the button again to circle through available preconfig ured modes Standard Music Movie Speech Custom 23 AUTO Available In PC mode Only Adjusts the screen display automatically 24 P SIZE Press to change the screen size PC DVI mode 4 3 TV DTV Ext mode Auto Wide Wide 16 9 Wide Zoom Zoom 4 3 Component mode Wide 16 9 W...

Page 12: ... monitor PC Using the DVI Digital connector on the video card Connect the DVI Cable to the DVI D Port on the back of your Monitor DVI D Connect the HDMI PC DVI D AUDIO IN port on the rear side of the monitor to the sound card of the PC Note You may enjoy clear and quality sound from the computer sound card using the monitor speakers You don t need to install any separate speakers for your computer...

Page 13: ...r monitor PC Note Turn on the monitor and Macintosh Connecting to Other devices Note This monitor allows the user to connect it to such input devices as a DVD player a VCR or cam corder or a DTV or TV without disconnecting the PC The configuration at the back of the monitor may vary from product to product The DVI to HDMI cable digital audio optic output cable and RCA to stereo for PC cable are al...

Page 14: ...n your computer 1 Connect the CATV cable or TV antenna cable to the ANT IN port on the rear side of the monitor Make sure to use a TV antenna cable sold separately as the antenna cable When using an interior antenna terminal Check the antenna terminal on the wall first and connect the antenna cable When using an outdoor antenna If you are using an outdoor antenna use a professional for installatio...

Page 15: ...t the VIDEO OUT port of the DVD DTV Set Top Box to the PR PB Y input ports using a component video cable PR PB Y Note Select Component using the SOURCE If you connect the PR PB and Y component cables to the incorrect terminals the screen will be displayed in red or blue For single family houses install an UHF antenna to receive digital broadcasting Connecting HDMI Note You can connect digital outp...

Page 16: ...connect the opposite jack to the HDMI PC DVI D AUDIO IN terminal of the monitor 3 When all the connections are completed connect the power cords for the monitor and DVD or the device connected to the digital output terminal 4 Select HDMI using the SOURCE button Note If you just connect using the DVI to HDMI cable without connecting to the sound source you cannot hear sound Connecting the audio out...

Page 17: ...er For information on how to connect a speaker and amplifier refer to the respective user manuals provided by their manufacturers Connecting COMMON INTERFACE Note You can install the CAM anytime whether the TV is ON or OFF Purchase the CI CAM module by visiting your nearest dealer or by phone 1 Insert the CI CARD into the CAM in the direction of the arrow until it fits 2 Insert the CAM with the CI...

Page 18: ...he monitor 1 Connect your headphones to the Headphone connection terminal Using the Stand Monitor Assembly Monitor and Bottom Tilt angle You can adjust the tilt angle within a range of 5 forward to 25 backward for the most comfortable viewing angle Connections 25 ...

Page 19: ...n the Self Test mode the LED power indicator remains green and the figure moves around on the screen 4 Turn off your monitor and reconnect the video cable then turn on both your computer and the monitor If your monitor screen remains blank after using the previous procedure check your video controller and computer system your monitor is functioning properly Not Optimum Mode If the vertical resolut...

Page 20: ... cables are properly connected to the computer 2 Check if the computer beeps more than 3 times when booting If it does request an after service for the main board of the computer 3 If you installed a new video card or if you assembled the PC check if you installed the adapter video driver and the monitor driver 4 Check if the scanning ratio of the video screen is set at 56 Hz 75 Hz Do not exceed 6...

Page 21: ...cted and the LCD monitor is on Refer to the Con necting the monitor Q Check Signal Cable message A Ensure that the signal cable is firmly connected to the PC or video SOURCEs Refer to the Connecting the monitor A Ensure that the PC or video SOURCEs are turned on Q Not Optimum Mode message A Check the maximum resolution and the frequency of the video adapter A Compare these values with the data in ...

Page 22: ...to ensure that the connector is properly connected 3 Problems related to Audio Note Problems related to audio signals and their solutions are listed below Q No sound A Ensure that the audio cable is firmly connected to both the audio in port on your monitor and the audio out port on your sound card Refer to the Connecting the monitor A Check the volume level Refer to the Volume Q The sound level i...

Page 23: ...Saver Set the function in the BIOS SETUP of the computer Refer to the Windows Computer Man ual Q How can I clean the outer case LCD Panel A Disconnect the power cord and then clean the monitor with a soft cloth using either a cleaning solution or plain water Do not leave any detergent or scratches on the case Do not let any water enter the monitor Q What are the benefits of digital broadcasting A ...

Page 24: ... tenement house A Consult the superintendent s office or broadcasting facility administrator for your apartment or tenement house to check whether UHF reception is available A Even if digital TV broadcasting is available in your area if you cannot watch it because the superintendent s office or common broadcasting facility does not rebroadcast the signal you have to install an indoor or outdoor an...

Reviews: