


GB
25
GB
24
3
LENGTH 2:30
SET LENGTH :
PRESS
REC
OK
REC
MENU
SPEED DUB TV/VCR TIMER
5
6
VCR INPUT
REPEAT
OL PROG/TRK
DISP./
CT
IPC INPUT
REPEAT
RK PROG
DISPLA
4
4
4
4
1
TRK PROG
REC
MENU
7
OK
REC
MENU
SPEED DUB TV/VCR TIMER
5
6
VCR INPUT
REPEAT
OL PROG/TRK
DISP./
CT
IPC INPUT
REPEAT
RK PROG
DISPLA
4
4
4
4
★
(SV-256I/SV-252I)
★
(SV-656I/SV-456I)
★
(SV-256I/SV-252I)
★
(SV-656I/SV-456I)
Recording a Programme with Automatic Stop
Recording a Programme Immediately
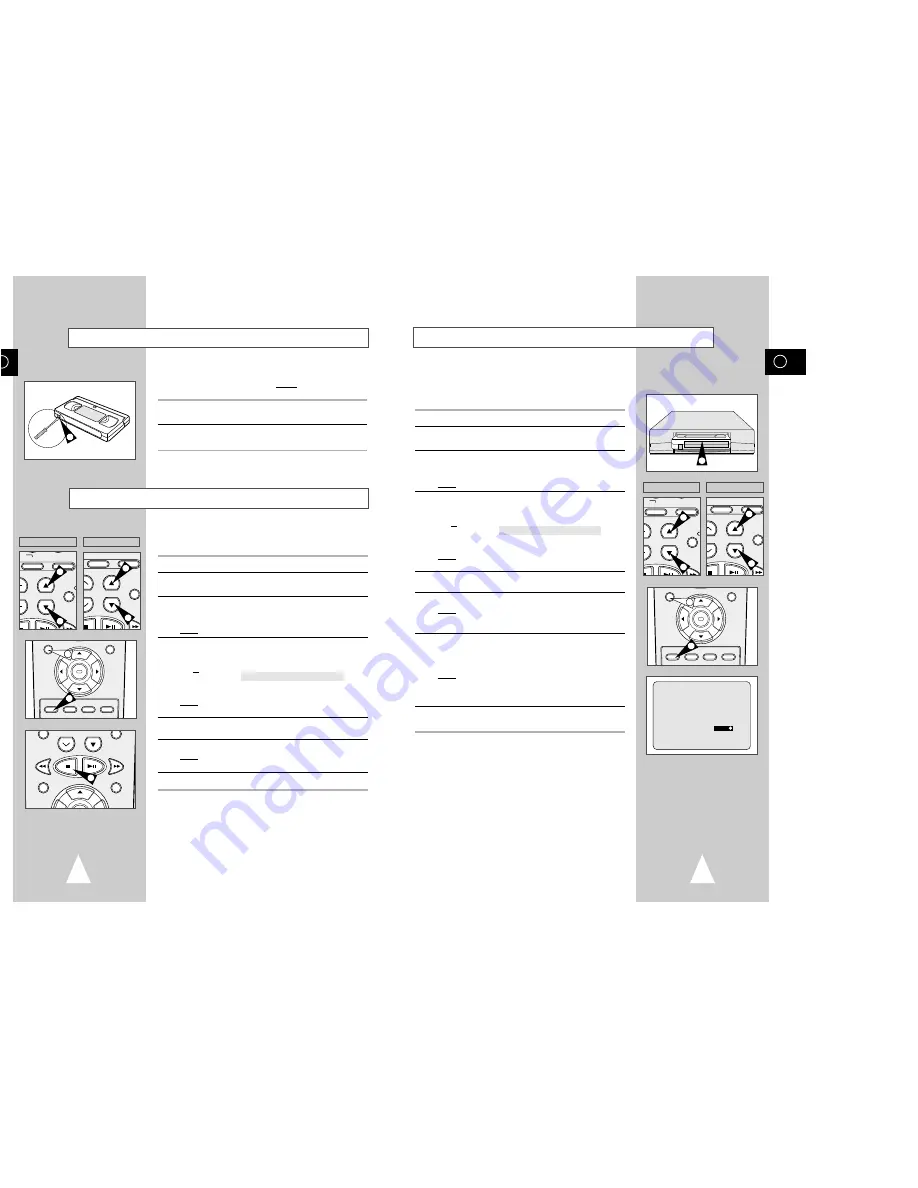
Protecting a Recorded Cassette
Video cassettes have a safety tab to prevent accidental erasure.
When this tab has been removed, you cannot record on the tape.
1
If you wish to protect a cassette, break off the tab using a small
screwdriver.
2
To re-record over a protected cassette (safety tab broken), cover
the hole with adhesive tape.
Before recording a programme, you must have preset the corres-
ponding station (unless you are recording via an external video
source). If you have not done so, refer to pages 18 and 19.
1
Switch on the television.
2
To monitor the programme being recorded, select the television
channel reserved for use with your VCR (or the AV input if used).
3
Insert the cassette on which the programme is to be recorded,
with the window visible and the safety tab intact or the opening
covered with adhesive tape.
Result:
The VCR is switched on automatically.
4
Select:
◆
The station to be recorded using the PROG/TRK (
$
or
❷
) /
PROG (
$
or
❷
) buttons
or
◆
The LINE IN 1 or LINE IN 2
★
(SV-656I/SV-456I only) source
using the INPUT button for a satellite tuner or external video
source
Result:
The station number is displayed and the programme
can be seen on the television.
5
Select the recording speed by pressing the SPEED button as
many times as required (see page 22).
6
Hold REC down for a while to start recording.
Result:
The record indicator appears on the television and VCR
display. An index is recorded on the tape (see page 33).
7
To stop recording, press
■
once.
➢
◆
If the cassette is ejected when you start recording,
check that the safety tab is intact or the opening is
covered with adhesive tape.
◆
If you reach the end of the tape while recording, the
cassette rewinds automatically.
This function enables you to record up to nine hours of
programmes. (LP)
Your VCR stops automatically after the requested length of time.
1
Switch on the television.
2
To monitor the programme being recorded, select the television
channel reserved for use with your VCR (or the AV input if used)
3
Insert the cassette on which the programme is to be recorded,
with the window visible and the safety tab intact or the opening
covered with adhesive tape.
Result:
The VCR is switched on automatically.
4
Select:
◆
The station to be recorded using the PROG/TRK (
$
or
❷
) /
PROG (
$
or
❷
) buttons
or
◆
The LINE IN 1 or LINE IN 2
★
(SV-656I/SV-456I only) source
using the INPUT button for a satellite tuner or external video
source
Result:
The channel number is displayed and the programme
can be seen on the television.
5
Select the recording speed by pressing the SPEED button as
many times as required (see page 22).
6
Hold the REC button down for a while to start recording.
Result:
The record indicator appears on the television screen
and VCR display. An index is recorded on the tape
(see page 33).
7
Press the REC button several times to increase the recording time
in:
◆
30-minute intervals up to four hours
◆
1-hour intervals up to nine hours (LP)
Result:
The length is displayed on the television displays. The
selected programme is recorded for the length of time
requested. At the end of that time, the VCR stops
recording automatically.
8
If you wish to cancel the recording before the end, press
VCR STANDBY/ON (STANDBY/ON).
☛
If the end of the tape is reached while recording:
◆
The recording stops
◆
The VCR automatically turns off


